I spent years fighting my thin hair — bad cuts, heavy products, and panic trims. The day I stopped trying to force volume and learned simple shapes was a turning point.
These shoulder length looks are what I now wear when I want hair that behaves. They’re low-fuss and actually work on fine strands.
10 Free Shoulder Length Hairstyles For Fine Hair
These 10 shoulder length hairstyles for fine hair are my real-life favorites. I tested them through humidity, commutes, and lazy mornings. Expect wearable, low-maintenance shapes and clear notes on what to ask your stylist for each idea.
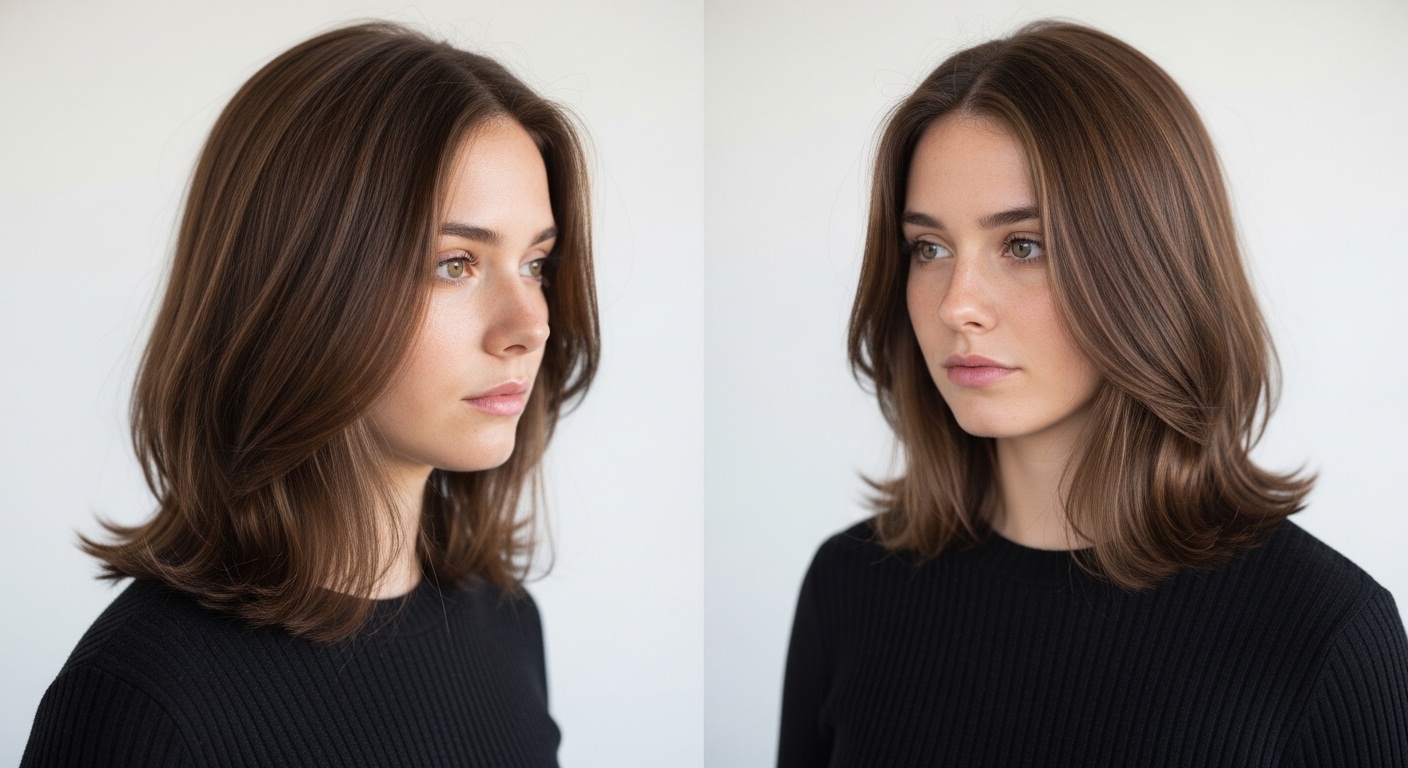
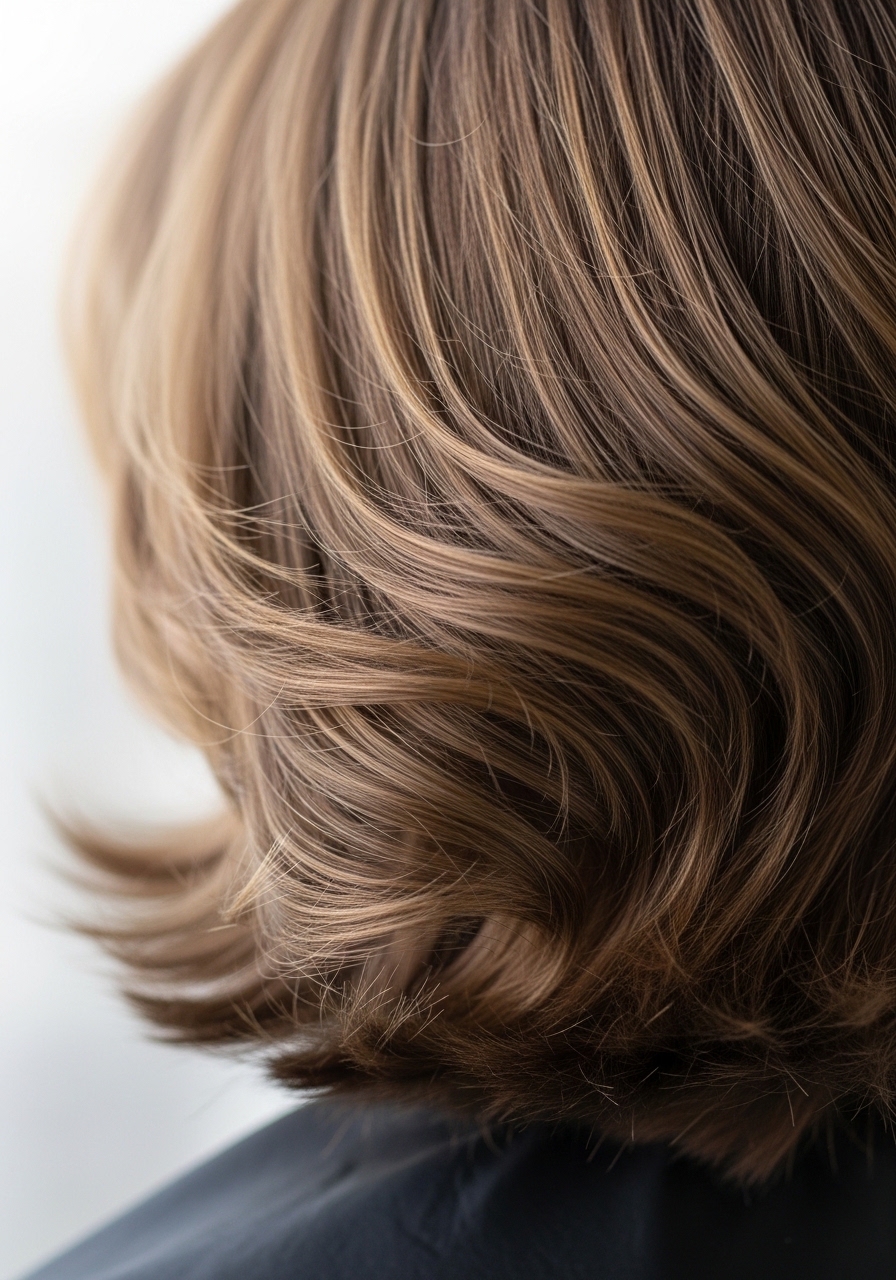
1. Soft Layers Around the Face That Make Fine Hair Look Fuller
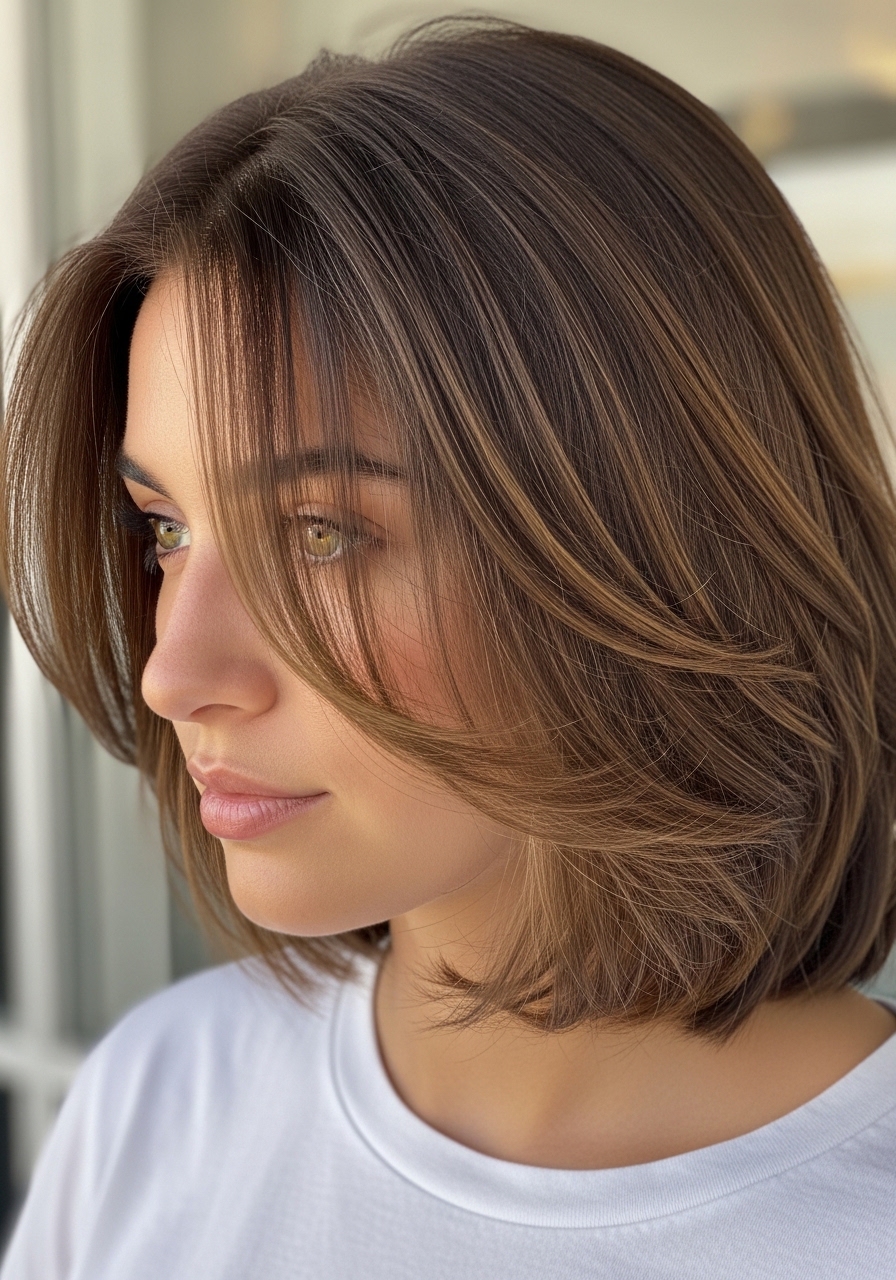
I asked my stylist for soft, short layers around my face to add density without losing length. At first the layers looked choppy on flat days, but when dried with a round brush they create soft lift where my hair is fine. It holds shape through a busy day better than blunt cuts; in humidity I get a little frizz at the ends but the layers keep movement.
This works best on straight to slightly wavy fine hair. If your hair is very thin at the ends ask for slight weight removal rather than razor texturing. My honest tip: don’t let them over-layer — I once said "lots of layers" and regretted it for weeks. It still feels manageable with dry shampoo between washes.
2. A Blunt Shoulder-Length Lob With a Gentle Under-Curve
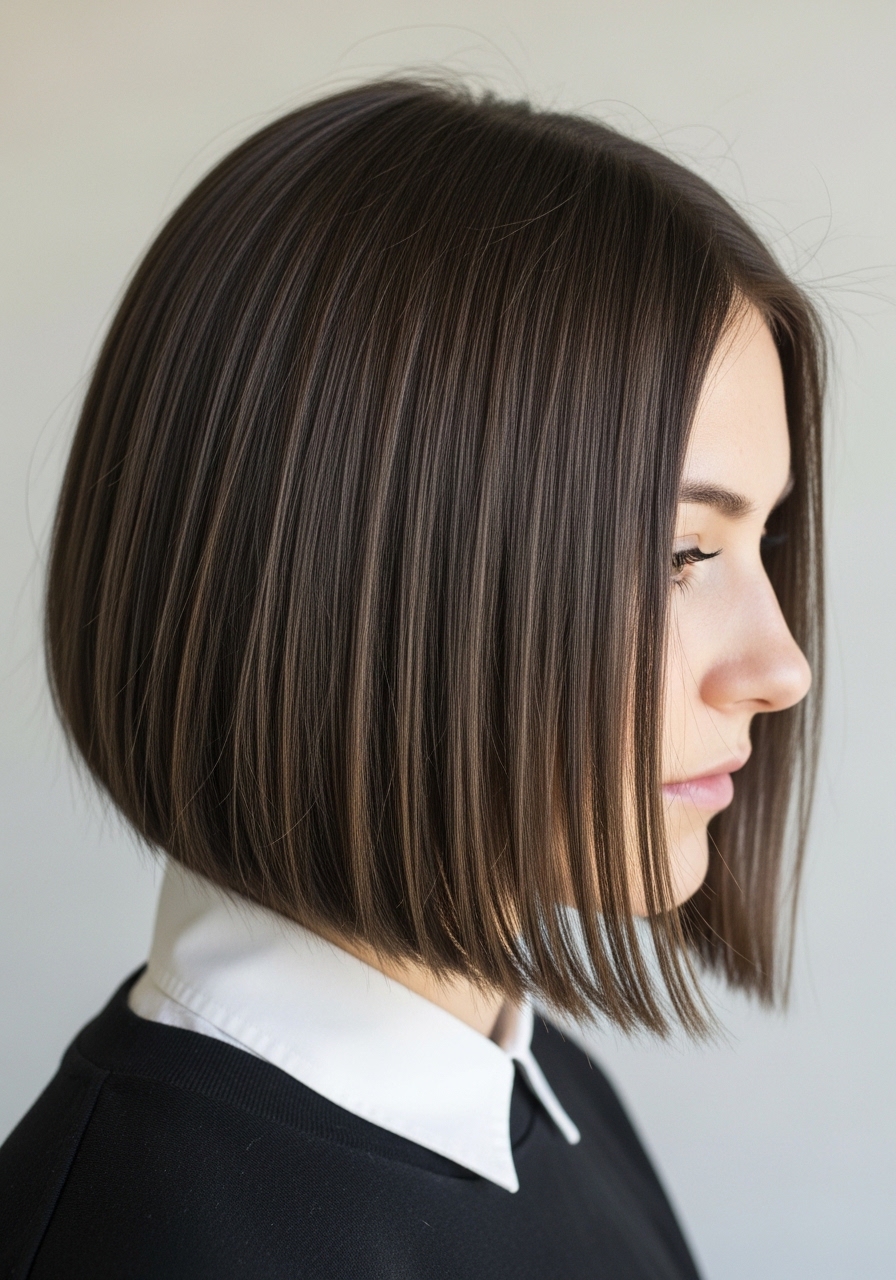
I went for a blunt lob that hits my shoulders with a soft under-curve. The blunt line makes my fine hair look denser because there's a visual weight at the ends. At first my hair looked flat at the roots, but a quick root lift with a blow-dryer or a little mousse in the mornings fixes that.
It sits neatly behind my ears and survives windy commutes better than I expected. On humid days the under-curve softens into a relaxed bend, which I actually like. Tell your stylist to avoid too much thinning at the ends — I had mine over-thinned once and it lost the blunt weight. I can go three days between washes with a bit of dry shampoo at the roots.
3. Curtain Bangs With Long Bits to Frame Fine Hair
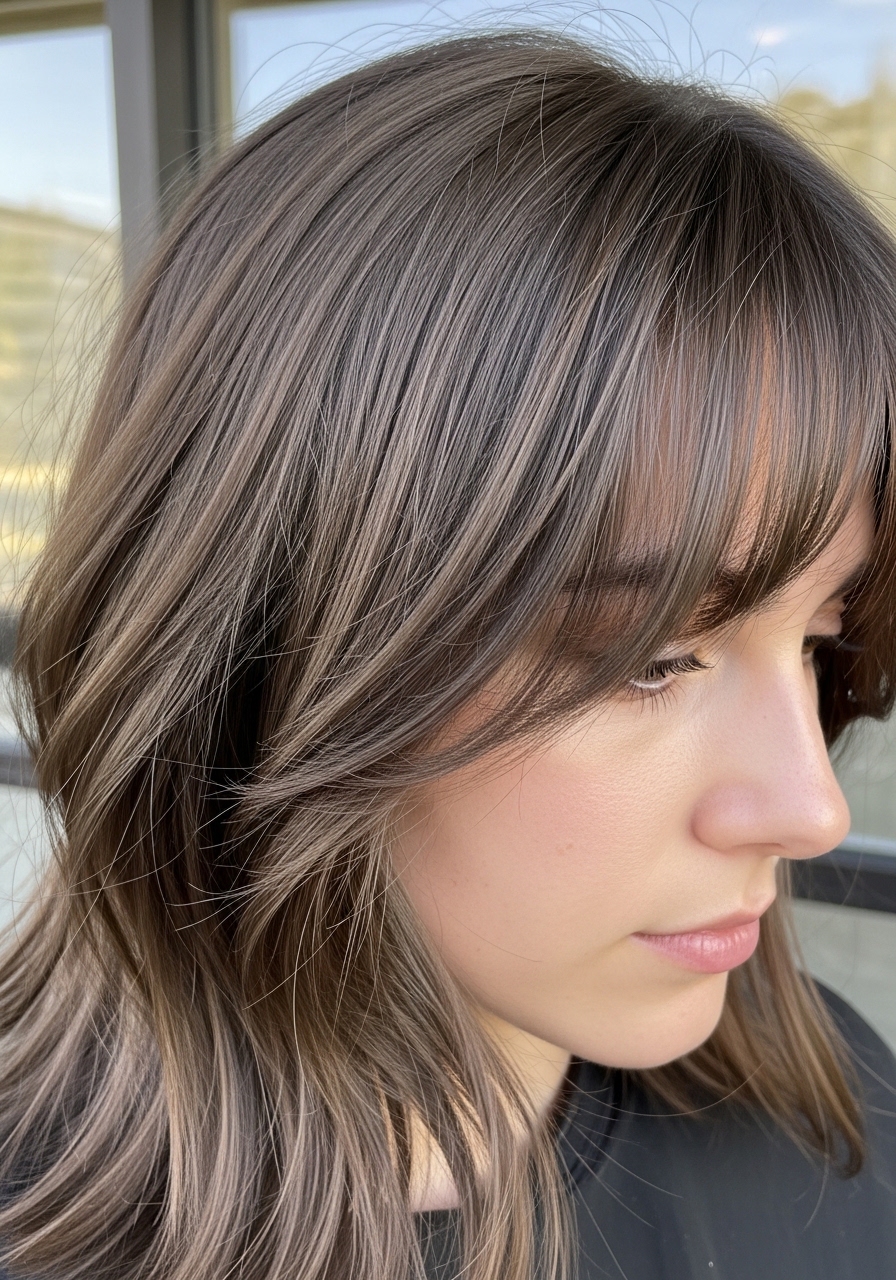
I asked for soft curtain bangs that graze my cheekbones and blend into the lob. They hid my sparse front hair and framed my face without needing heavy styling. The first week I over-trimmed them in panic and had to grow them out; lesson learned — keep them longer at first.
In real life they separate with humidity and look relaxed, not perfect. They work best on fine hair that still has some density at the crown. My stylist showed me to blow them with a flat brush and cool air for a smooth swoop. Tip: ask for longer pieces through the front so you can pin them back when you want. They give me a casual frame without daily heat if I air-dry on second day.
4. Textured, Razor-Sliced Ends for Movement Without Weight
I begged my stylist for razor-sliced ends to add movement without thinning. The first cut felt airy and fun, but I learned the hard way that too much razor equals straw by week two. When done carefully the texture gives a lived-in bend and extra body at shoulder length.
It behaves best on hair with a tiny bit of natural wave. Straight fine hair shows the cuts clearly and needs smoothing tools. I wear this messy on weekends and tamer for work. My tip is to ask your stylist to slice only the outer layer and leave the bulk; I once trusted a photo and ended up with invisible ends. A tiny bit of sea-spray or light mousse wakes the slices without weight.
5. Subtle A-Line Lob That Gives Lift at the Back
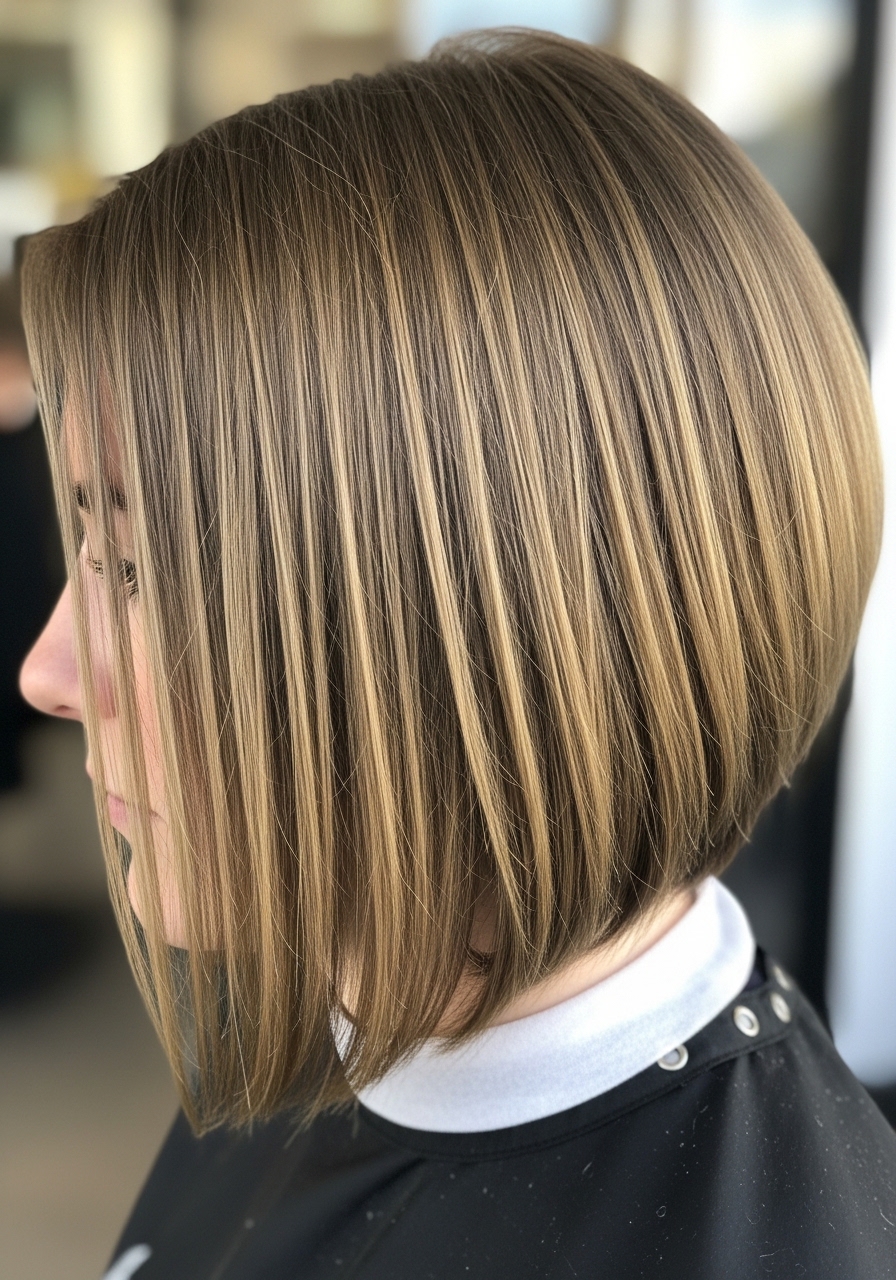
I had an A-line lob cut slightly shorter in the back for a subtle lift. Sitting in traffic I noticed the back kept its shape and my crown looked fuller without teasing. It reads polished but still casual when I flip it to the side.
In reality the angle is gentle, not dramatic. If you have very fine roots ask for a little graduation instead of a steep angle. I refresh the shape every three months; I tried stretching it to five and it lost the back lift. On humid days the line drops slightly but the graduation still masks thinness at the nape. I also ask my stylist for just enough weight at the collarbone to avoid feathering.
6. Deep Side Part With Root Volume for Instant Lift
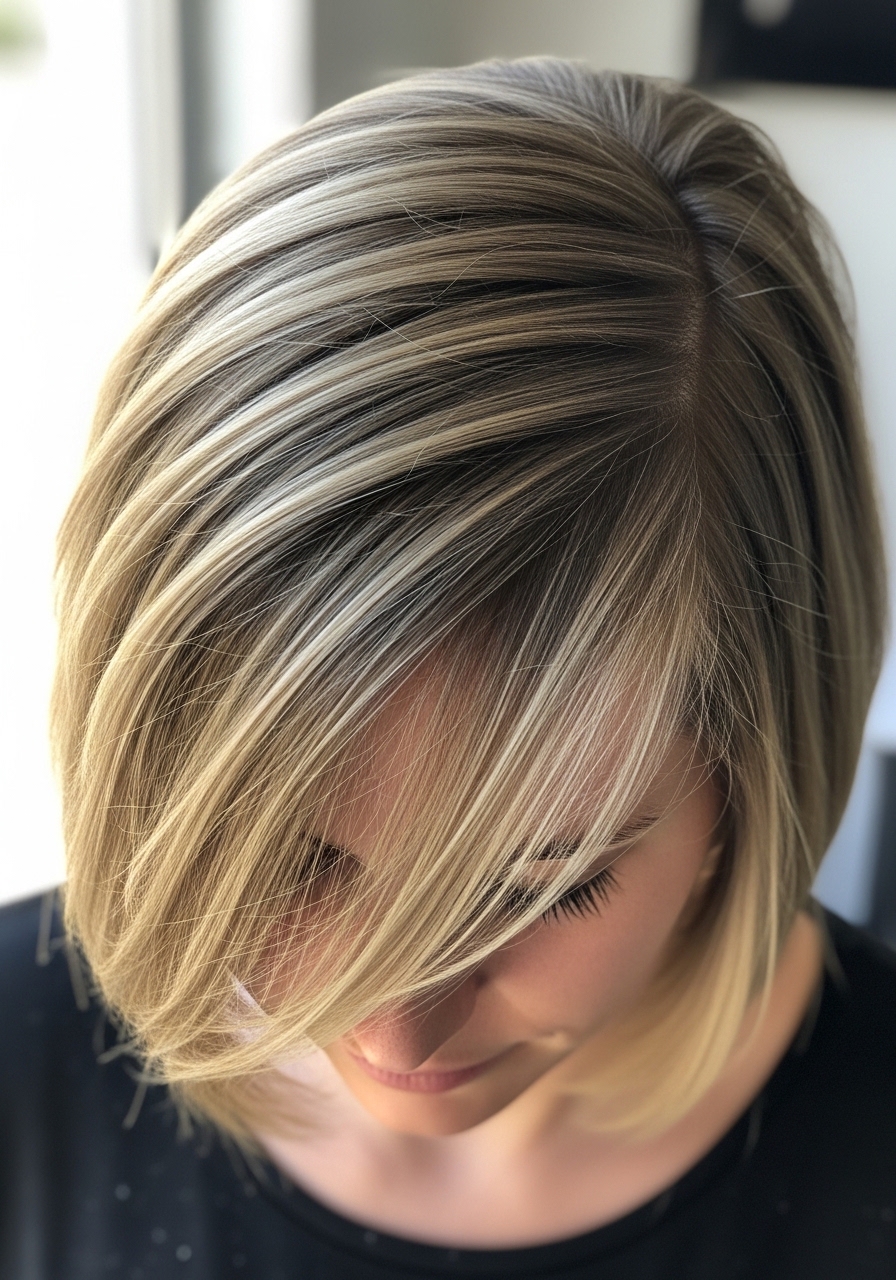
I switched to a deep side part once and it made all the difference for my lifeless roots. It creates an instant shadow and lift where my hair is fine. The first day it looked dramatic; by day two the part stayed bold if I used a dry shampoo at the roots.
Live testing showed it breaks up the flatness without cutting. It works best on hair that holds a bend — too soft hair needs product to keep the part in place. My tip: ask for a subtle razor point at the part to avoid a hard line. I like to sleep on the opposite side to keep the lift. During humid afternoons I add a few sprays of root-lifting mist and pinch the part with my fingers to revive shape.
7. Beachy Waves With a Heat-Free Twist for Thin Strands
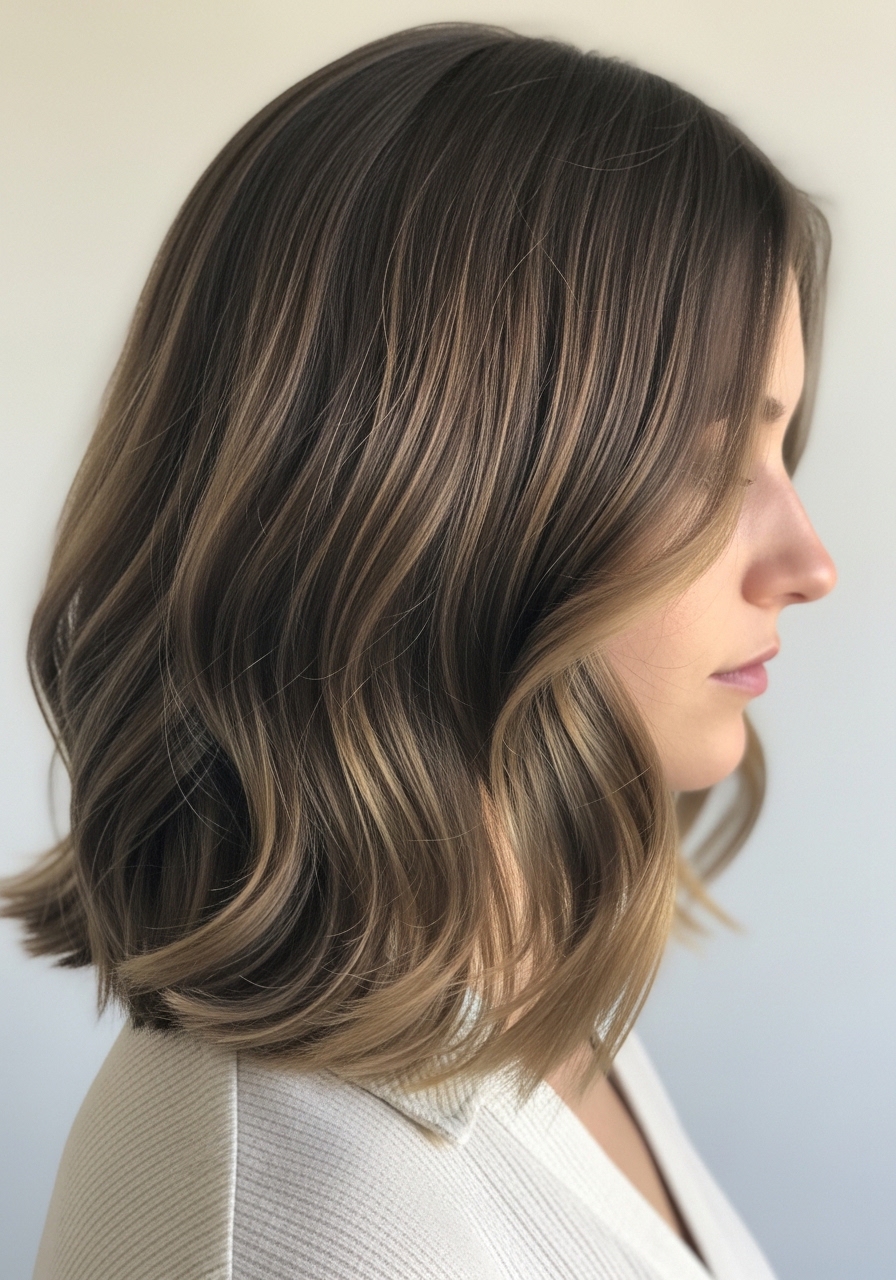
I learned a no-heat wave trick when I was tired of frying my ends. I braid damp hair into two loose plaits and sleep; in the morning I loosen them and get soft, shallow waves that suit my fine shoulder length. It isn’t glossy like salon waves, but it feels alive.
The waves drop by day two but still read as texture rather than limpness. My mistake was using too much salt spray at first — it stiffened my hair and made it crunchy. Now I use a tiny bit of lightweight cream and scrunch. If you want more hold, I twist one side into a loose knot on top while sleeping — works for me and doesn’t flatten the roots.
8. Sleek Tucked-Behind-Ear Look to Show Shape
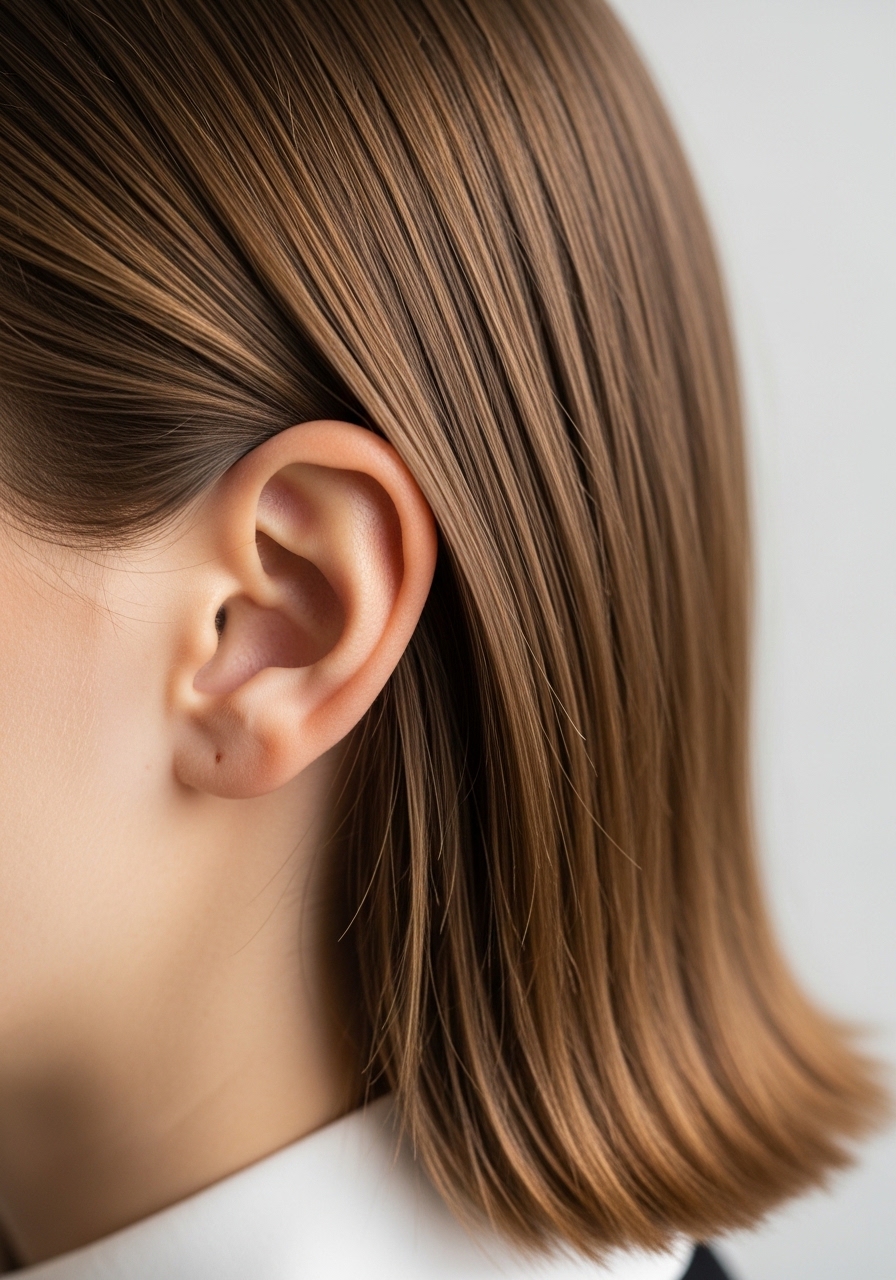
I like tucking one side behind my ear for a sleek, clean look that shows my shoulder-length shape. It makes my hair feel intentional without much heat. On good days the tuck holds with a dab of light balm and a clip; on windy walks it pops out, but I can fix it in under a minute.
It flatters fine hair because it reveals the line and hides the thinness at the part. I once used too much gel and it looked helmet-y. Now I keep product minimal and use a bobby pin hidden at the root if I need extra hold. I get compliments because it reads intentional and manageable.
9. Half-Up Twist That Adds Crown Volume
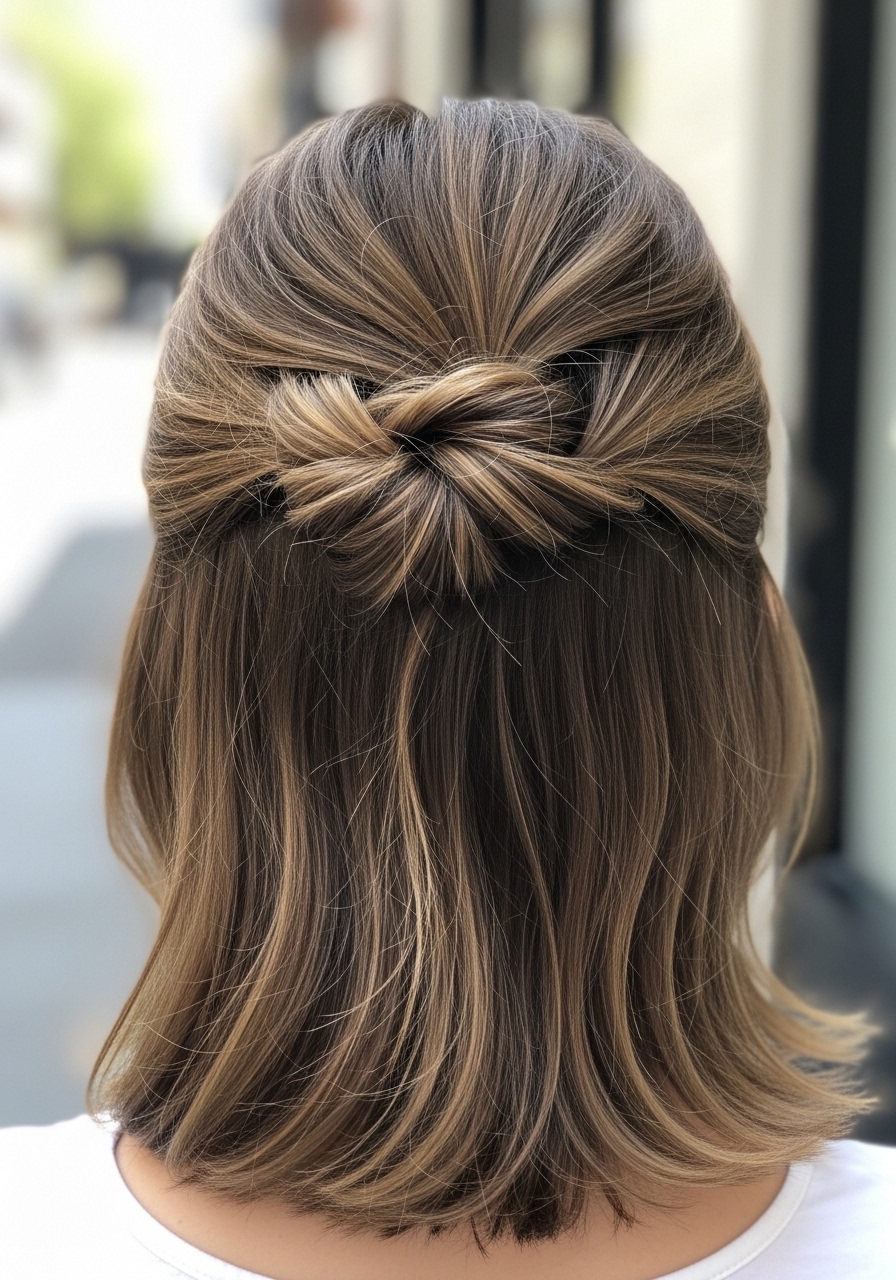
I started doing a half-up twist when my hair felt like it needed a focal point. I twist the top half and pin it, leaving the rest loose. It lifts the crown and tricks my fine hair into looking thicker without a haircut.
The twist loosens by midday for me, especially in humidity, but that relaxed look still works. I sometimes over-tease the roots and make a mess, so my new rule is a few backcombing pulses only. Ask your stylist to leave the crown slightly layered so the twist has something to hold onto. I can re-pin the twist in seconds after sleep and it lives three days with dry shampoo.
10. Low, Loose Pony With Face-Framing Pieces
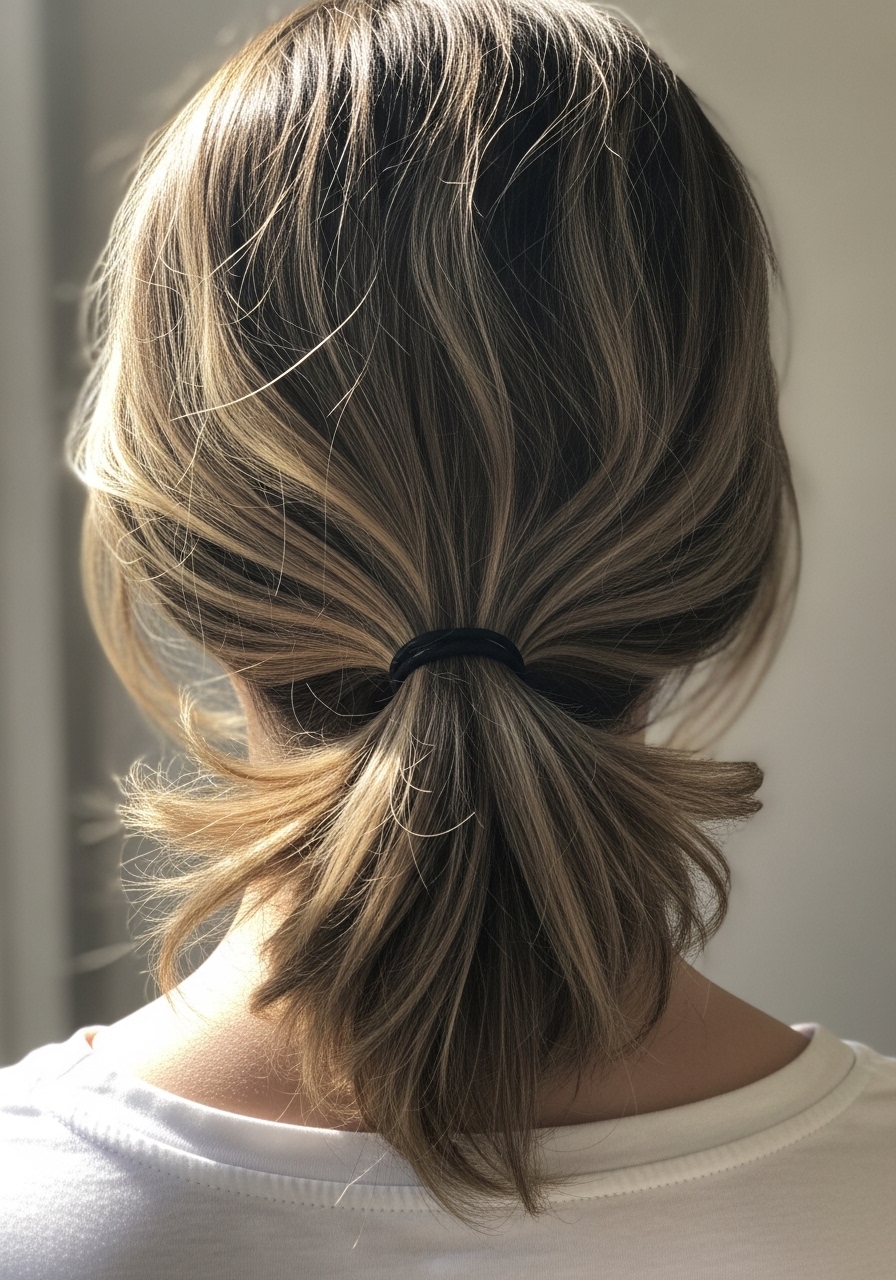
I rely on a low, loose pony when I need hair out of my face but still soft. I leave two face-framing pieces and tie the rest low at the nape. It looks effortless and hides thinness at the crown when I tug lightly at the sides for volume.
I learned not to pull it too tight — a too-tight pony makes my fine strands look sparser. On humid days the pieces may frizz, so I smooth them with a tiny amount of balm. For salon talk: ask for long face-framing layers and avoid heavy thinning at the nape. If I want more interest I loop the elastic once and pull a small section out for a soft twist; that trick hides limpness.