I used to fight my thick hair. I kept asking for less and left with more puff.
The day I asked for shape, not removal, was game-changing for my mornings. I finally knew what to ask for and how it behaved in real life.
20 Easy Pixie Bob Haircuts for Thick Hair
These 20 pixie bob ideas are the exact cuts and variations I tried on my thick hair. Each one comes from a real salon chair moment. Read them and you’ll know what to ask for and how it will actually behave day-to-day.
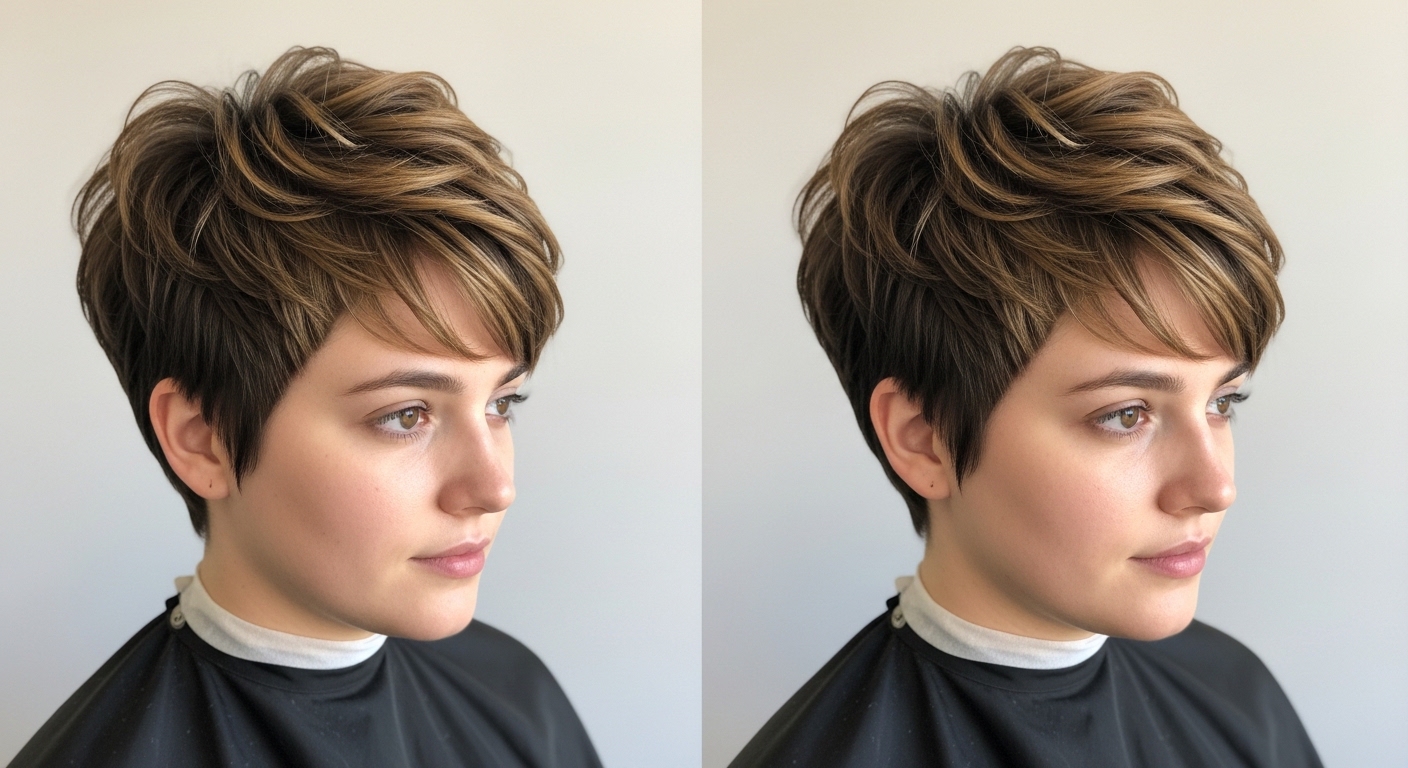
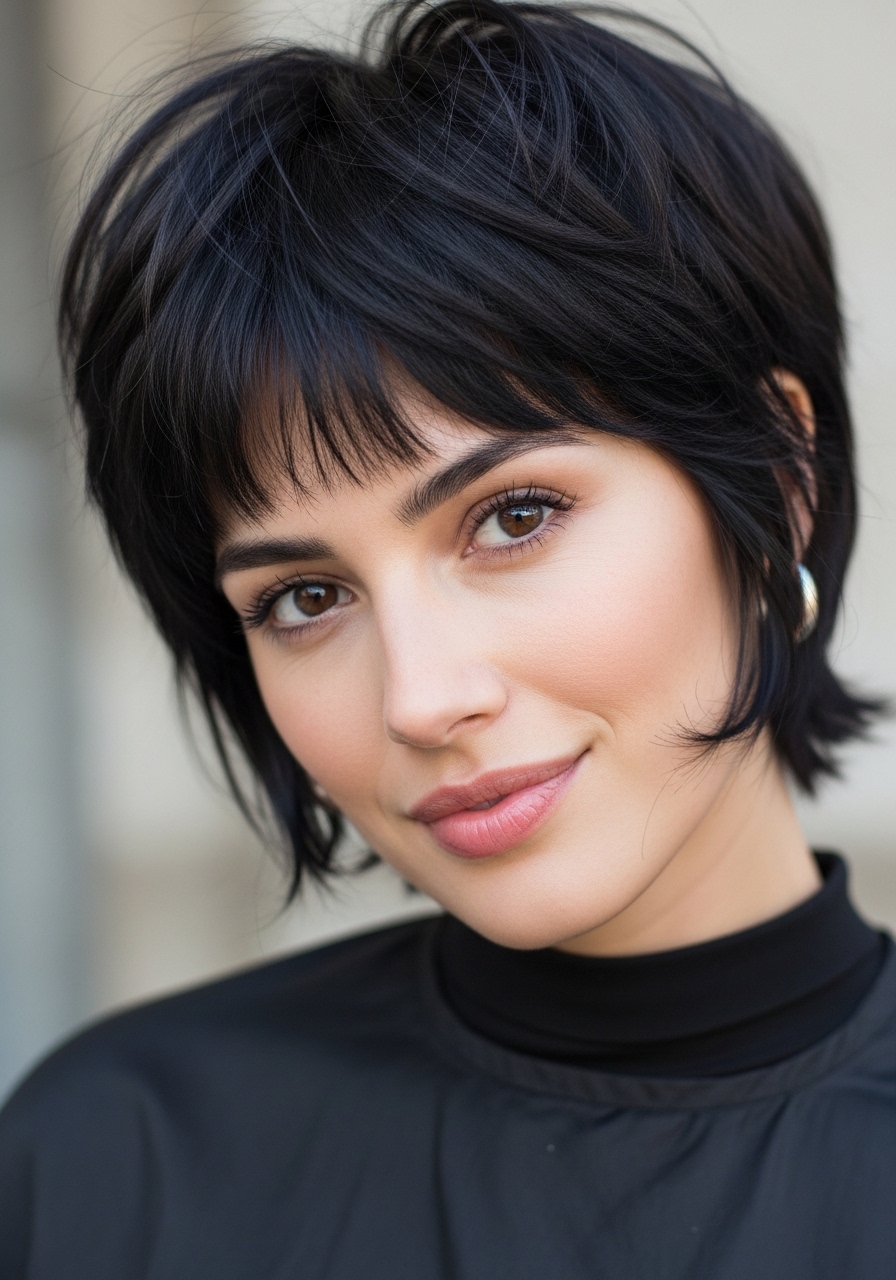
1. Classic Side-Swept Pixie Bob That Controls Bulk
I asked my stylist for a side-swept pixie bob that didn’t balloon at the cheeks. She removed weight from the sides and left length in the fringe. It softens my face and gives a direction to heavy hair.
In photos it looks neat. In real life it settles into a relaxed swoop. By midday humidity can push the fringe out, so I use a light cream and finger-style it back.
Tip: tell your stylist to point-cut the sides and keep at least two inches on the fringe so it sweeps without needing daily trims.
2. Blunt Pixie Bob That Still Moves Naturally on Thick Hair
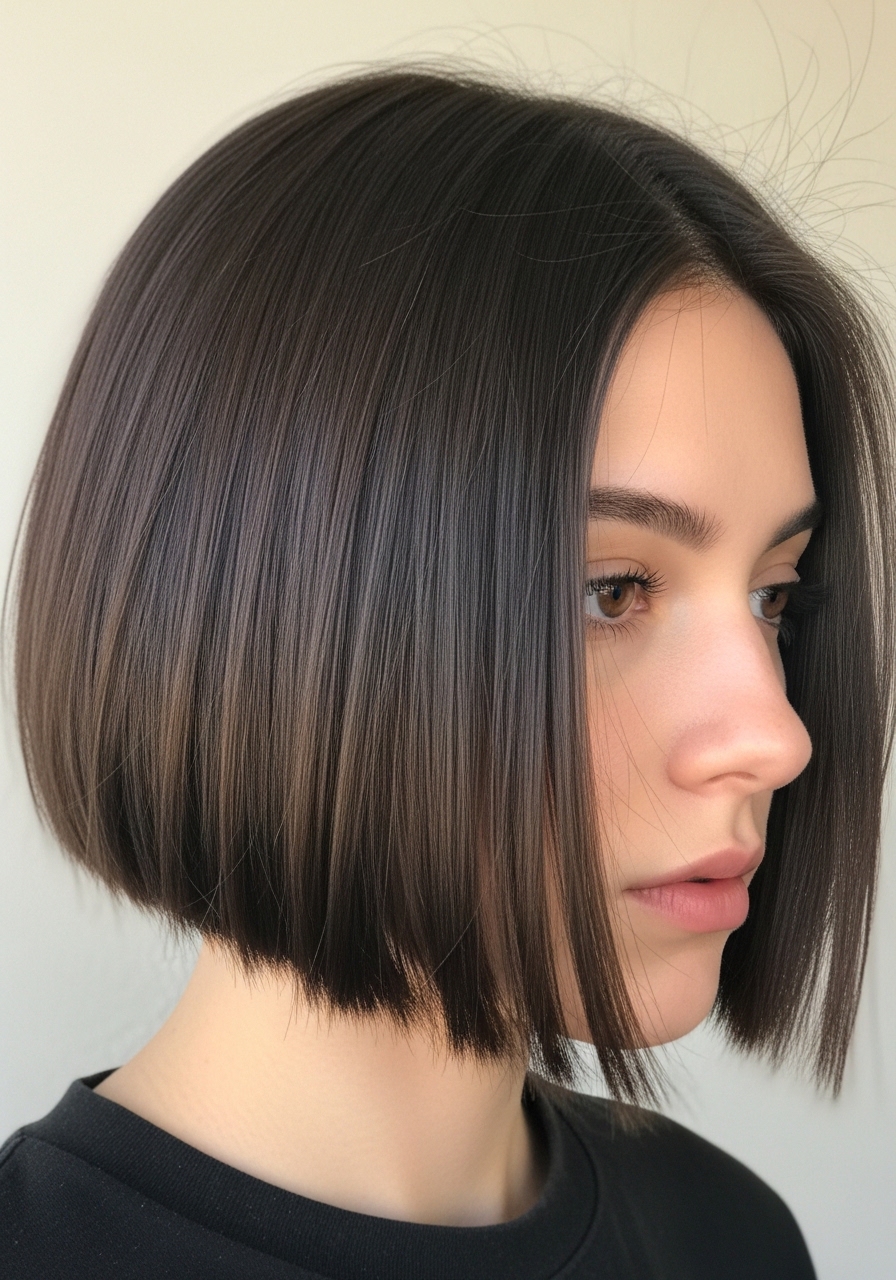
I once wanted a razor-y chopped look and ended up with too much texture. With this blunt take I asked for weight at the ends instead. The result feels cleaner on my thick hair but still moves when I turn my head.
It looks structured in photos. In real life the thickness gives it body so it never looks flat. I had to resist my first instinct to over-texturize; that made it poofy.
Tip: ask for blunt ends with soft point-cutting on the interior so it sits heavy but not boxy.
3. Graduated Stacked Pixie Bob for a Fuller Crown
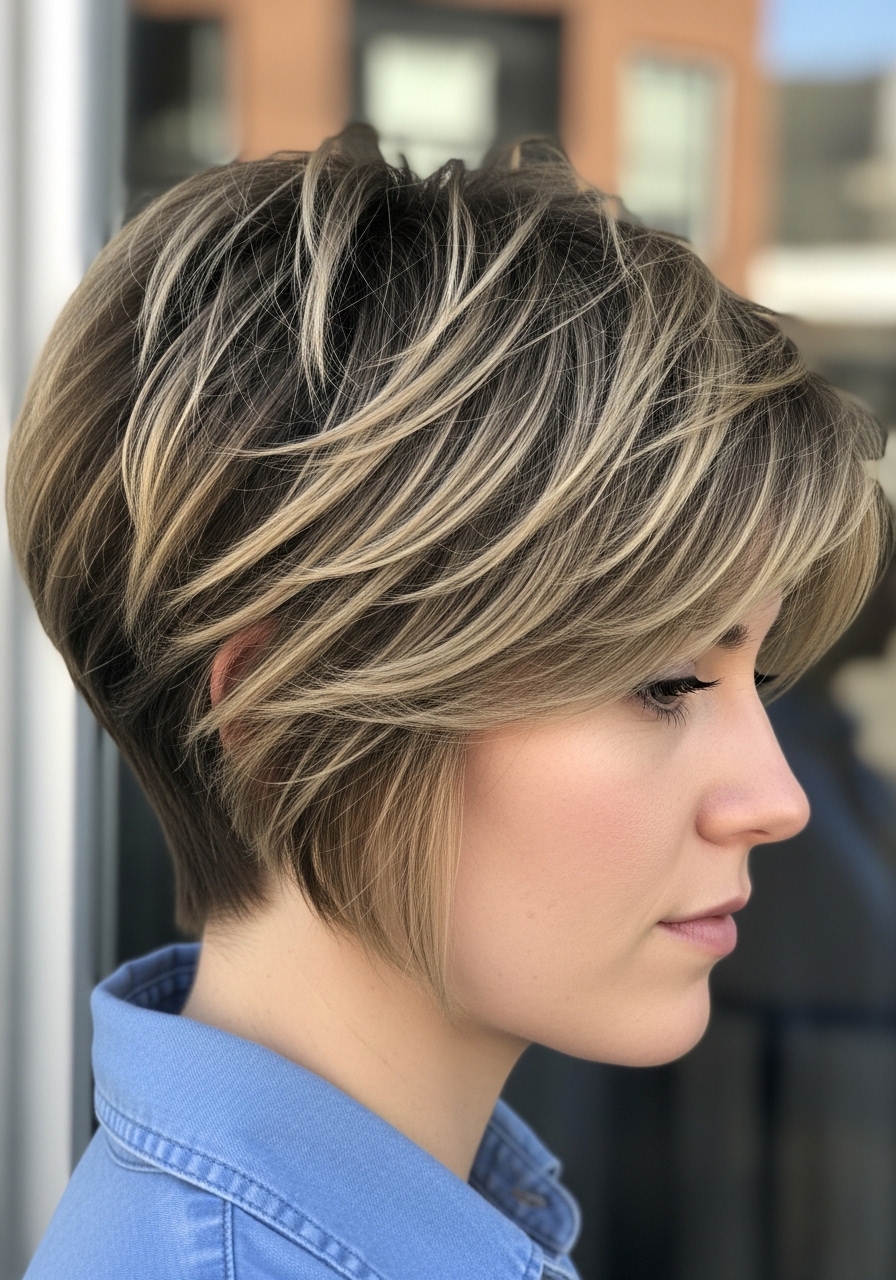
I finally tried a stacked graduation to tame my heavy nape. My stylist stacked the layers at the back to lift the crown and kept longer pieces in front. I felt instant shape without losing thickness.
In pictures the crown looks sculpted. In real life it gives me a lift that lasts through the day. My mistake at first was over-layering and creating gaps; the trick is gradual stacking.
Tip: ask for a subtle stack and heavier front lengths so the crown lifts but the silhouette remains solid.
4. Razored-Edge Pixie Bob for Soft Movement
I let my stylist use a razor on the ends to give movement without thinning everything out. The edges are softer but still hold weight. It gives me that lived-in look without a lot of fuss.
Photos make it look effortlessly tousled. In real life the pieces separate nicely after a day or two. It can frizz in humidity if I use too much product though.
Tip: request light razor texturing only at the tips and not through the bulk; you want separation, not gaps.
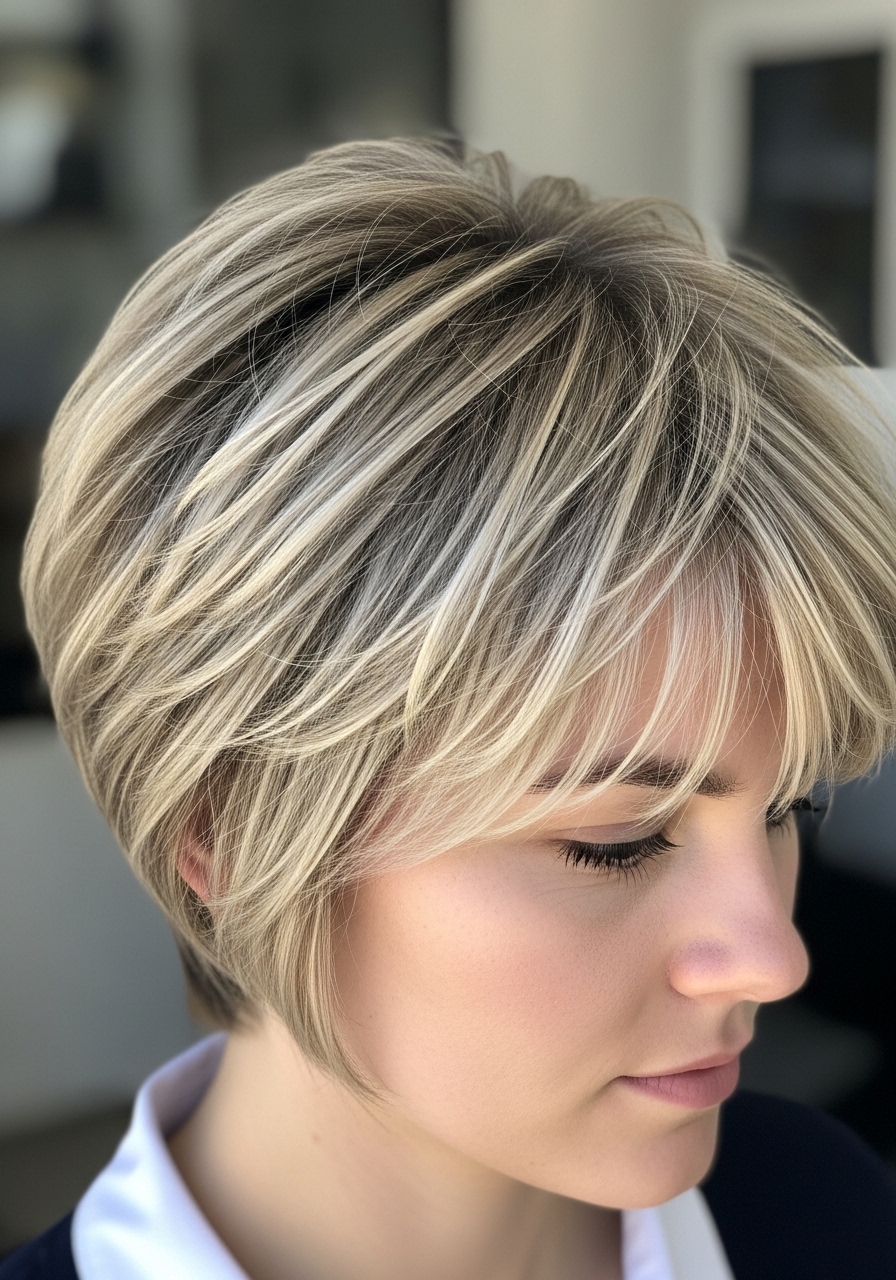
5. Long Pixie Bob with Curtain Bangs (Thick Hair Friendly)
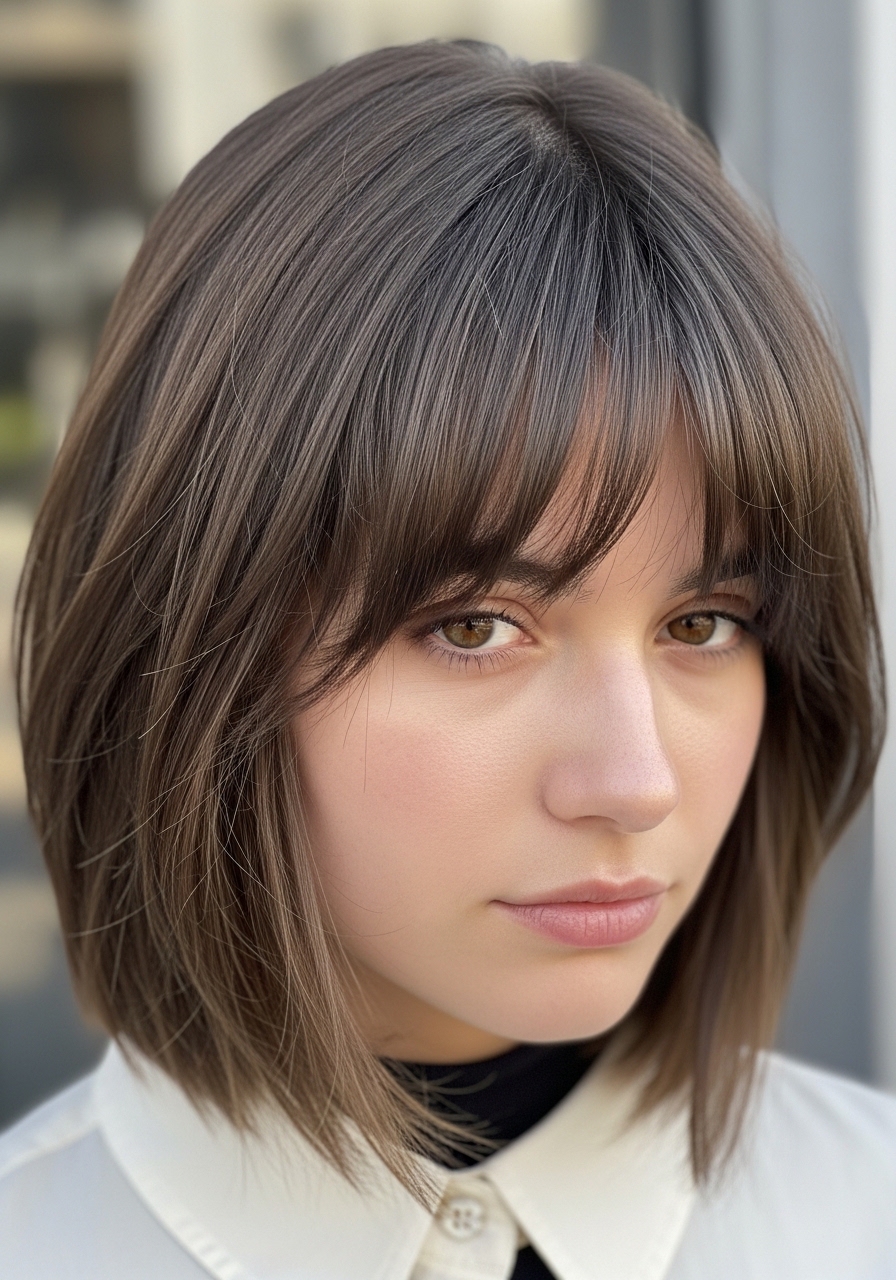
I kept the front longer and added curtain bangs to control my heavy forehead area. The bangs tuck behind my ears or fall soft over my eyebrows. It makes the cut feel longer and more wearable.
In photos the curtains frame the face. In real life they breathe with movement. I once cut them too short and they puffed out. Now I ask my stylist to leave extra length to ionize into place.
Tip: tell your stylist to keep curtain bangs long and slightly weighty—about jaw to cheekbone length—so they settle instead of sticking up.
6. Textured Choppy Pixie Bob with Separated Pieces
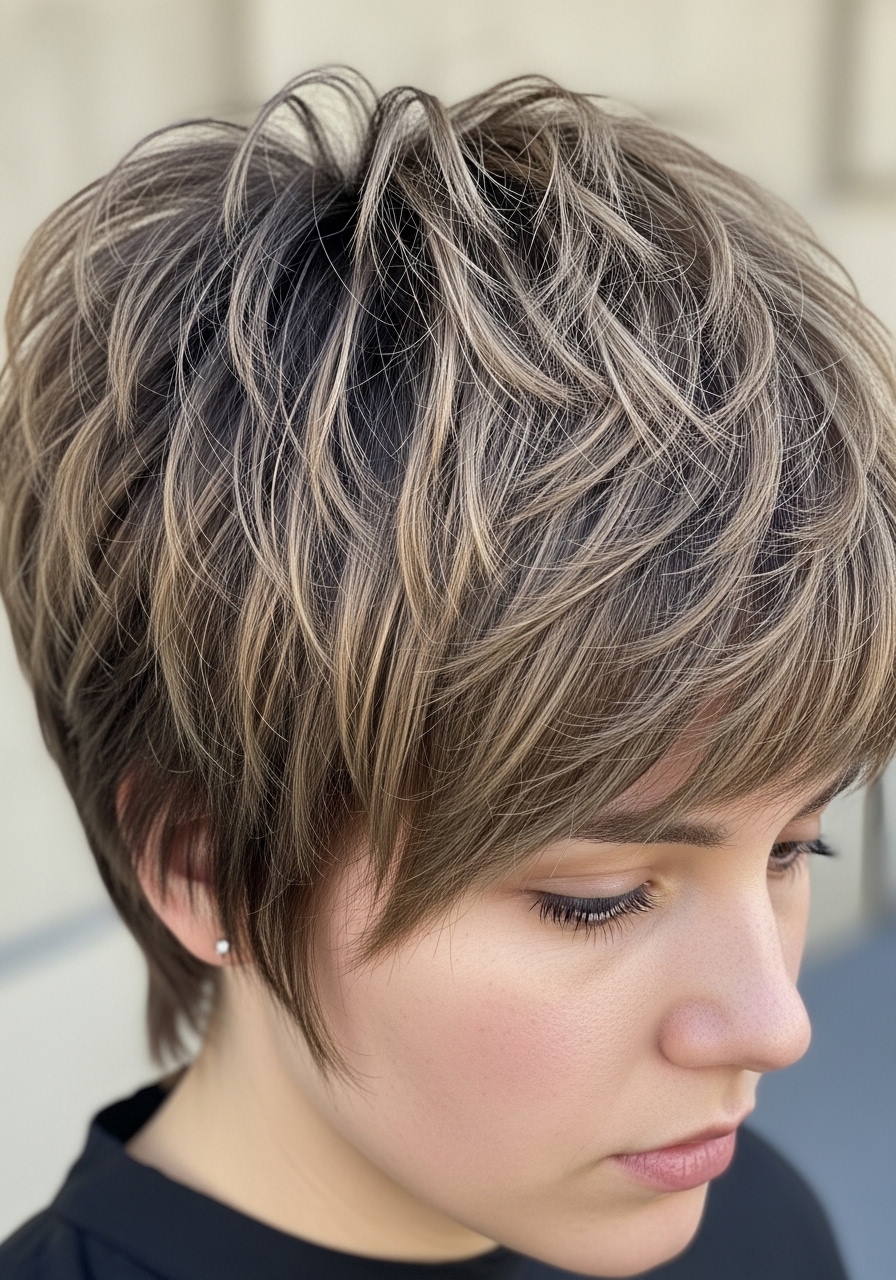
I love this choppy version for weekend texture. My stylist chopped in short layers and left chunky pieces. It shows off thickness without feeling heavy.
It photographs edgy and lived-in. In real life I get the best look after a day or two of dry shampoo. My styling mistake was using a heavy pomade; it flattened instead of separating.
Tip: use a light salt spray and scrunch with a diffuser on low to enhance those chunky pieces instead of weighing them down.
7. Tapered Nape Pixie Bob to Reduce Weight

I had my nape tapered to remove the stubborn weight that made my neck hot and hair flop forward. The taper gives structure while the top keeps heavy volume. It instantly felt lighter.
In photos the back looks neat. In real life I noticed less collar tug and a cleaner fall. Early on I regretted letting the taper go too short—ask for a conservative taper if you sleep on your back a lot.
Tip: tell the stylist “soft taper at the nape, not shaved,” so it reduces weight but still blends with thick top layers.
8. Asymmetrical Pixie Bob with Longer Front
I tried an asymmetrical line to give my thick hair a modern edge. One front side hangs longer and the other is cropped. It frames my face and hides extra bulk.
It looks dramatic in photos. In real life it’s wearable because my thickness gives the long side weight. My early mistake was making the difference too extreme; it looked unbalanced after a week.
Tip: ask for only an inch or two of asymmetry so it reads clean and still plays well with thick hair.
9. Curly Pixie Bob That Holds Shape All Day
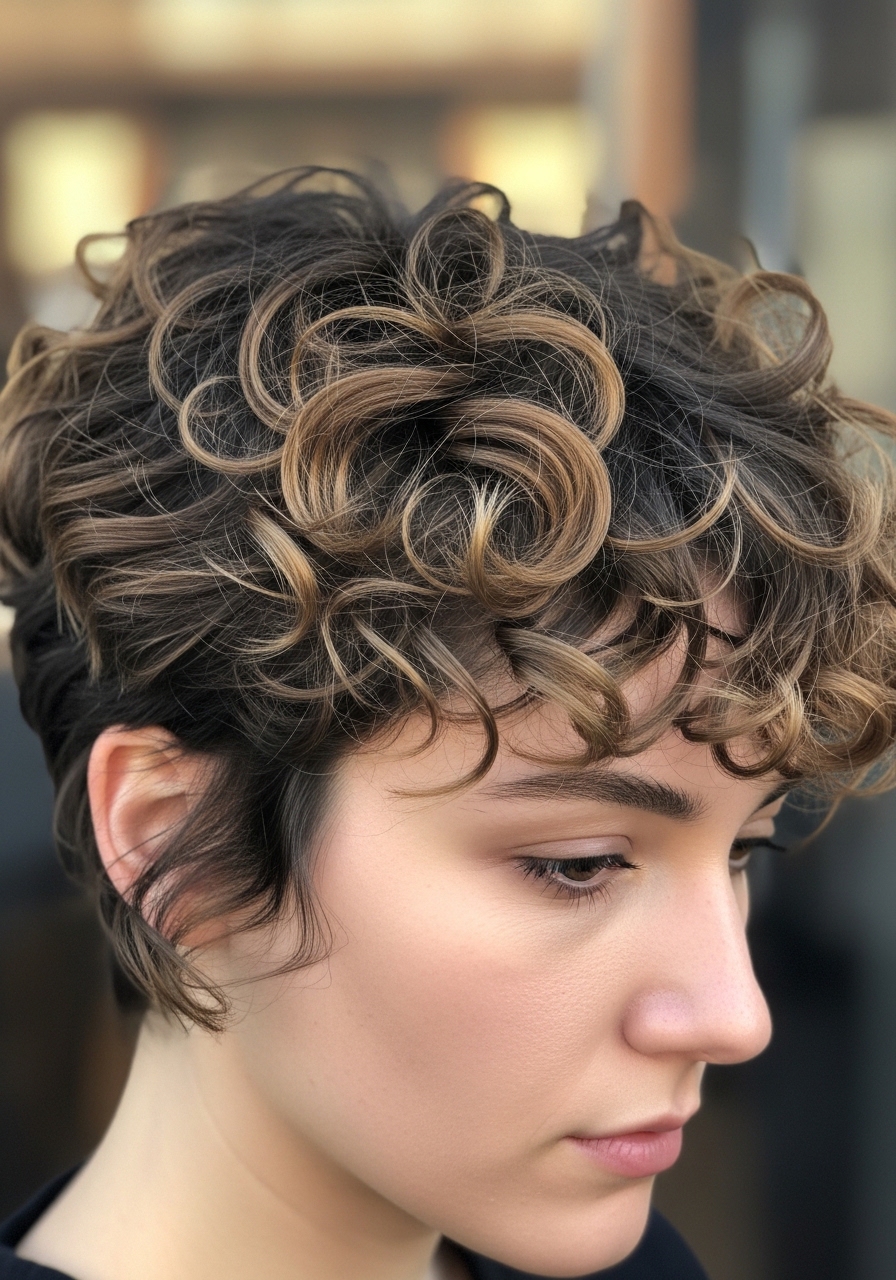
I was nervous about cutting my curls short. My stylist left length in the ringlets and shaped around my curl pattern. The cut gives me a rounded silhouette that lasts.
In photos it looks bouncy. In real life humidity can weigh it down, but the cut holds better than I expected. My initial mistake was over-thinning the curls; that created frizz lines.
Tip: ask your stylist to dry-shape your curls in the chair and remove bulk only where curls actually sit, not all over.
10. Wavy Pixie Bob with Beachy Texture
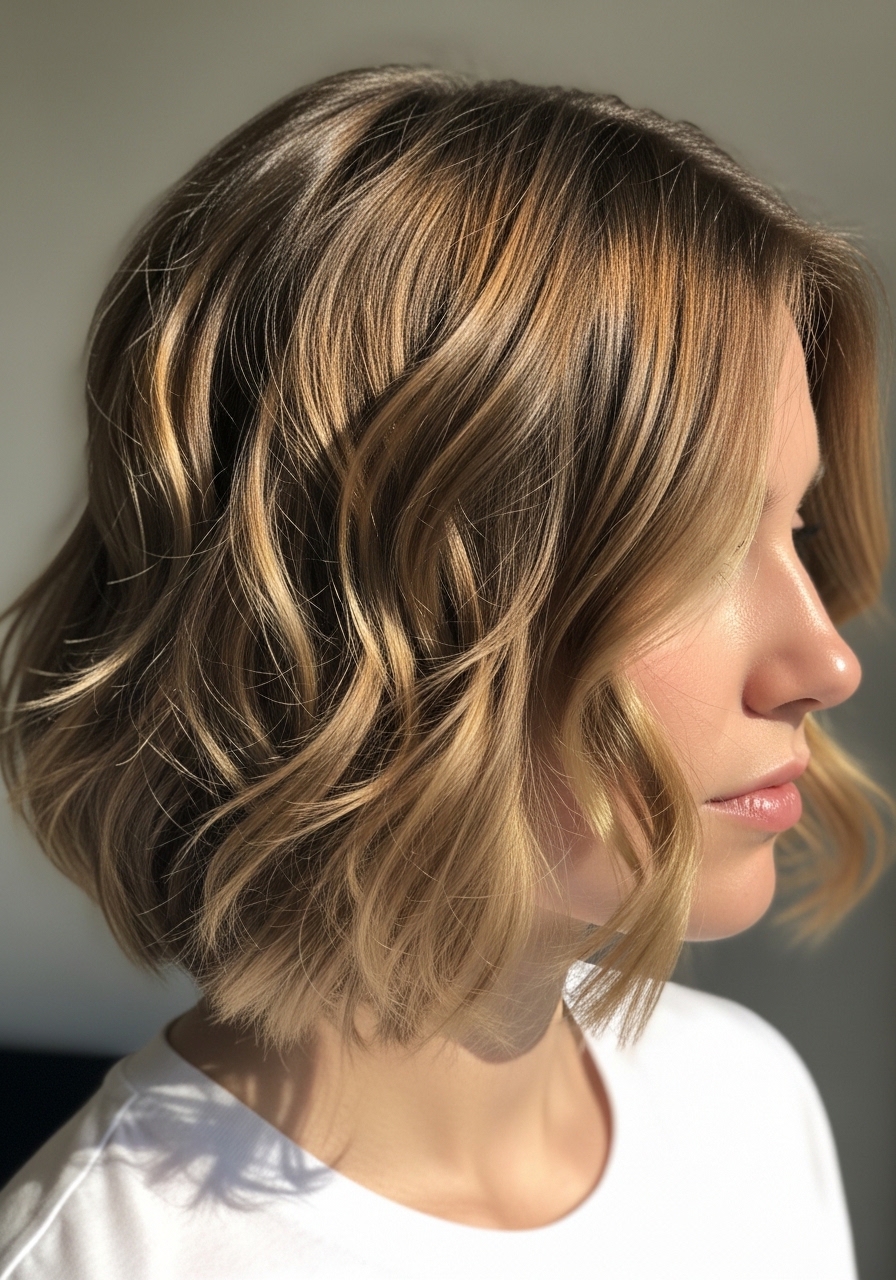
I kept a bit more length to let my waves do the work. The cut is just long enough to scrunch into a beachy wave without daily heat. It feels casual and I can pin pieces back.
It looks soft in photos. In real life I get the best shape after a light salt spray and air-dry. Sometimes I over-salt and it ends up crunchy; less is more.
Tip: tell your stylist to leave two to three inches of length on top so waves can form naturally without bulking the sides.
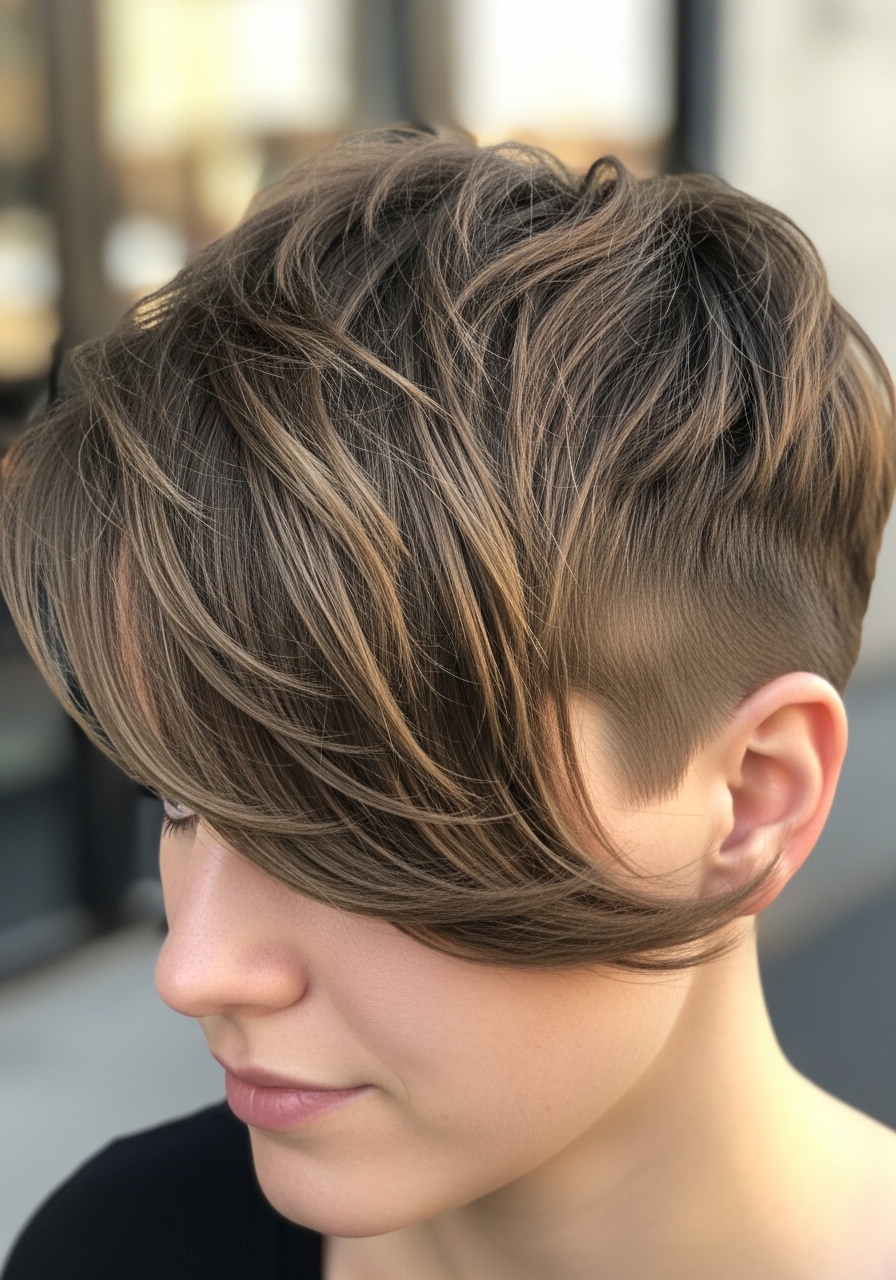
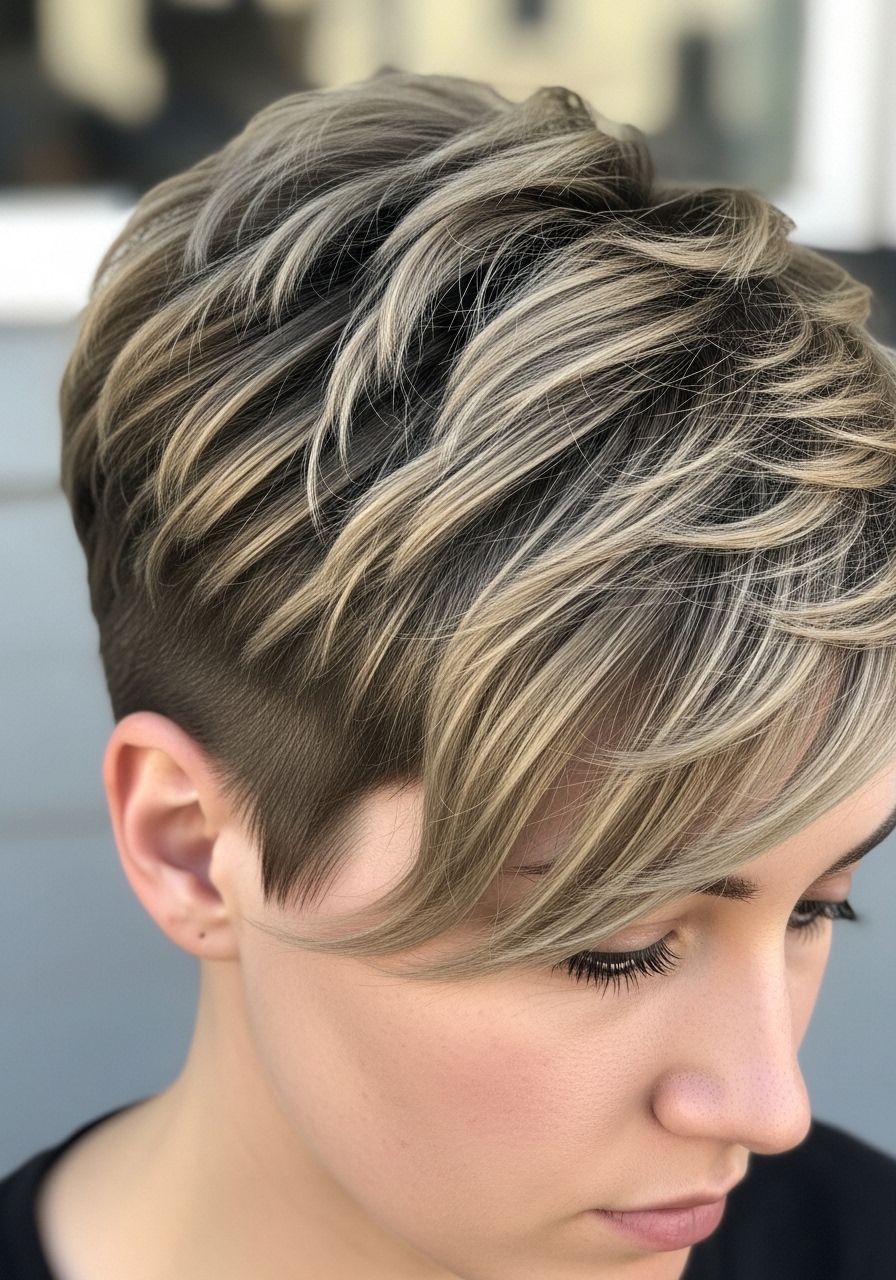
11. Undercut Pixie Bob for Manageable Volume
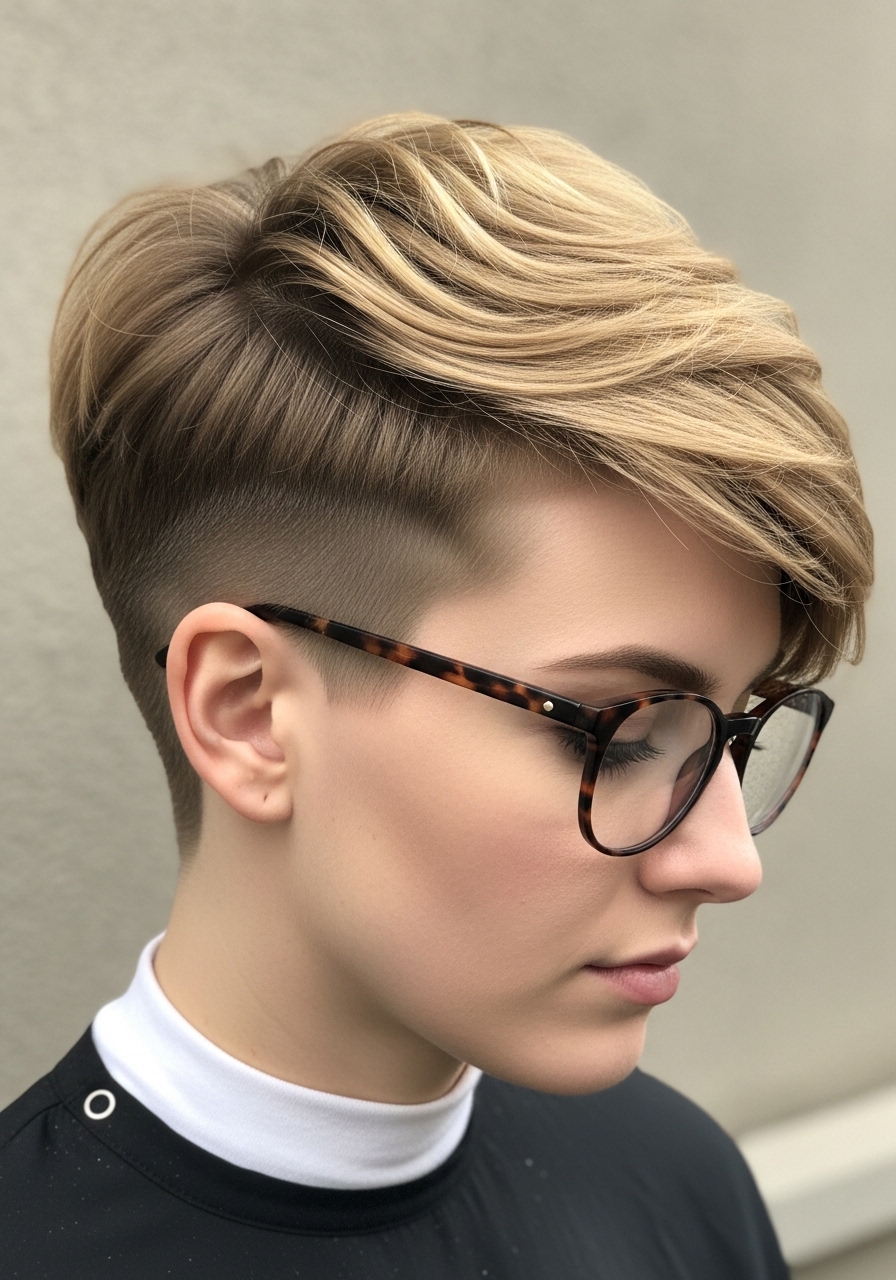
I got an undercut to remove the relentless bulk at my occipital zone. The top stays long while the sides and back sit closer to the head. It made styling in the morning so much easier.
In photos it can look bold. In real life it’s surprisingly subtle under hats and collars. I once shaved too aggressively and had a visible line; now I ask for a graduated undercut.
Tip: ask for a clipped undercut that melts into the top layers rather than a hard line—about a #3 or #4 guard for thick hair.
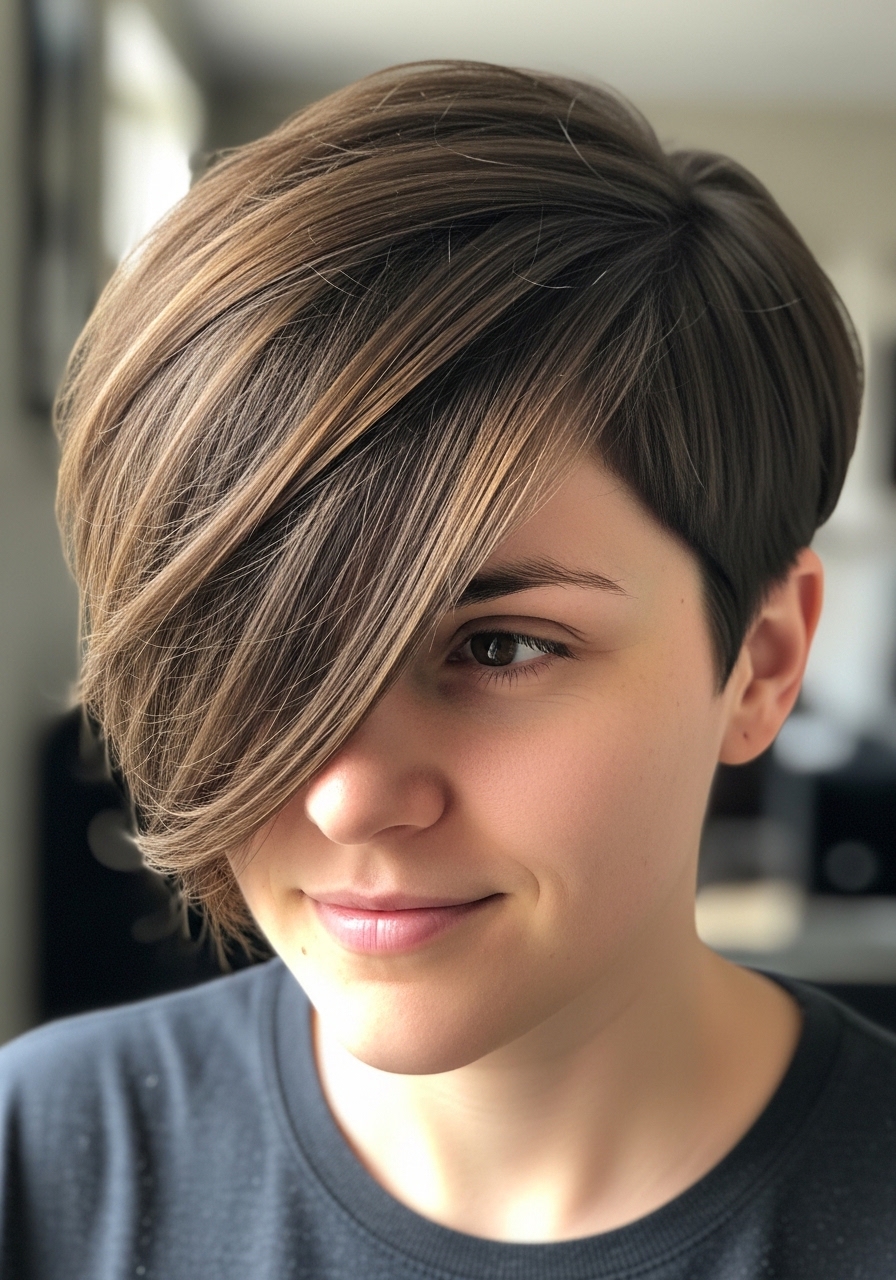
12. Deep Side-Part Pixie Bob with Sleek Sides
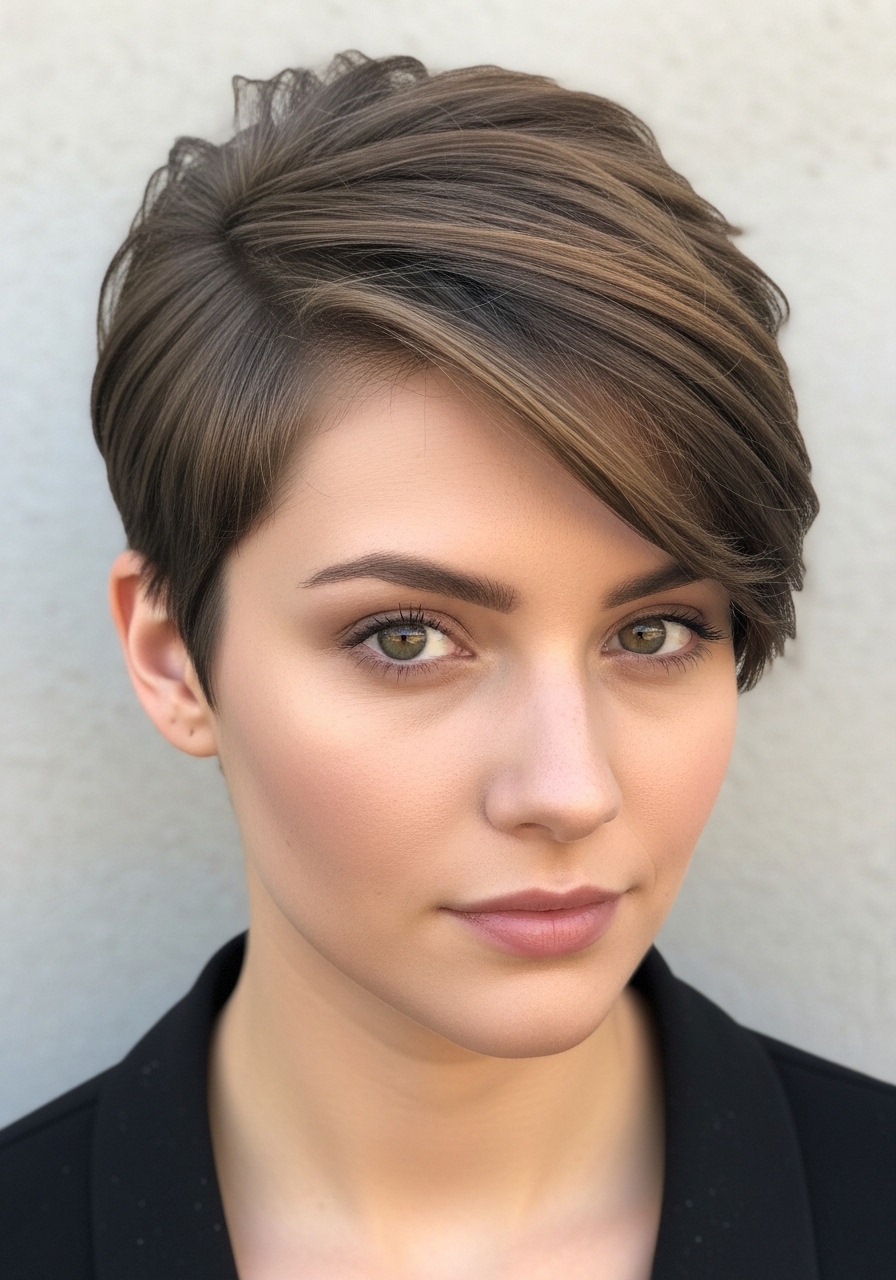
I started doing a deep side part to tame my volume. My stylist flattened one side and left the other fuller. It made mornings predictable and gave a chic silhouette.
Photos make it look polished. In real life gravity helps the longer side stay down, but humidity pushes the sleek side out if I skip smoothing cream. I used to overbrush it and lost the part.
Tip: ask for a defined side part and a bit of weight on the flatter side so it holds with minimal product.
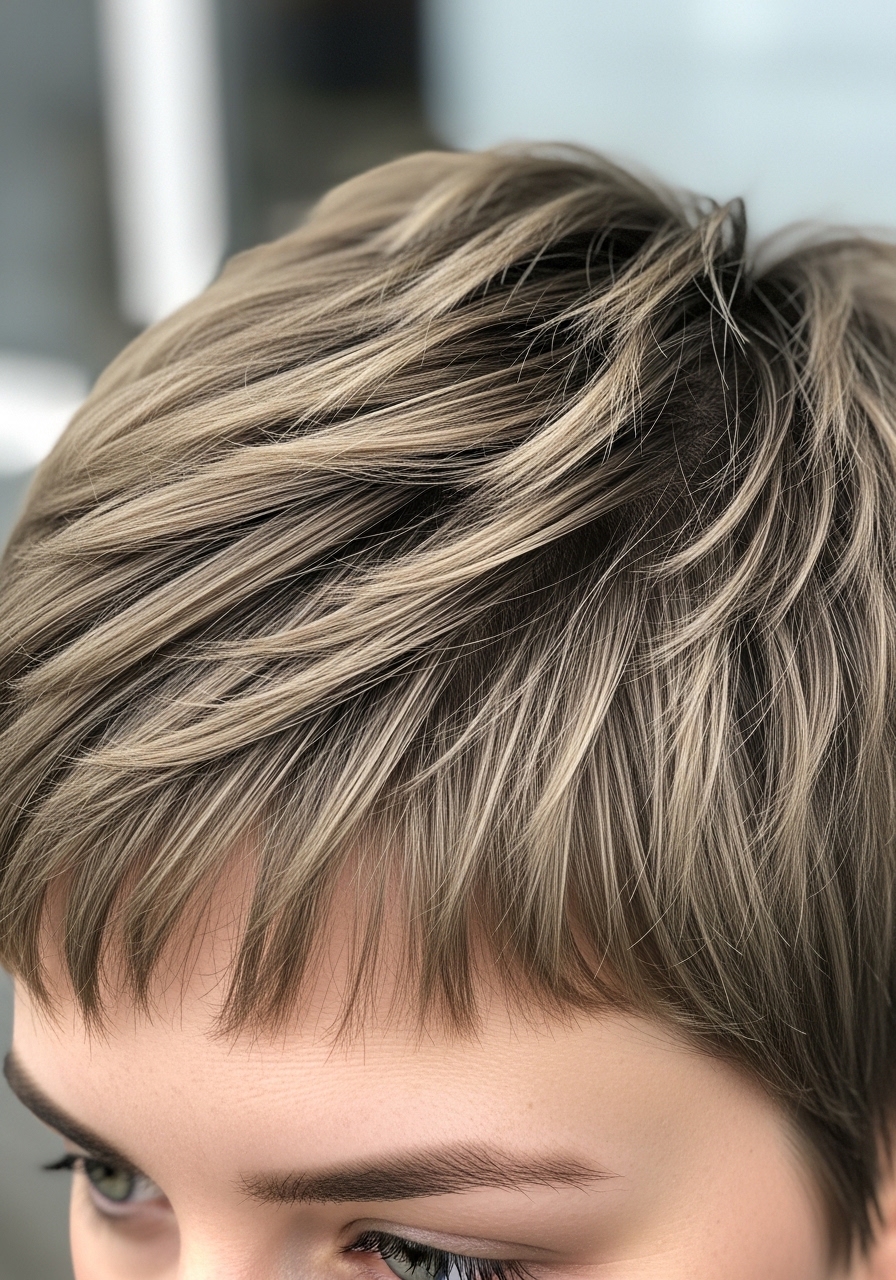
13. Feathered Top Pixie Bob for Lightness
I asked for feathered layers on top to reduce the dense mass but keep body. The top breathes and the base still reads full. It gives movement without hollowing things out.
It photographs airy and lived-in. In real life the feathering settles into natural waves and keeps me cool. My first cut had too much feathering and looked sparse near the part.
Tip: tell your stylist to feather only the top crown, leaving heavier density at the sides so you don’t lose shape.
14. Blunt Fringe Pixie Bob That Frames the Face
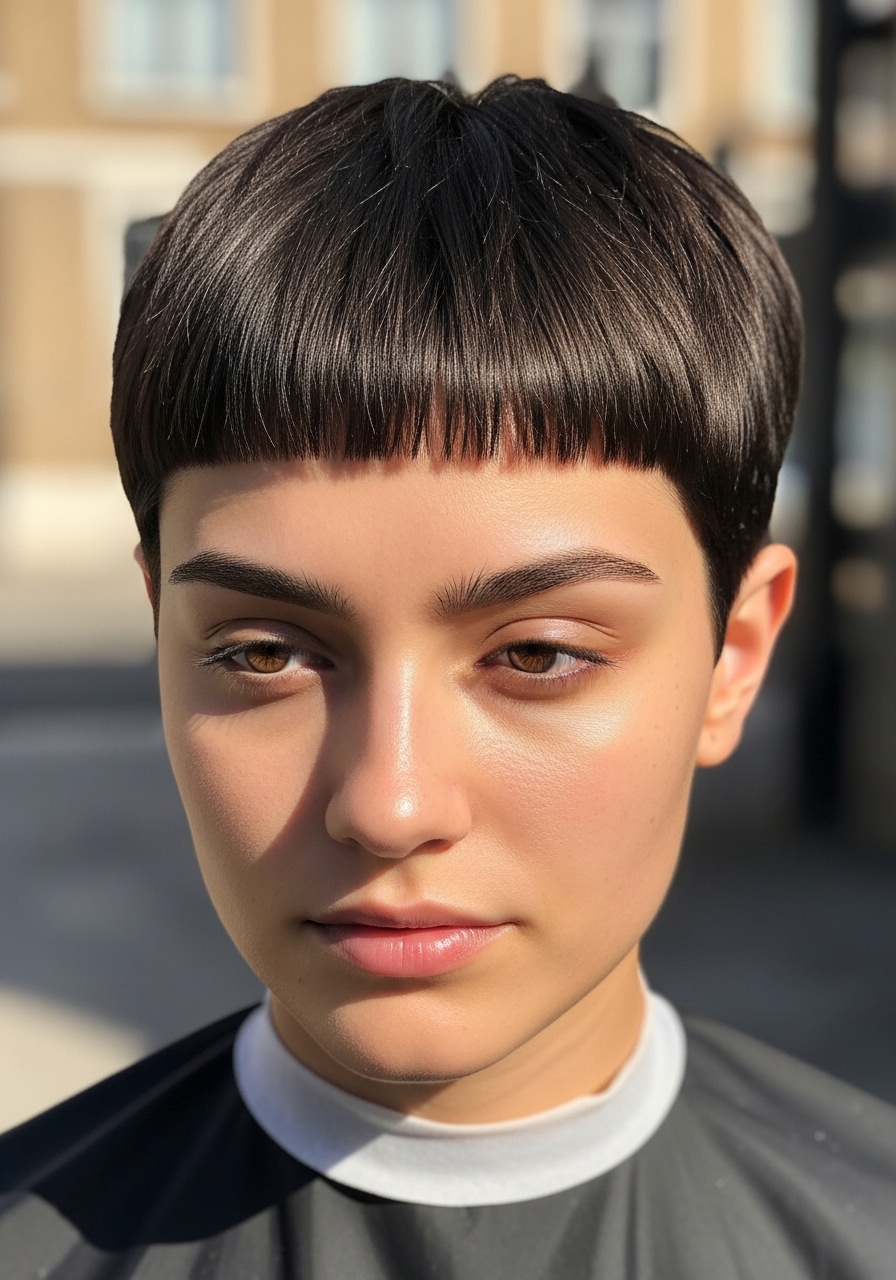
I tried a blunt fringe to shorten my forehead visually. My thick hair made the fringe sit like a solid band. It felt grounding and modern.
In pictures it looks precise. In real life the fringe can puff in humidity or stick out if cut too bluntly. My early mistake was cutting it too short; longer, blunt fringe sits better.
Tip: ask for a blunt fringe that’s slightly longer than your reference—your thickness will bring it into place.
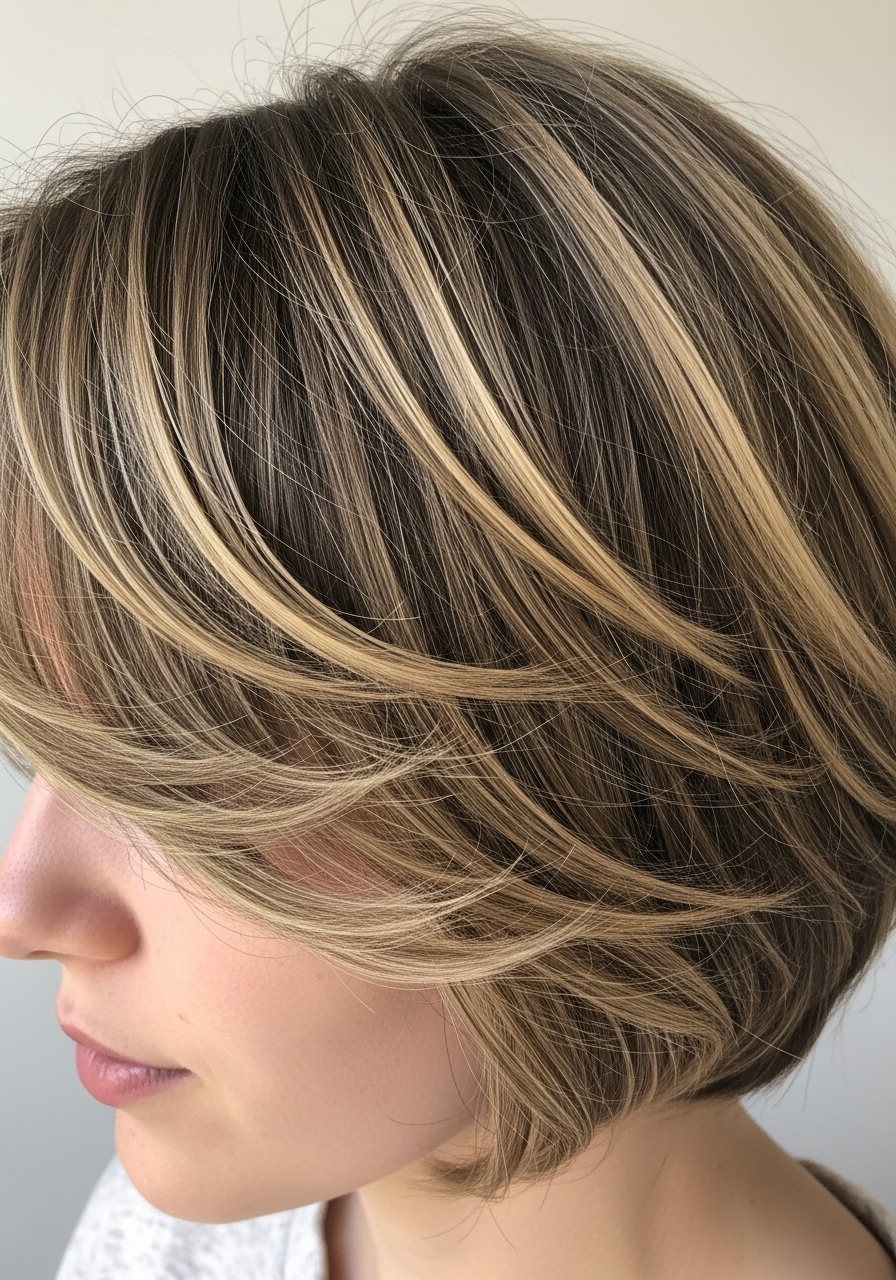
15. Stacked Pixie Bob with Soft Layers
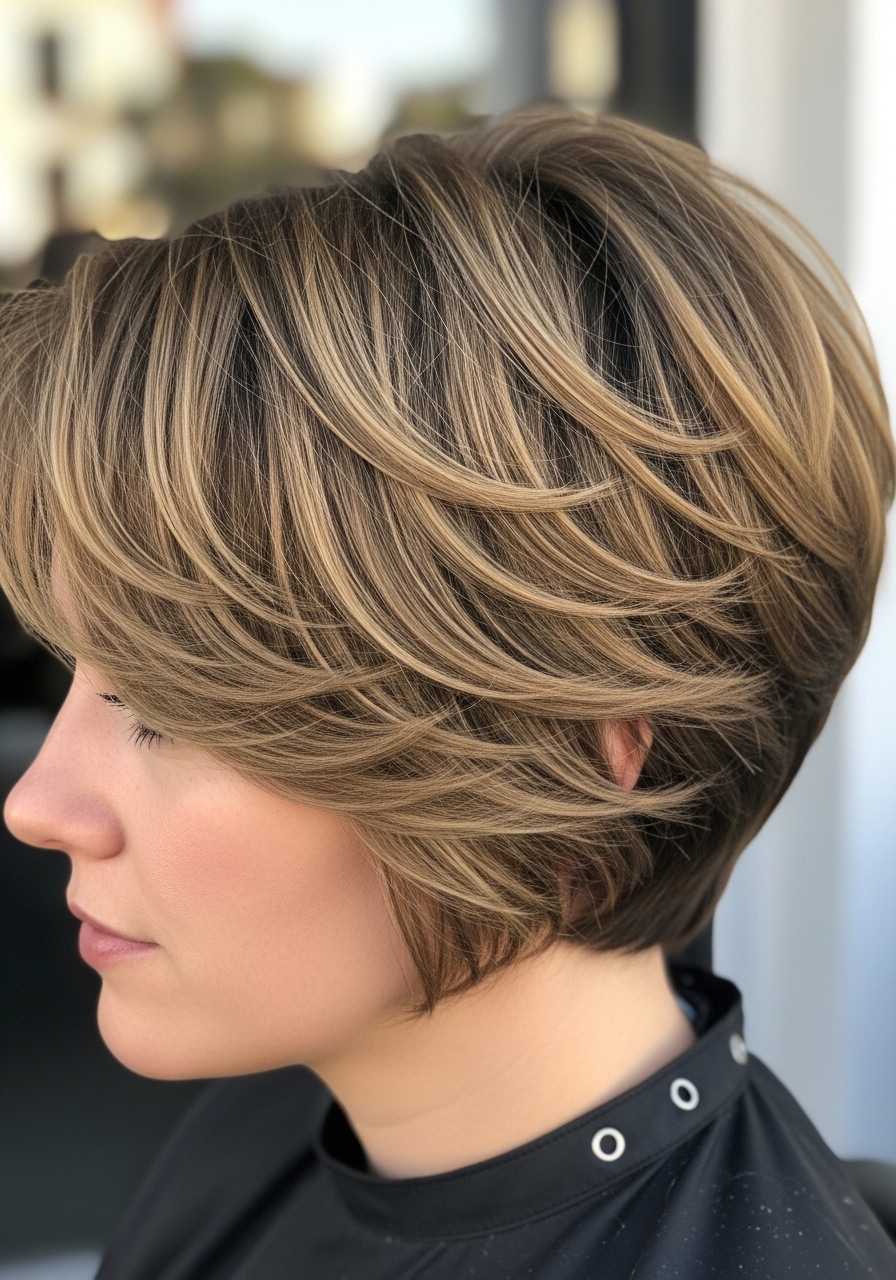
I went for a soft stacked back to get a rounded shape without losing bulk. The layers blend into each other and my hair sits like a helmet in the best way.
In photos it looks sculpted. In real life it gives me consistent volume and makes styling a five-minute task. I once asked for too much stacking and had an exposed neck line.
Tip: request a gentle stack and ask the stylist to show the shape by moving your head so you can see how it sits before finalizing.
16. Slicked-Back Pixie Bob for Polished Days
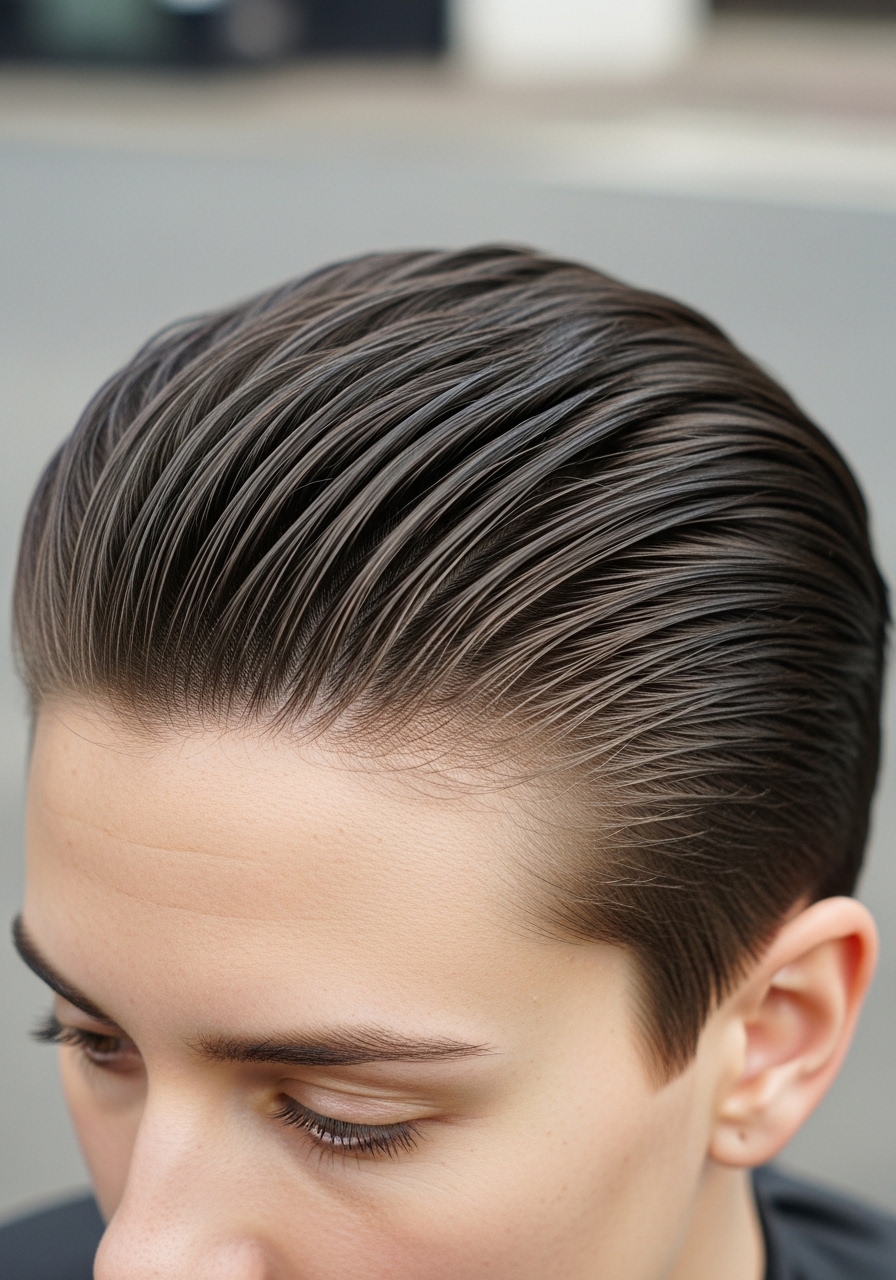
I reserve this for meetings. I smooth my thick top back with a lightweight gel and a paddle brush. It tames volume and looks intentional.
Photos read glossy. In real life it stays put all day if I use a small amount of product. My mistake was using too much gel once—the style looked stiff and the hair lost its natural fall.
Tip: use a pea-sized dab of product, comb through, then finger-sculpt the ends so it reads sleek, not helmeted.
17. Piecey Micro-Pixie Bob for Thick Hair
I chopped into a micro-pixie bob to simplify styling. The top has intentional pieces that break up the density and show movement. It’s playful but still manageable for thick hair.
In photos it reads edgy. In real life it’s low-maintenance and air-dries into a lived-in mess that I like. My early error was letting the top be too long, which hid the piecey effect.
Tip: ask for defined 1–2 inch pieces on top and short cropped sides to let the texture do the work.
18. Long-Top Pixie Bob You Can Pin Back
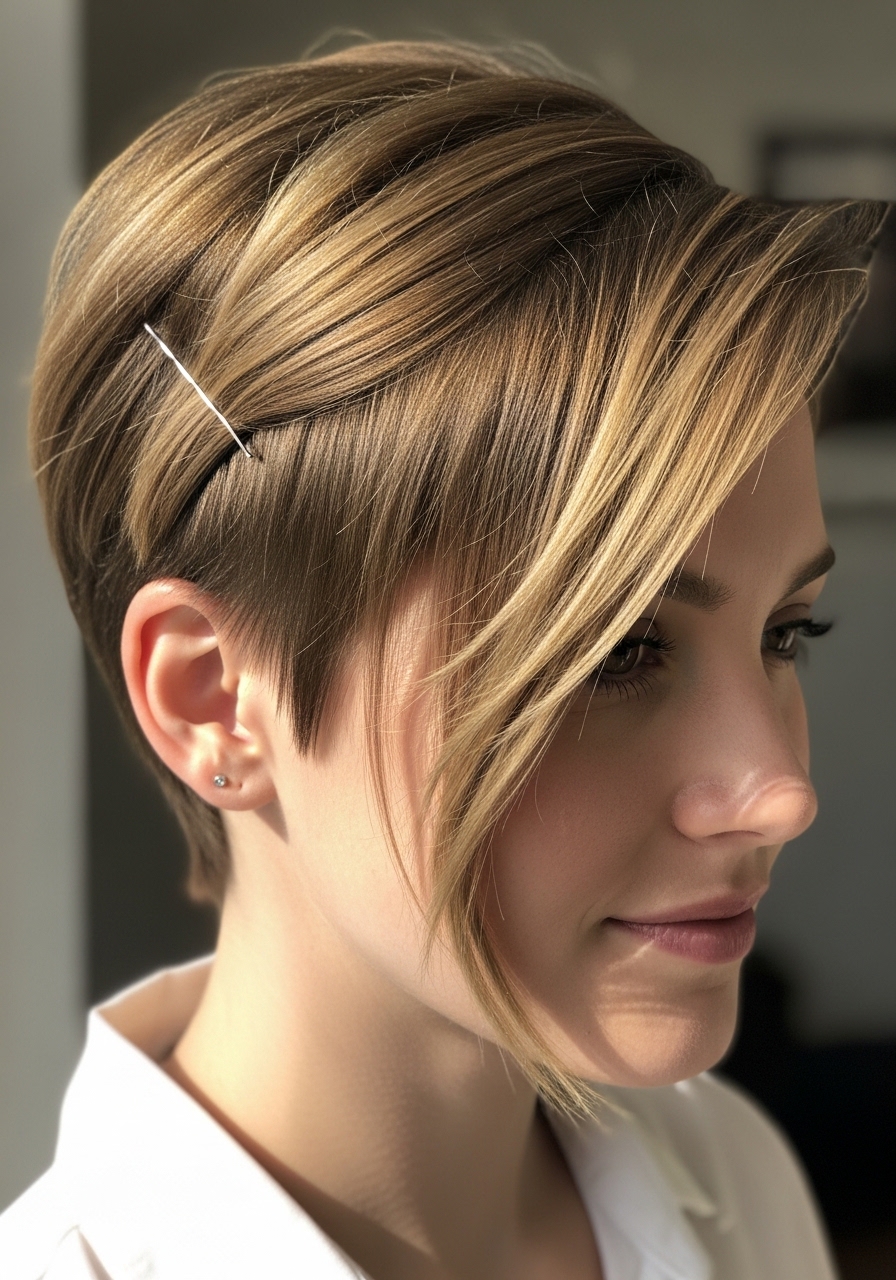
I kept the top long enough to knot or pin back on hot days. The sides are shorter so the pin holds and the top still looks full. It’s versatile and feels forgiving.
Photos show a polished pinned look. In real life I sleep on it and can still sweep it back without redoing much. My mistake once was leaving the top too heavy so pins slipped.
Tip: ask your stylist to keep the top long but layered slightly so pins grip and the shape still sits clean when loose.
19. Soft-Layered Pixie Bob with Face-Framing Pieces
I asked for soft layers that hug my cheekbones. The face-framing pieces make my cut feel feminine while the rest keeps its thickness. It’s an easy everyday look that still feels crafted.
In photos it softens the face. In real life those framing pieces often need a quick tuck behind the ear. Early on I let them grow uneven; now I trim them regularly.
Tip: request subtle face-framing layers that start at cheekbone level, not chin, so they flatter without overwhelming thick hair.
20. Razor-Textured Pixie Bob with Natural Finish
I finally let my stylist use a razor but only at the tips. The texture breaks up my thickness and gives small pieces that catch light. It reads casual and real.
Photos show movement. In real life it loosens over a few days and I love the variety of shapes it creates. I once let them go too shaggy with a razor and had maintenance issues.
Tip: ask for razor texturing limited to the outer tips and not through the base—this keeps the shape while giving natural finish.