
I finally stopped chopping off too much and learned what my hair actually does. I fought with curls and limp roots for years.
The cut that saved me was layered. It moved, but still felt manageable. I want you to leave the salon knowing exactly what to ask for.
12 Cool Pixie Bob Layered Haircuts to Try
These 12 pixie bob ideas are pulled from my own trial-and-error. Each one is different but realistic. Expect clear, usable descriptions and one honest tip per cut. There are exactly 12 looks here for you to try.
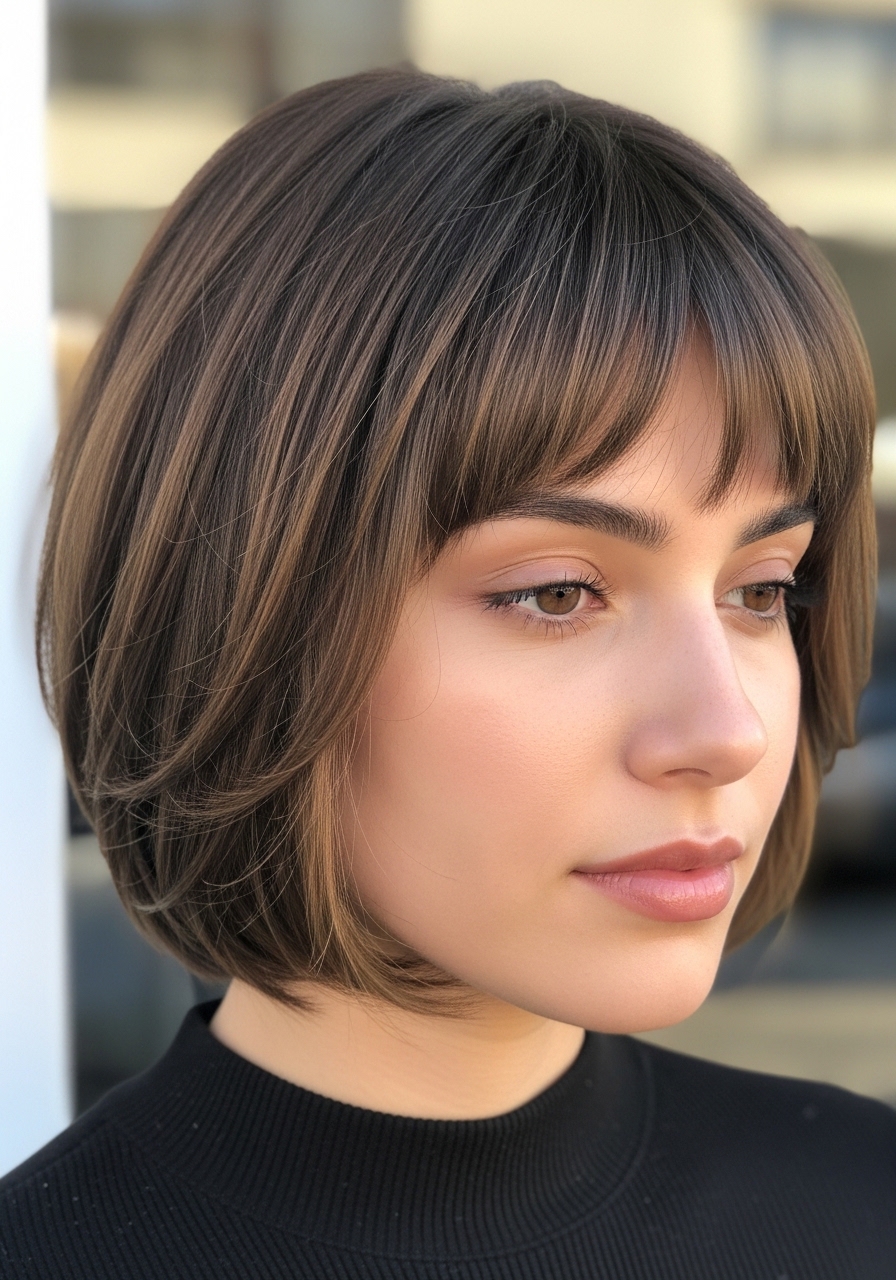
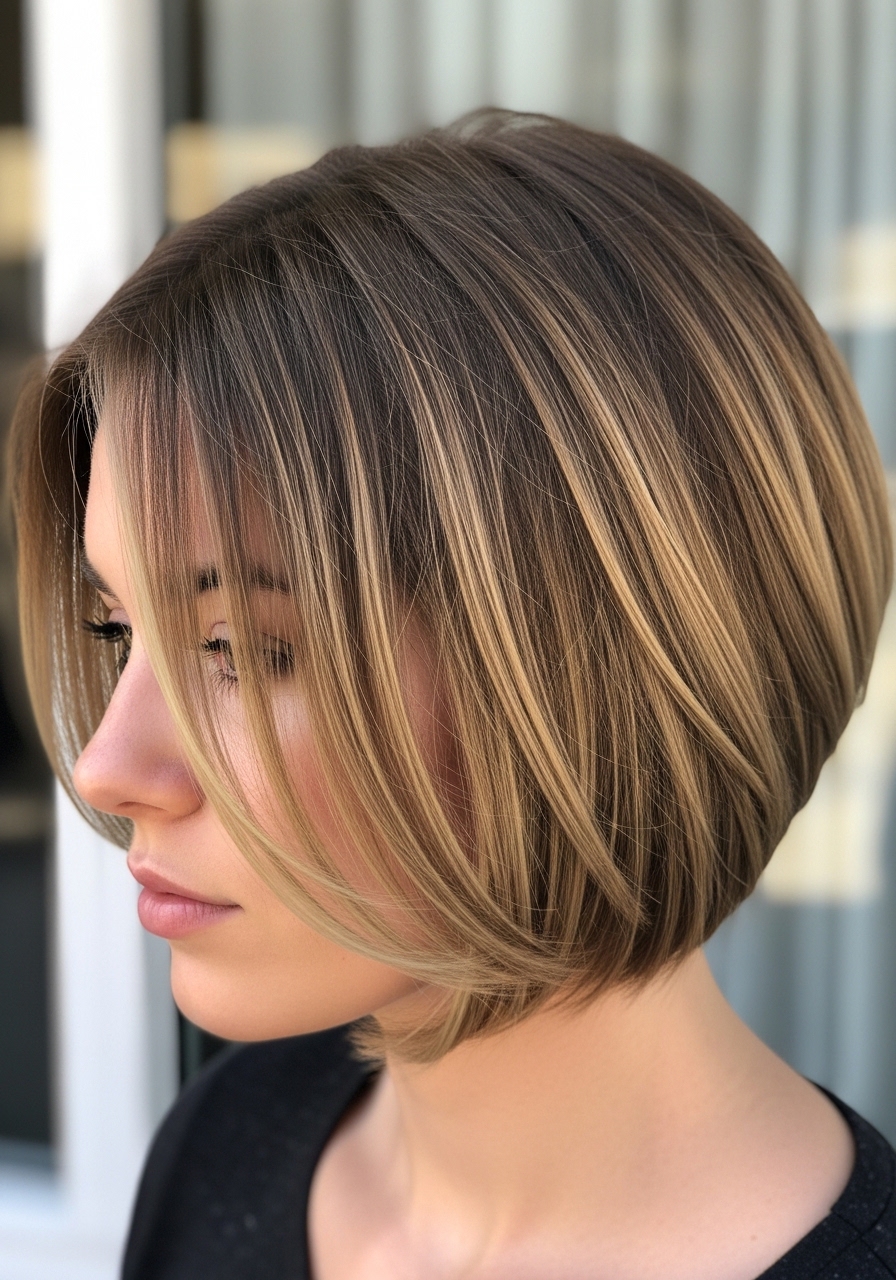
1. Soft Face-Framing Layers for Fine Hair That Add Fullness
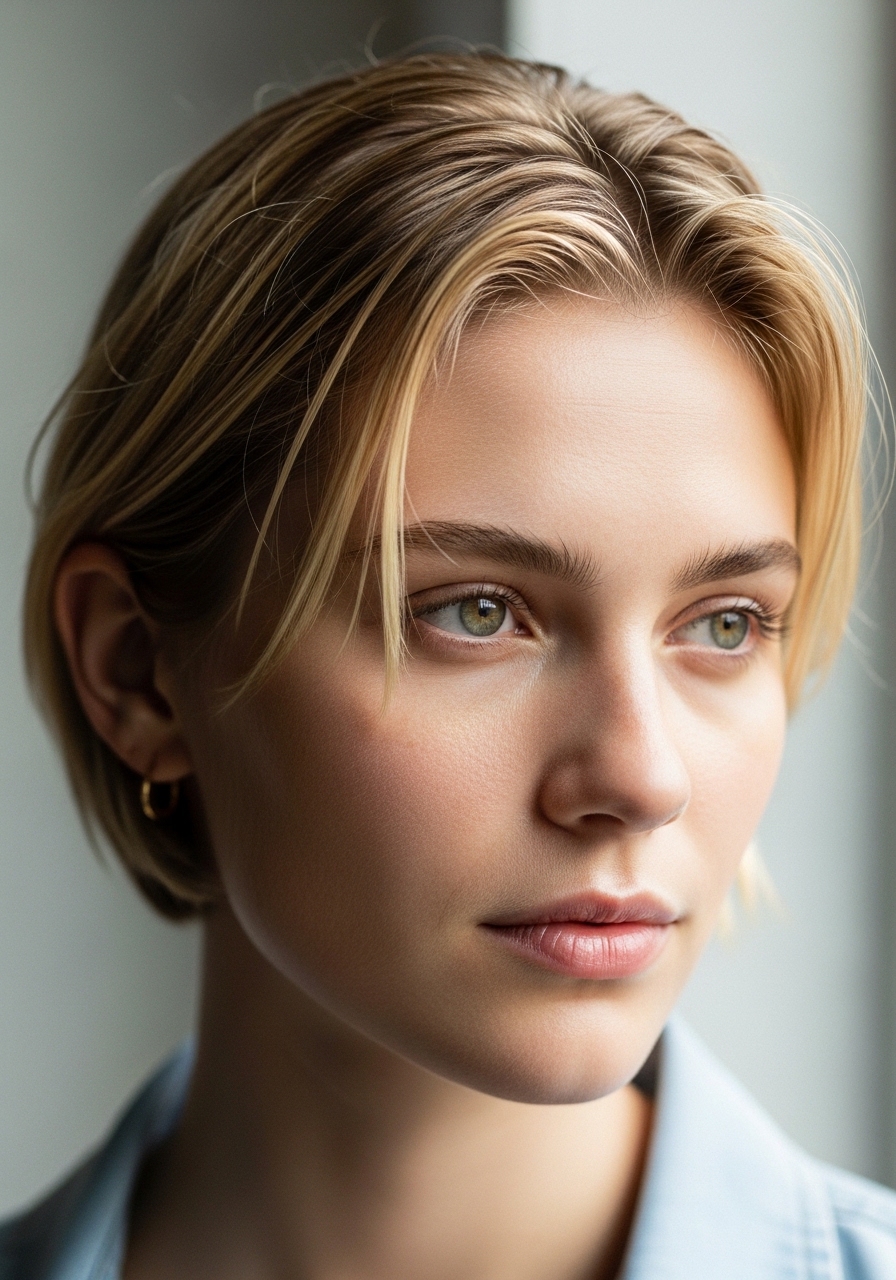
I asked my stylist for soft layers to hide my widow’s peak. It looked delicate in photos. In real life those layers help my fine hair read fuller without heavy product.
By day three the shape still sits nicely if I fluff the roots with my fingers. It doesn’t go flat like my old blunt bob. It’s forgiving on humid mornings too.
This works best on straight to slightly wavy fine hair. Tell your stylist you want layers that blend into the nape, not choppy face pieces. I use a wide-tooth comb and a tiny bit of mousse at the roots. It keeps shape without feeling stiff.
2. Choppy Top Layers to Play Up Natural Texture
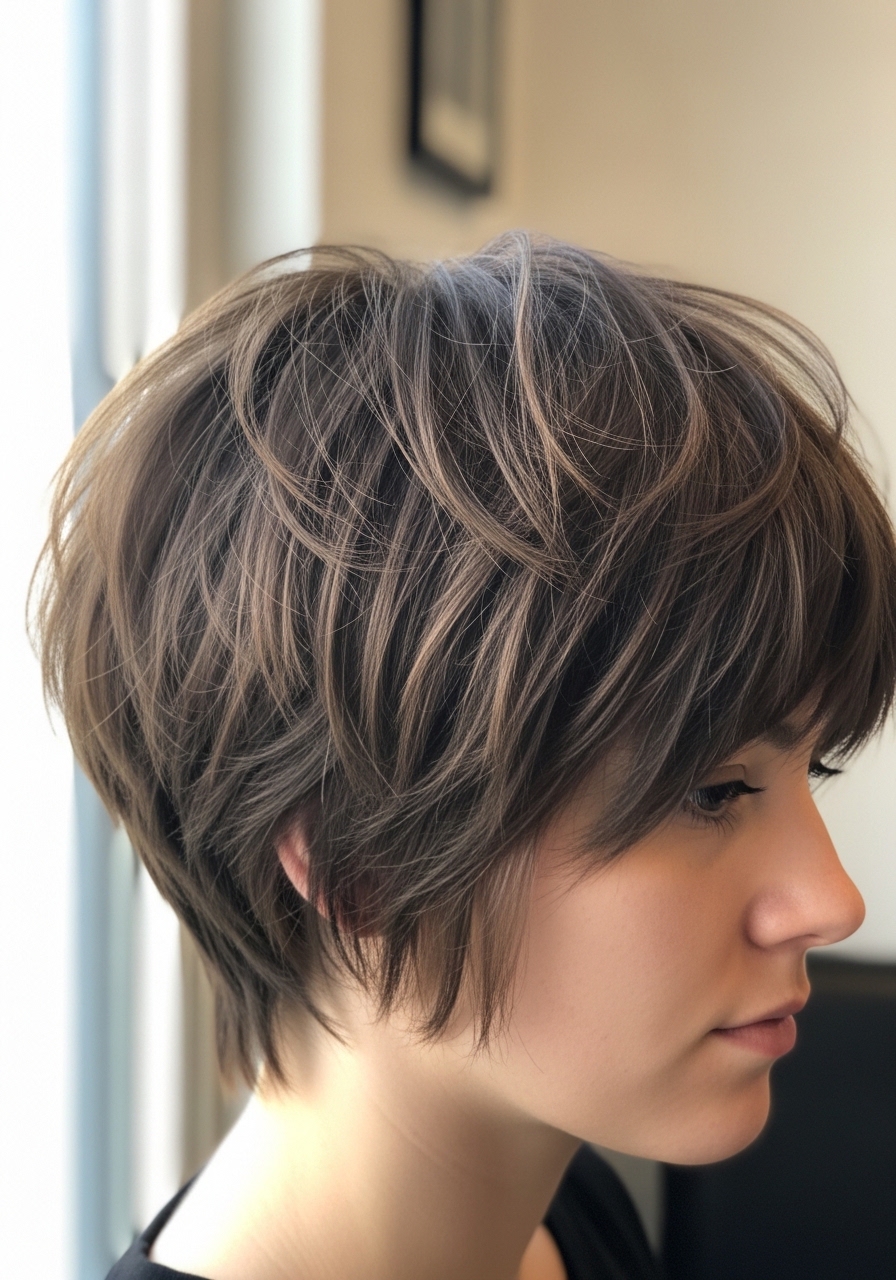
I went choppy because I wanted movement. My stylist used point-cutting on the top. At first it looked too edgy in the mirror. I panicked and thought I’d over-thinned it.
After a week, the choppy layers loosened and my hair finally matched the messy photos I’d saved. It’s lively through the day and hides a second-day oiliness well.
This is best on hair that already has some grit or wave. My mistake was asking for “really choppy” without showing a close photo. Next time I said “soft choppy,” and we got the playful texture I wanted. Dry shampoo at the roots helps keep the shape.
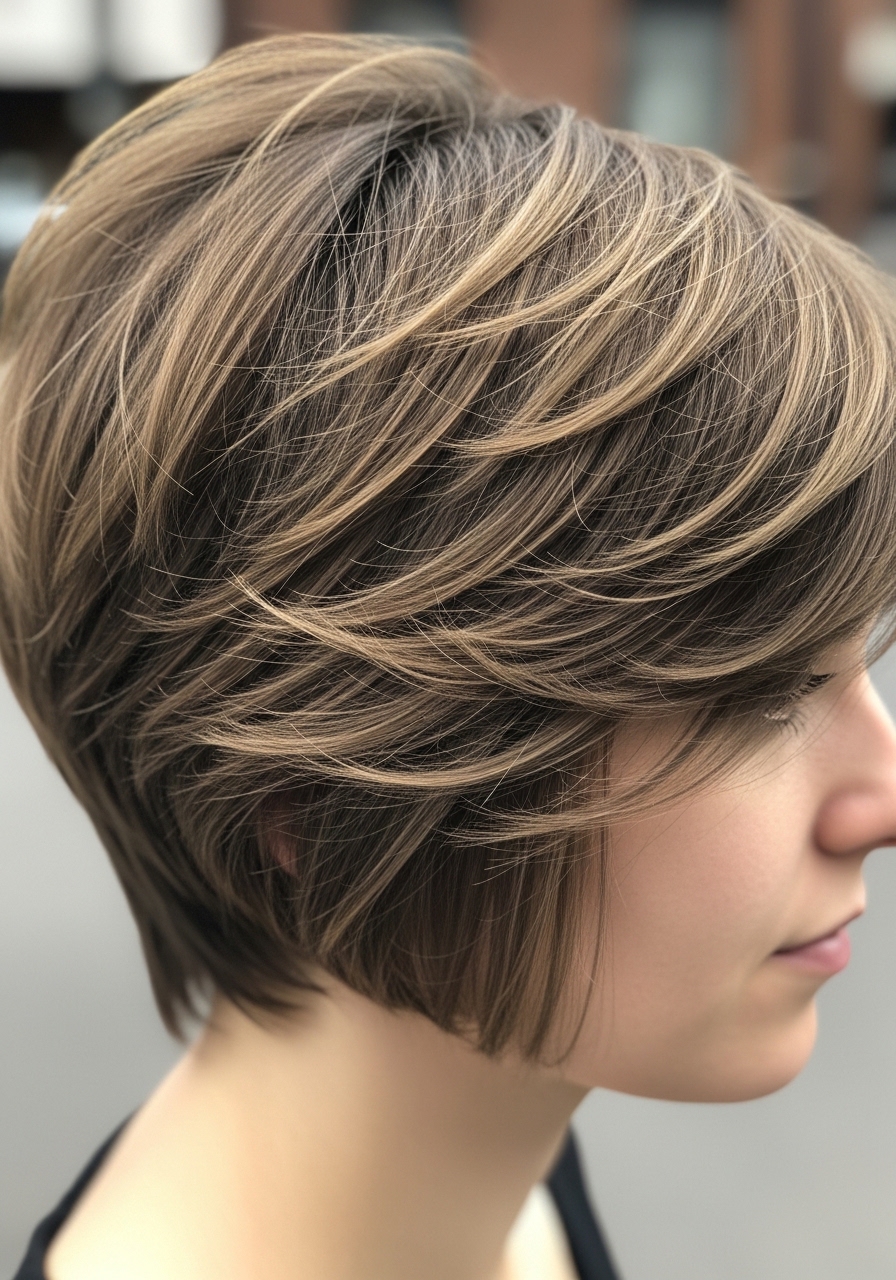
3. Graduated Nape Layers for a Clean Silhouette
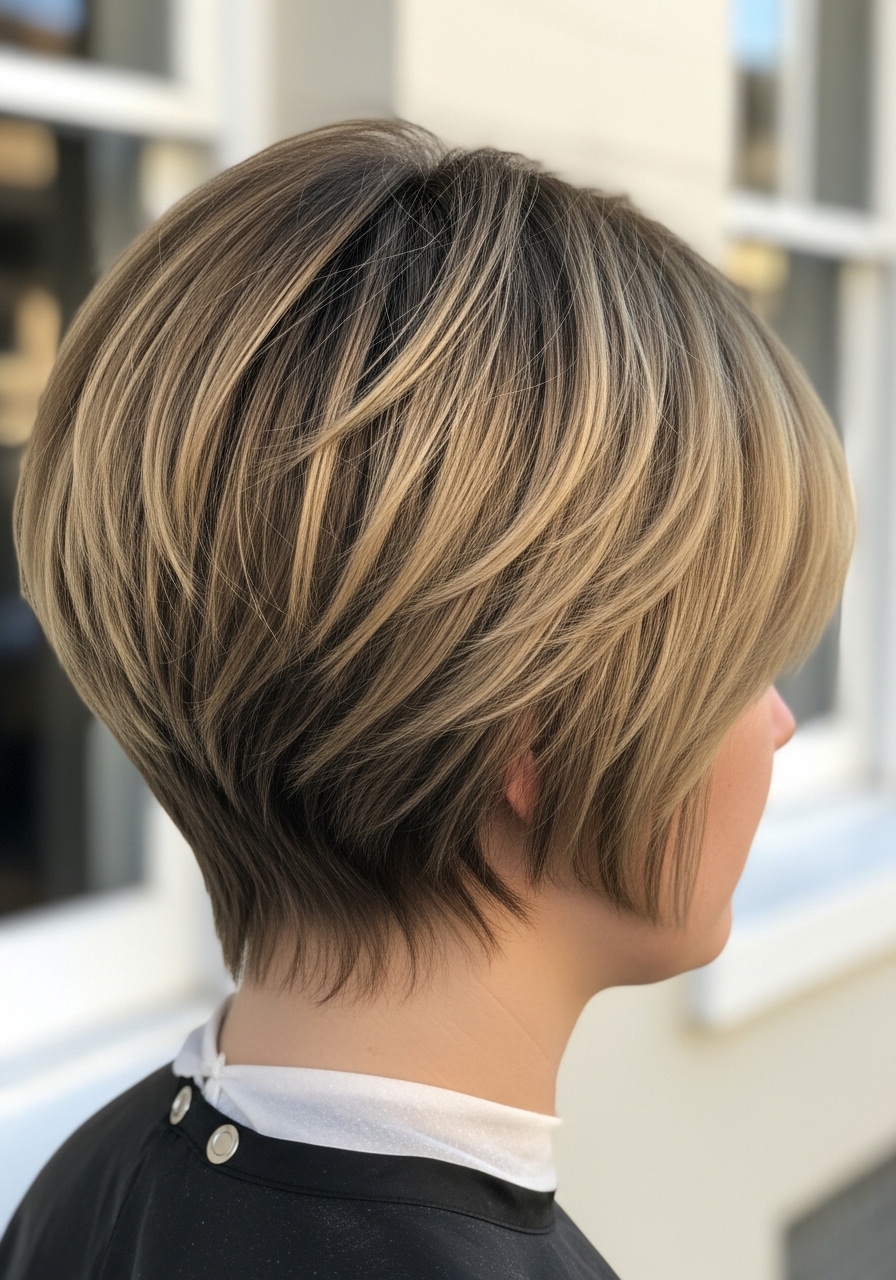
I chose a graduated nape because my neck gets hot in summer. The stacked layers give a tidy silhouette. Pictures looked geometric, but mine softened once styled.
In daily wear the cut gives lift without bulk. The back keeps its shape for weeks. I sleep on it and the slope settles back rather than collapsing.
This style works great on straight or slightly wavy thick hair. Tell your stylist you want a rounded stack that grows out softly. I ask for a small length at the crown to keep movement. A quick round-brush blowout in the morning finishes it.
4. Long Top Layers for a Swept-Over Pixie Bob
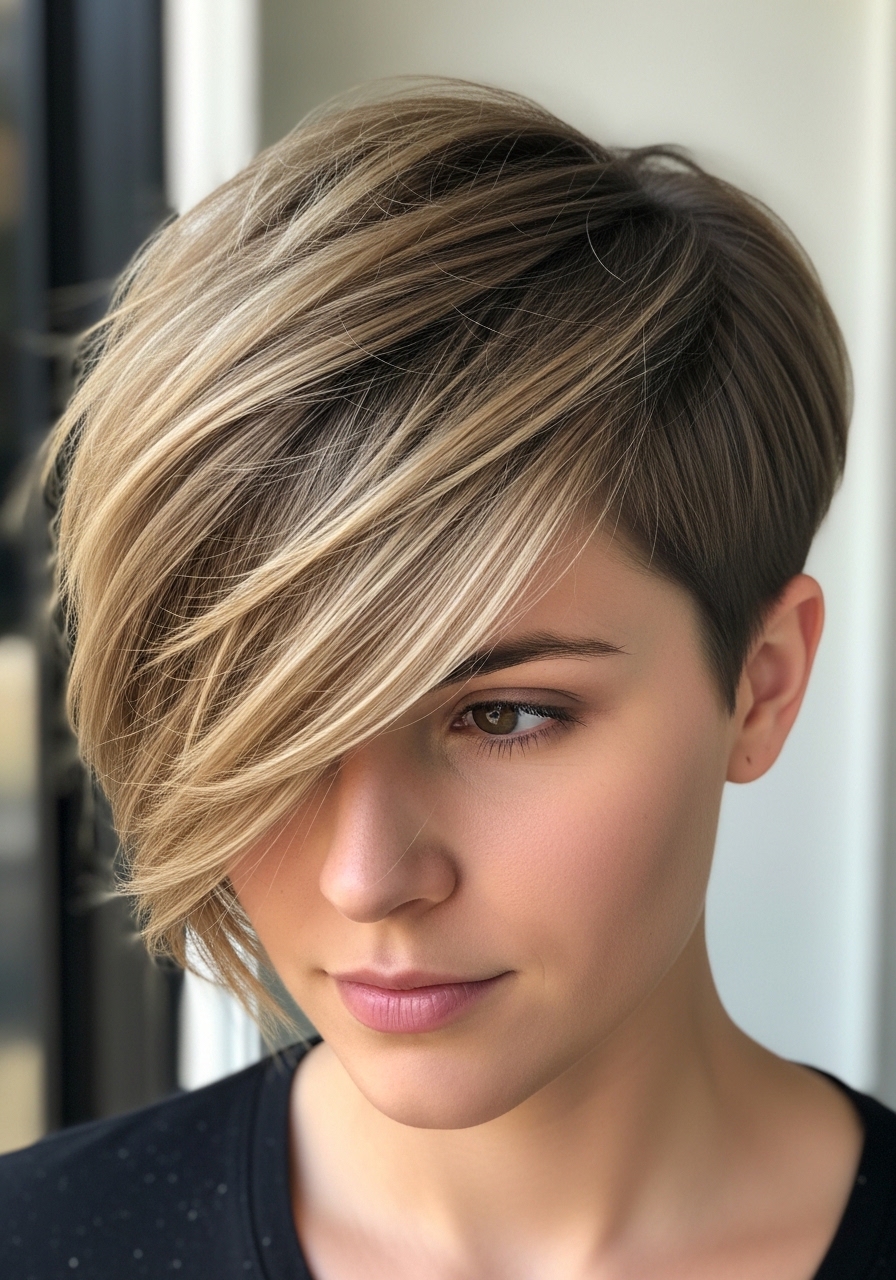
I kept the top long because I love a side sweep. At first it took ages to train the part. I spent nights coaxing it with pins. That was my mistake — impatience.
Once the longer top settled, I had options. I can tuck it behind an ear or sweep it dramatically. It behaves well in wind and doesn’t look limp midday.
This suits medium to thick hair best. Tell your stylist you want length on top to sweep across the forehead and softer, tapered sides. I use a flat iron to shape the sweep and a dab of wax at the ends to hold it without stiffness.
5. Curtain-Fringe Pixie Bob with Layered Sides
I finally tried a curtain fringe with my pixie bob. The fringe changed everything. It frames my eyes and makes the cut feel softer.
In real life the fringe drifts and benefits from morning shaping. It looks lived-in by lunch, which I like. It doesn’t hide my face; it gently opens it.
This look fits wavy to straight hair. Ask your stylist for a long, partable fringe that blends into the side layers. My tip: trim the fringe little by little at home if you’re nervous. A tiny round brush and blow-dry give it a subtle bend.
6. Piecey Layers for Curly Pixie Bobs That Avoid Bulk
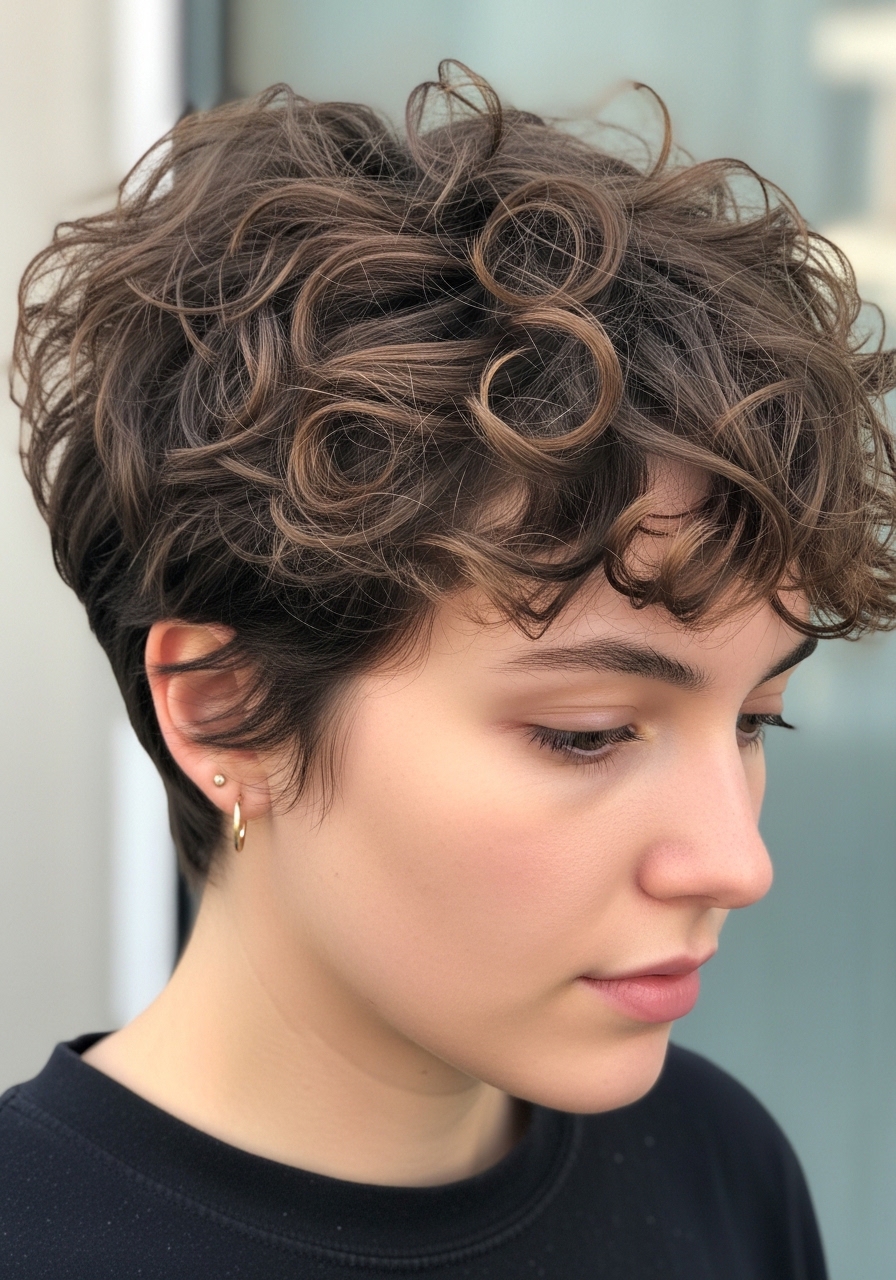
I wanted curl definition without the helmet look. My stylist cut piecey layers into the crown. For a while I over-applied gel and ended up crunchy. That was a styling mistake.
Once I backed off product, the layers let my curls breathe. The shape separates instead of puffing. It’s manageable after sleep and responds well to scrunching.
This works for tight to loose curls. Ask for staggered layers that remove weight, not length. I use a light leave-in and scrunch; then I diffuse until 80% dry. It keeps the piecey look soft and natural.
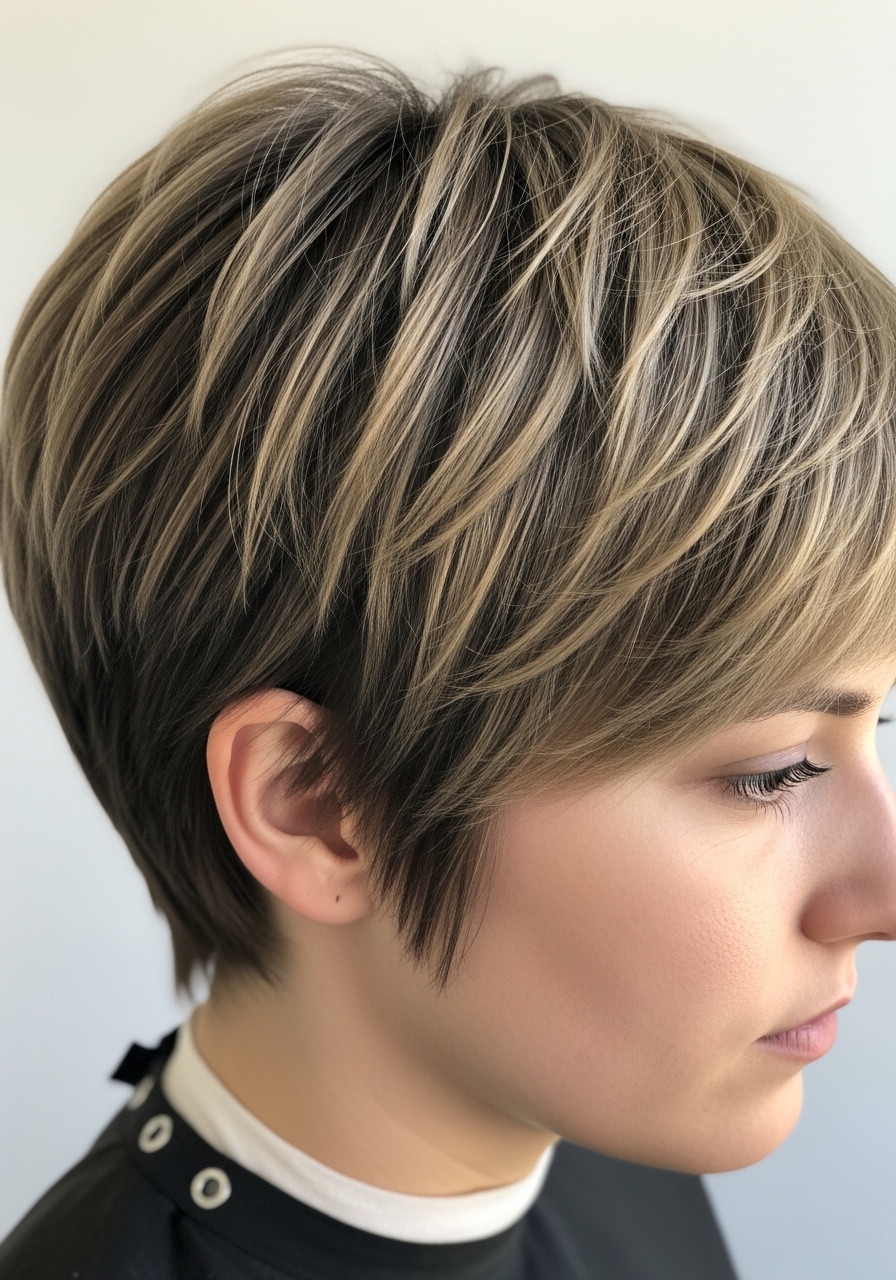
7. Textured Micro-Layers for a Modern, Lightweight Finish
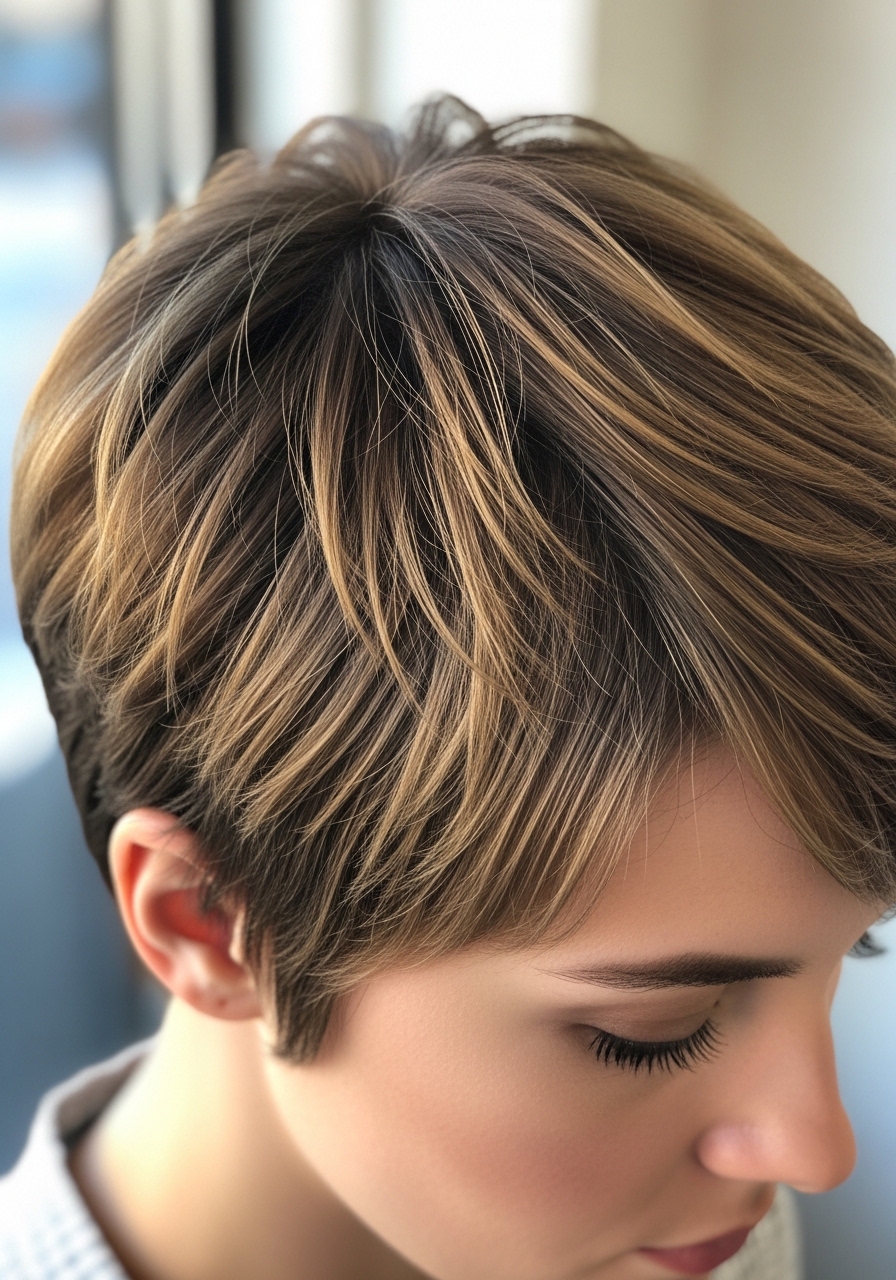
I tried micro-layers because I wanted airy texture. The cut is short but not severe. In photos it looked trendy. In the mirror it felt approachable.
Day-to-day it moves a lot. I can run my fingers through the crown and it bounces back. It’s low-maintenance on most mornings.
This is best on fine to medium hair that needs lift. Tell your stylist you want micro-layers graded for movement, not choppy slices. I use a light paste to separate pieces. It gives definition without weighing the hair down.
8. Undercut with Long Layered Top for Edge Without Effort
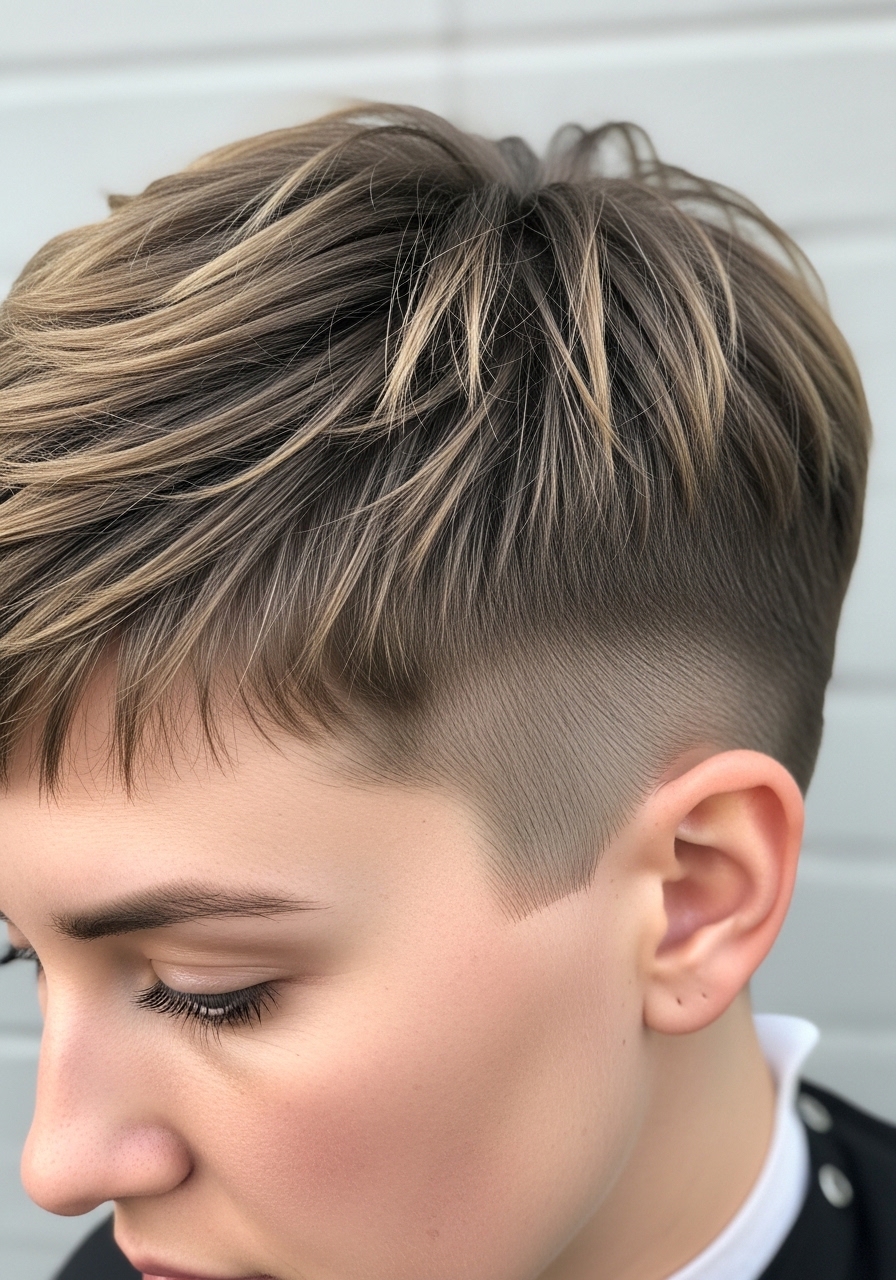
I went for a subtle undercut to remove bulk at the sides. At first the regrowth line annoyed me — I hadn’t planned the timing. That was on me.
As it grew, the layered top hid the undercut nicely. The contrast gives shape and keeps the look fresh. It’s a good way to have an edge while staying tidy.
This is ideal for thick hair or anyone who gets hot easily. Say “soft undercut” to your stylist and mention how long you want the top to be. I sweep the top across and lock it with a light mist for hold.
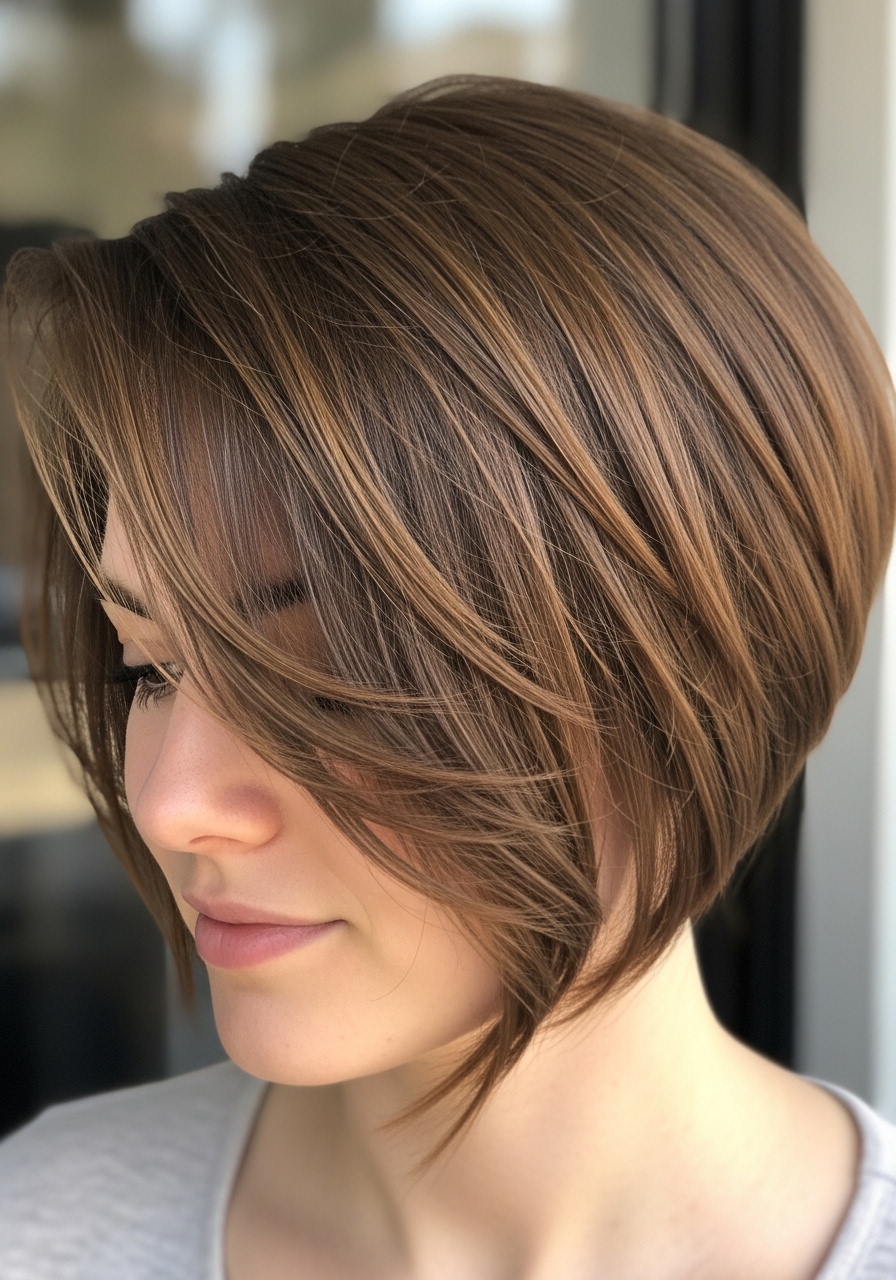
9. Blended Layers with a Soft Blunt Edge for Body and Shape
I needed shape but didn’t want a choppy look. My stylist blended layers into a soft blunt edge. In pictures it looked structured. In real life it still has movement.
The blunt edge gives weight at the ends and the layers add lift. It behaves well through a long day and keeps a clean outline as it grows out.
This suits straight or slightly wavy hair that needs body. Ask for blended layers that meet a soft blunt line. My tip: a quick flat-iron pass on the ends before heading out keeps that clean edge without stiffness.
10. Feathered Layers with a Wispy Finish for Airy Movement
I asked for feathered ends to avoid that chunky bob look. At first the wispy layers seemed uneven. I’d requested too much texture in one pass — rookie mistake.
After a few trims the feathering settled. The ends breathe and the cut moves softly. It looks undone but tidy, even after I nap on it.
This is great for fine to medium hair. Tell your stylist you want feathering that softens the ends, not bits chopped into the middle. I use a light cream on the ends to keep the wispy feel without frizz.
11. Asymmetrical Layers for a Bold Side-Swept Statement
I went asymmetrical when I wanted something different. The longer side hides my round cheeks. It’s dramatic in photos but casual in the city.
In daily life the weight on one side settles into a flattering sweep. I can tuck the long side behind one ear or pin it for a different vibe. It’s surprising how wearable it is.
This suits straight to wavy hair with medium thickness. Say “longer on one side, blended into shorter layers” to your stylist. I blow-dry the long side with a paddle brush for a soft sweep and use a small clip when I need it off my face.
12. Short Crown Layers with Longer Nape for a Soft Mullet-Inspired Pixie Bob
I tried a short crown with a longer nape for something playful. At first it read too mullet-y in the salon photo. I panicked and asked for more blending. That was my hesitation.
Once blended, it felt modern and relaxed. The crown gives lift and the nape softens the profile. It grows out into a flattering shape instead of an awkward block.
This is good for thick or wavy hair that needs structure. Ask for cropped layers on the crown with a slightly longer, textured nape that blends. I style with fingers and a bit of cream to keep it soft and wearable.