
I used to chisel away at my hair trying to force volume. I walked out of more than one salon with limp layers that looked thinner.
Then I learned to work with my fine, thin strands. Little changes in length and technique made the blunt lob actually wearable for me — and simple enough for rushed mornings.
25 Real Blunt Lob For Fine Thin Hair
These 25 blunt lob ideas are pulled from my own salon wins and mistakes. Each one is practical and focused on fine, thin hair. You’ll get exact things I asked for, how the cut behaved day-to-day, and one real tip to tell your stylist. There are 25 specific looks here.
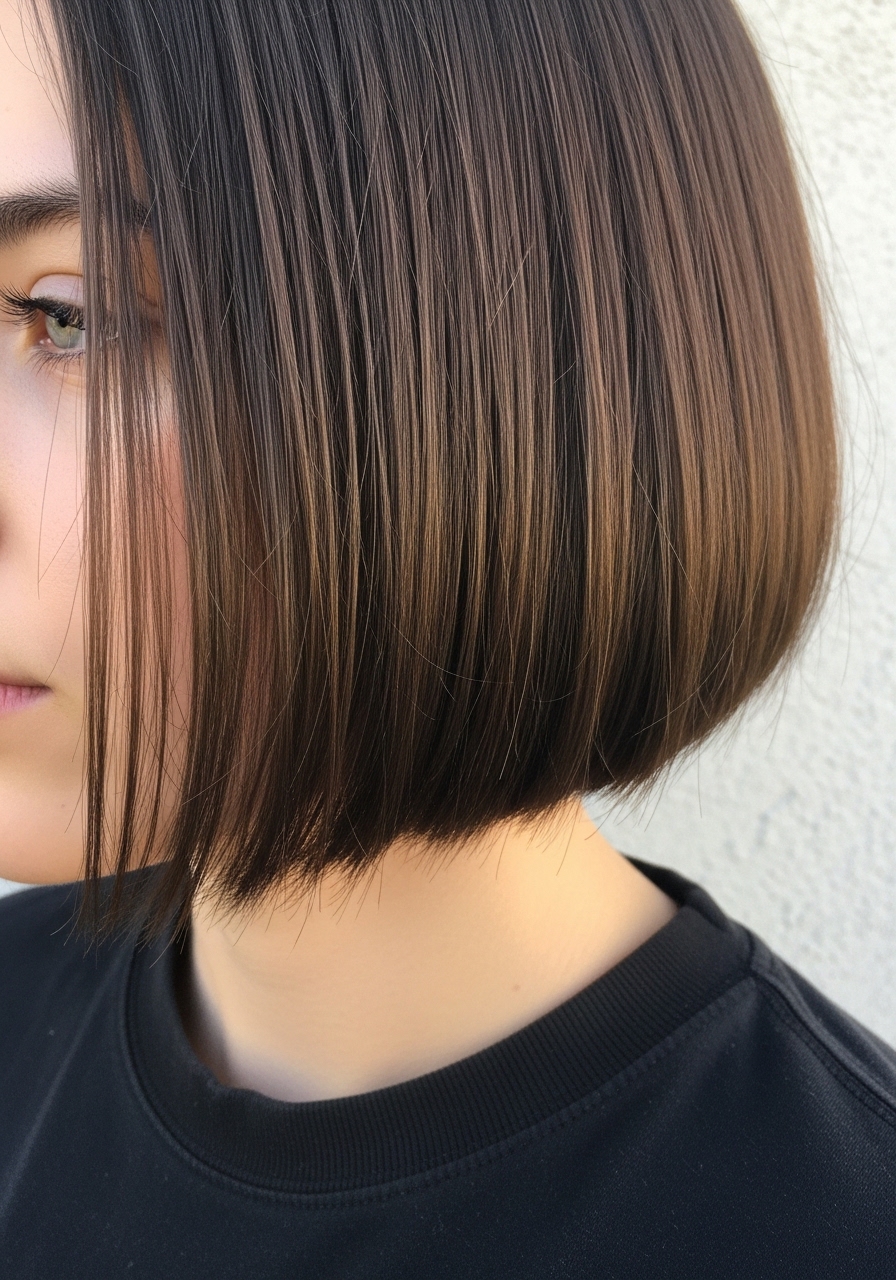
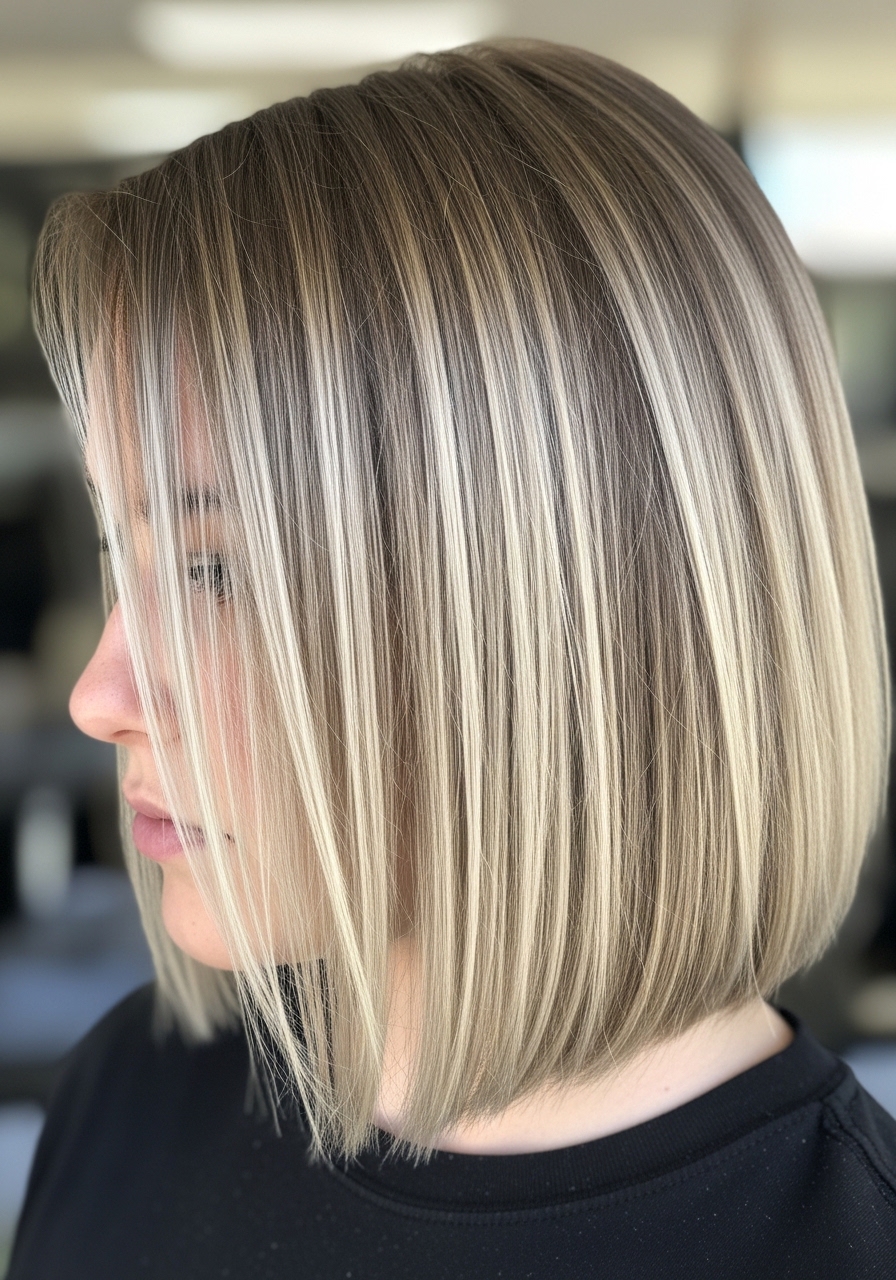
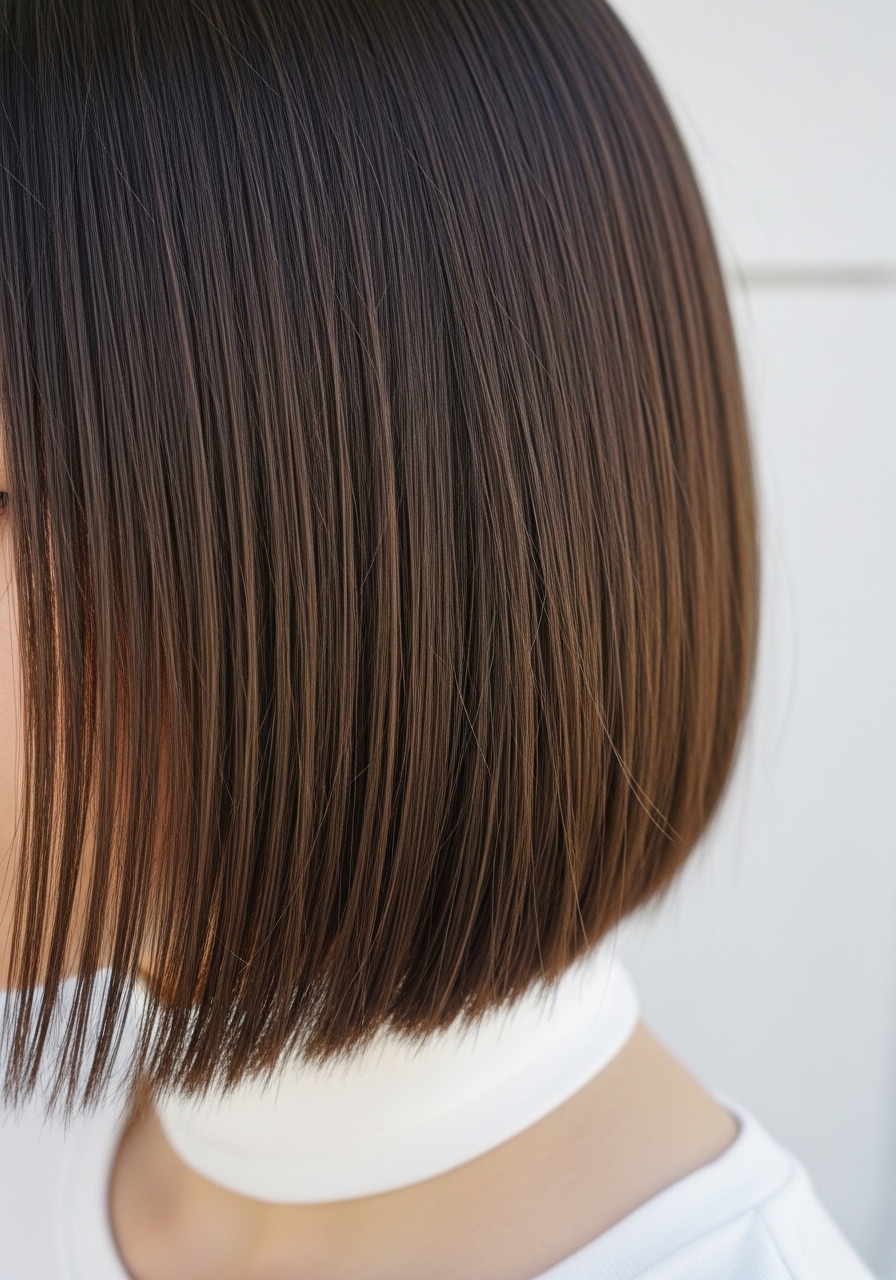
1. Blunt Lob with Soft Face-Framing Ends
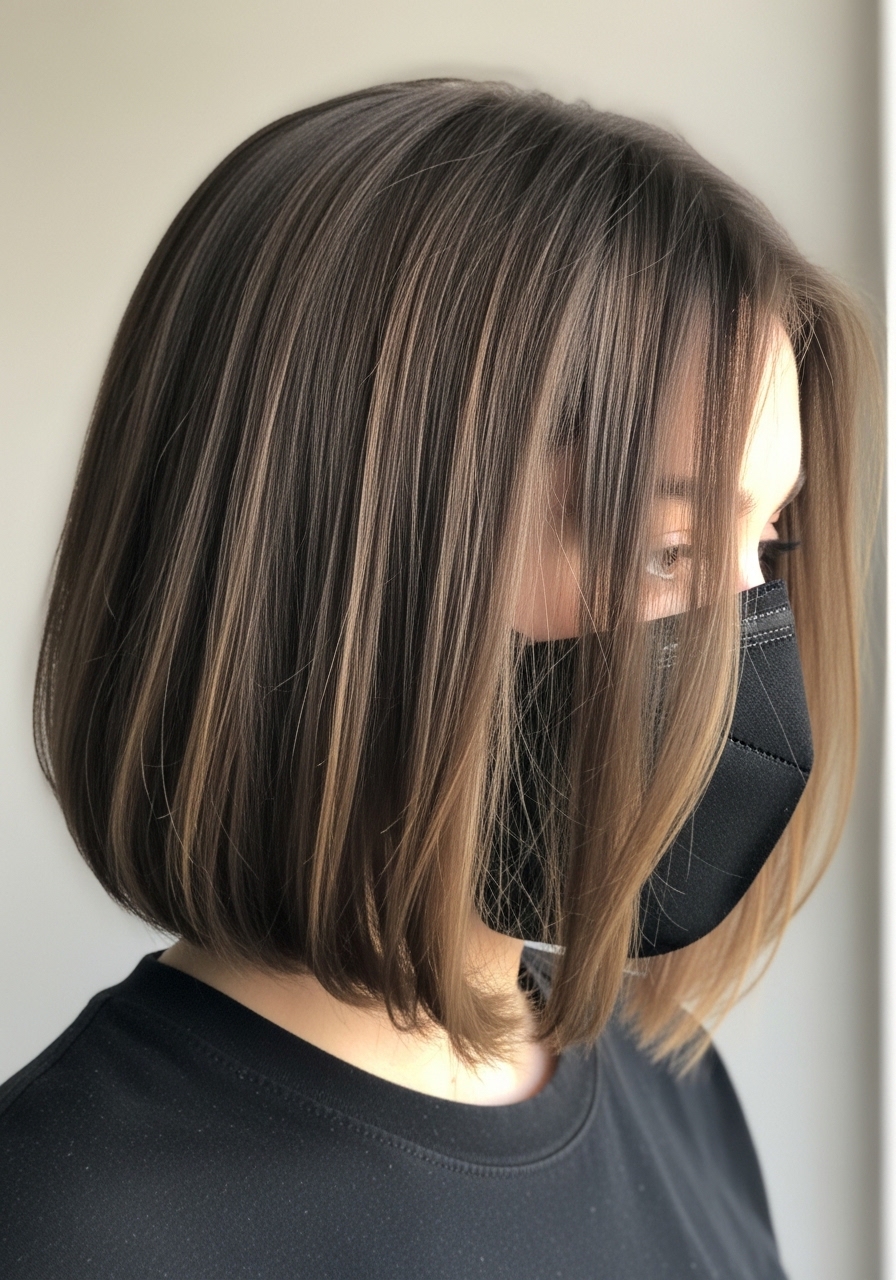
I asked my stylist for a blunt lob but with the ends slightly rounded toward my jaw. It keeps the straight edge but avoids the severe boxy look that flattened me before. The first week it looked polished; by day three it still had shape without heavy styling.
On my fine hair it creates an illusion of density at the perimeter. In humidity the inward bend softens rather than goes limp. My tip: ask for “blunt ends with a tiny amount of graduation at the front” and a single-point trim every 10-12 weeks.
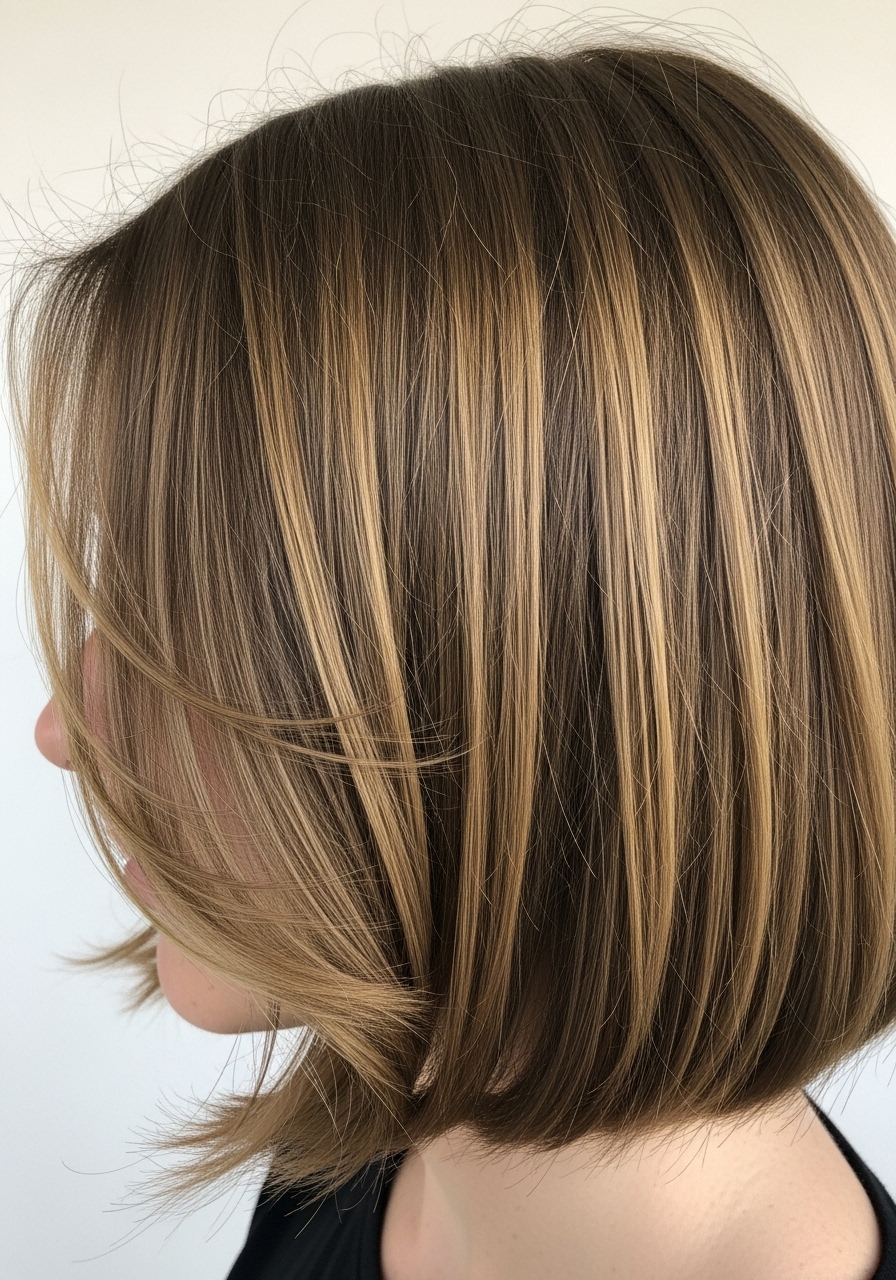
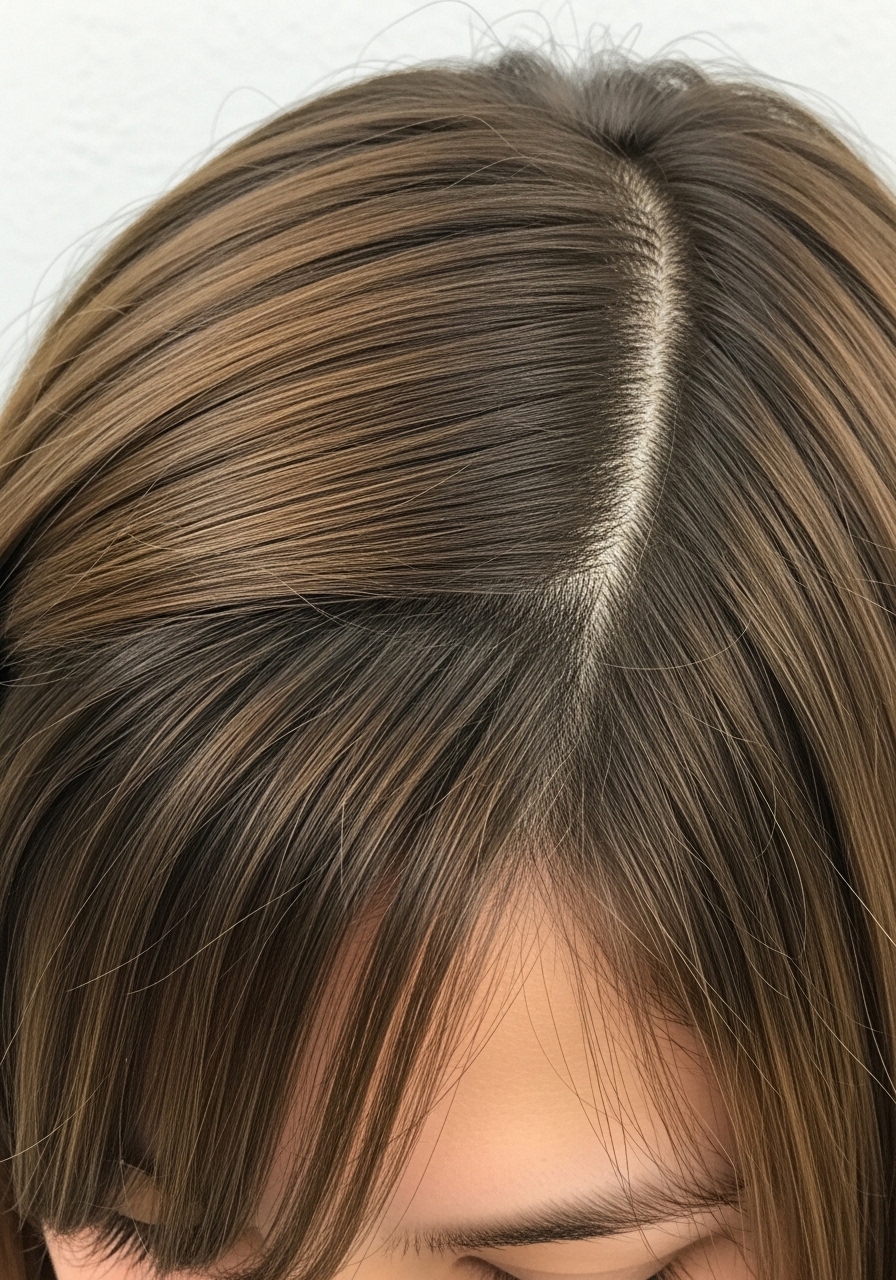
2. Center-Part Blunt Lob That Adds Root Movement
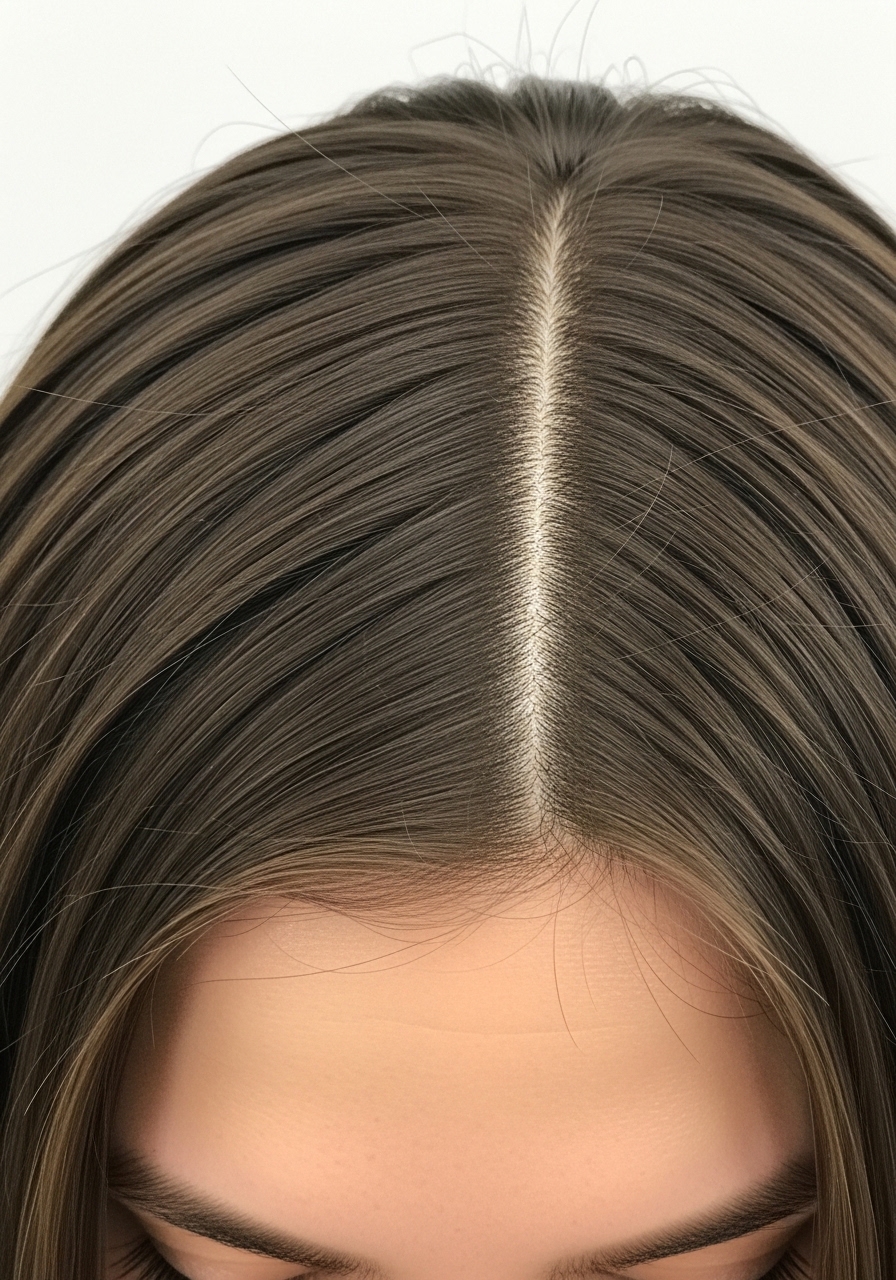
I switched to a center part and it changed everything. The blunt lob looked sharper and my hair showed more root movement instead of lying flat. The center part highlights symmetry, which fooled my eyes into seeing fuller sides.
It doesn’t stay perfectly centered on sweaty days, but a quick finger-tuck restores it. For my hair, a lightweight mousse at the roots before blow-drying gave lift without weight. I tell my stylist to keep the length just at collarbone so the part reads cleanly and the ends don’t droop.
3. Slightly Textured Blunt Lob for Soft Shape
I was nervous about any texture in a blunt cut. But my stylist used tiny point cuts only inside the ends — not layers — and it made the shape breathe. It removed the “helmet” look I’d gotten from too-strict blunt lines.
In real life it keeps a clean perimeter but moves when I turn my head. I once asked for too much texture and it thinned my ends, so be cautious. My tip: say “micro point thinning inside the ends only” and avoid visible layers.
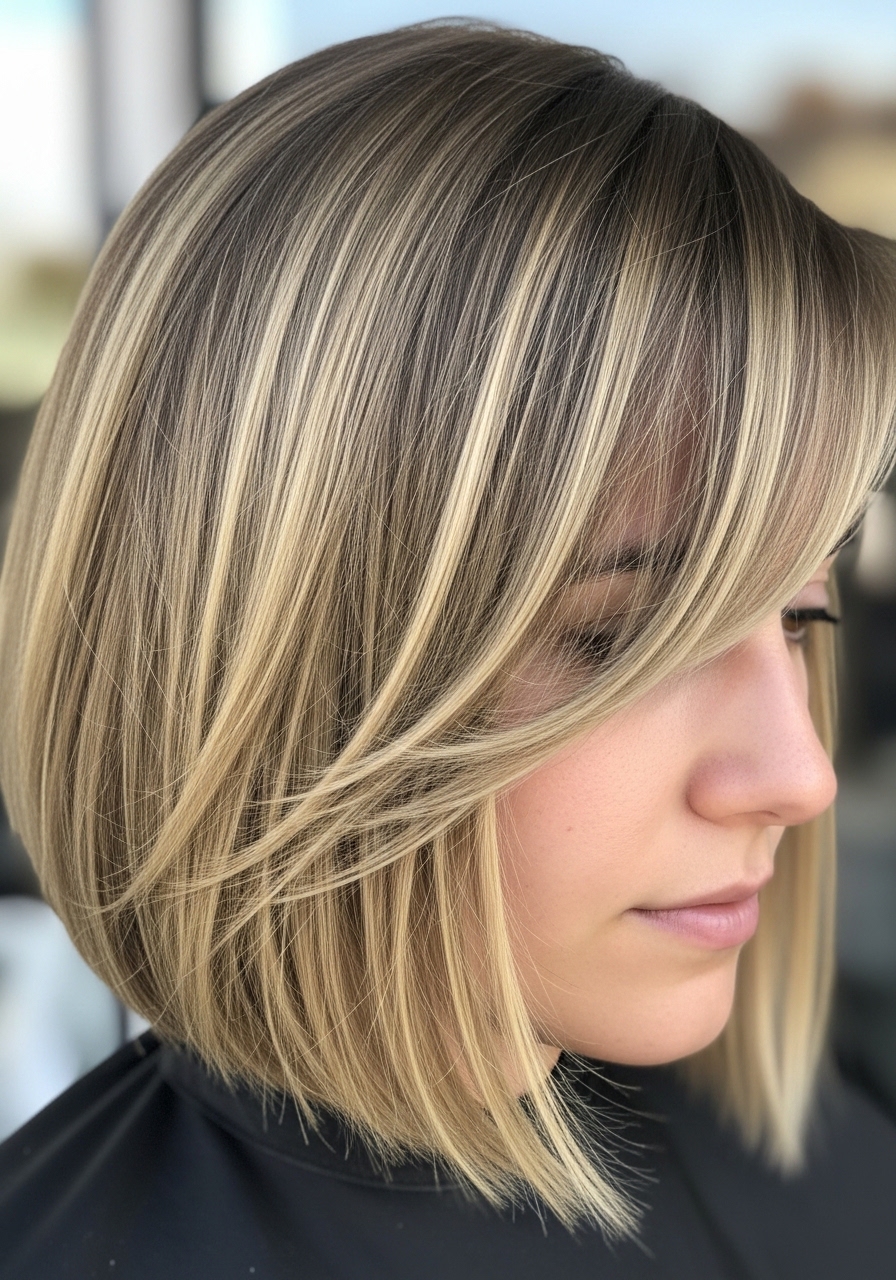
4. Blunt Lob with Curtain Bangs for Face Balance
I tacked on curtain bangs after a hair rut. They softened my forehead and made the blunt lob look intentional. The bangs grew out into a gentle frame and hid my thin part line without heaviness.
They do get oily faster than the lob, and I had to learn dry-shampoo timing. I tell my stylist to keep bangs long enough to sweep and to blend slightly at the ends. A little root lift spray in the morning keeps the bangs airy without flattening the lob.
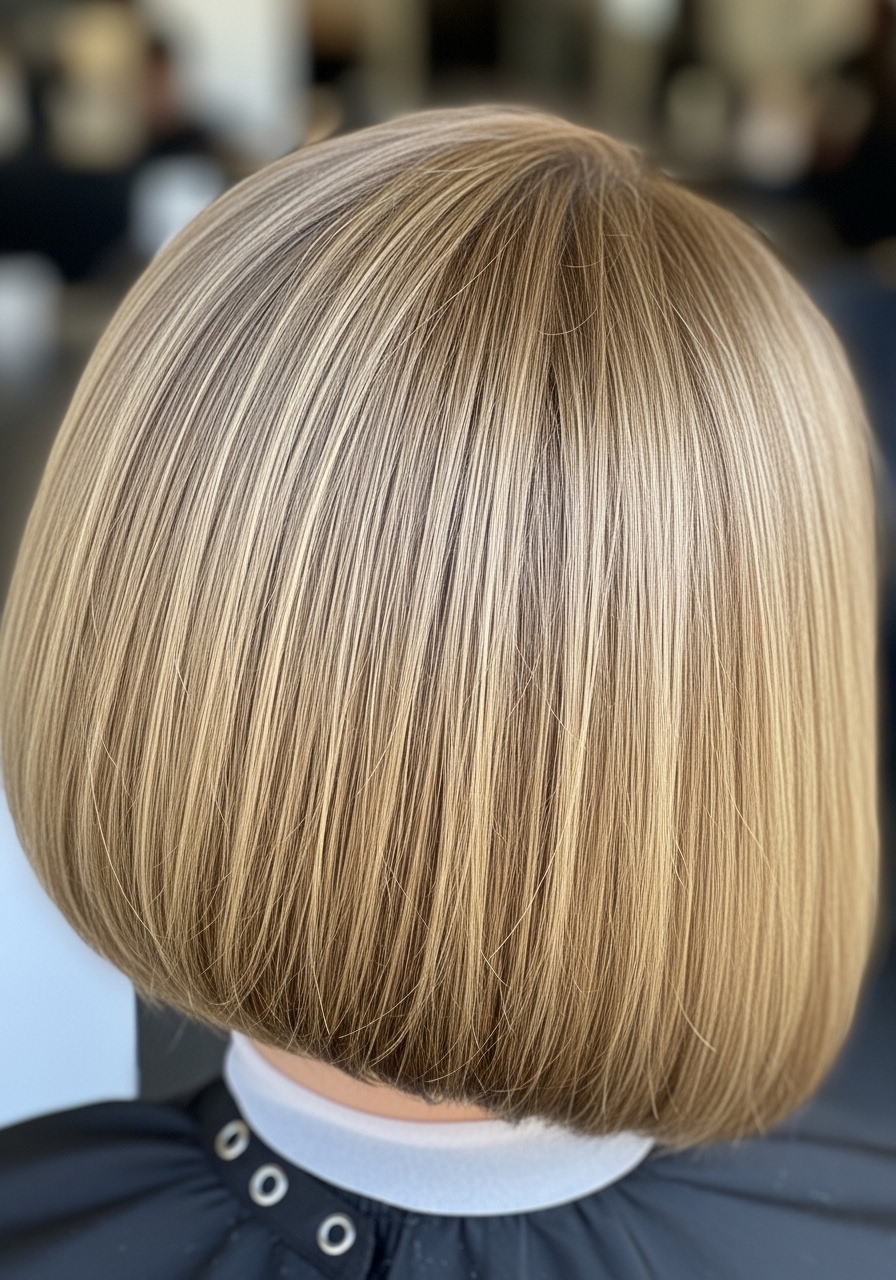
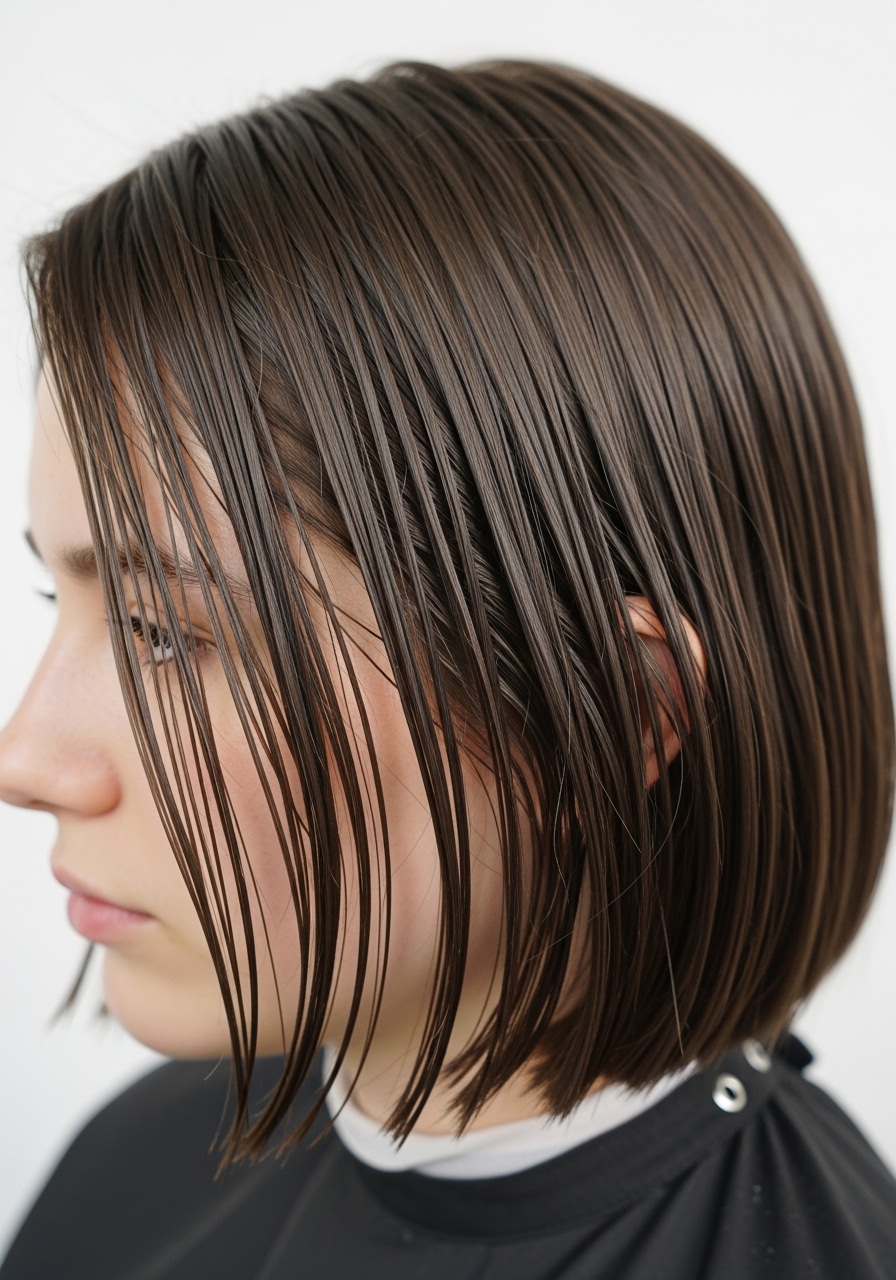
5. Chin-Length Blunt Lob That Boosts Perimeter Thickness
I went shorter to the chin and it suddenly read thicker. The blunt edge creates a clear mass, which was exactly what my thin hair needed. It felt bold at first, but it’s manageable and quick to style.
The trade-off: it shows cowlicks more, so I had to accept spot-fixing in the morning. I ask for a blunt cut that ends at the chin and for the stylist to point-cut only if needed. A small round brush while blow-drying tucks the ends inward and keeps the perimeter intact.
6. Blunt Lob with a Subtle A-Line for Shape
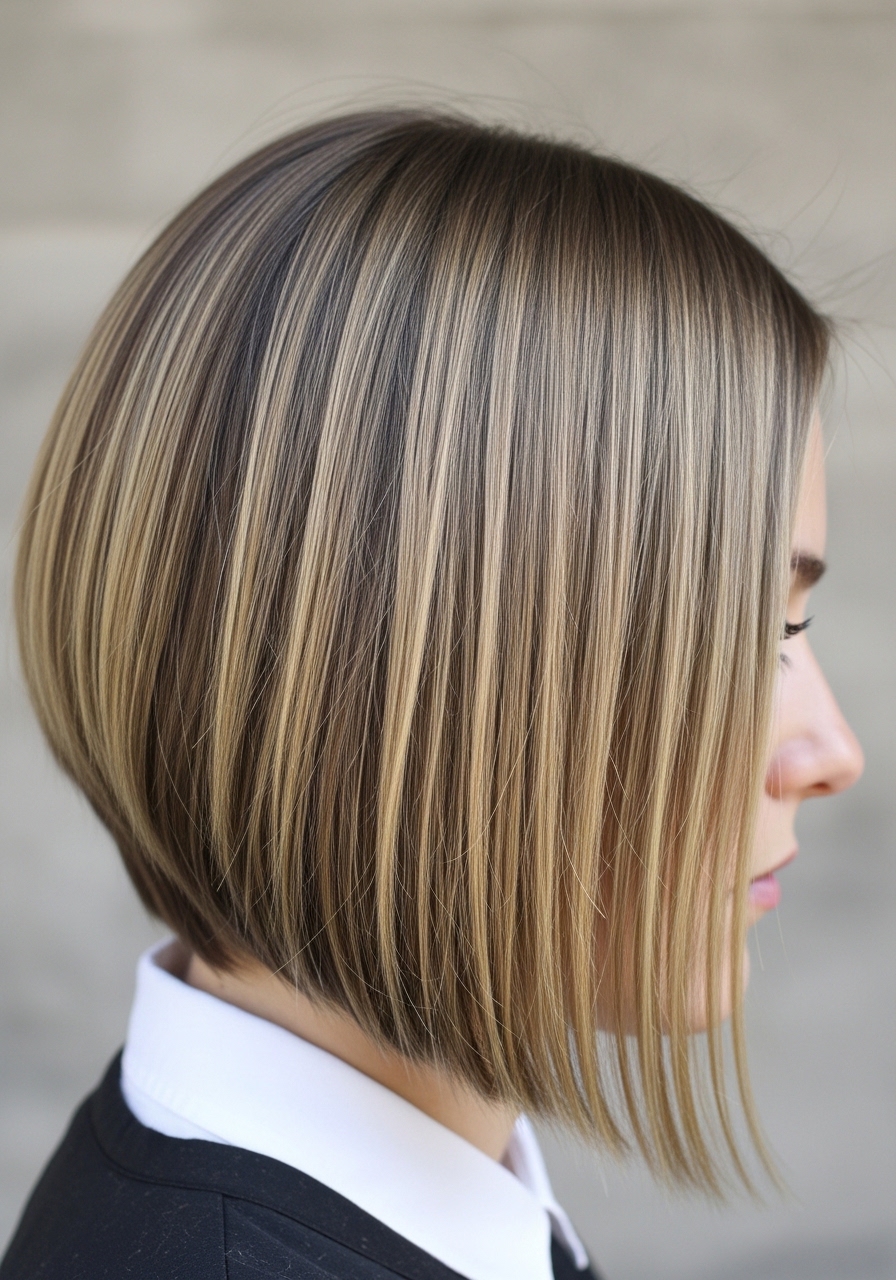
I tried a very mild A-line so the front read a touch longer than the back. It helped frame my collarbones and made the blunt edge feel modern, not heavy. On my thin hair the angle draws the eye forward and gives a sense of volume at the sides.
I once accepted a steep A-line and it exaggerated thinness at the back — lesson learned. Now I say “very subtle A-line, less than an inch difference.” I let the back be paper-thin only if I want air-dry texture; otherwise keep the back slightly fuller.
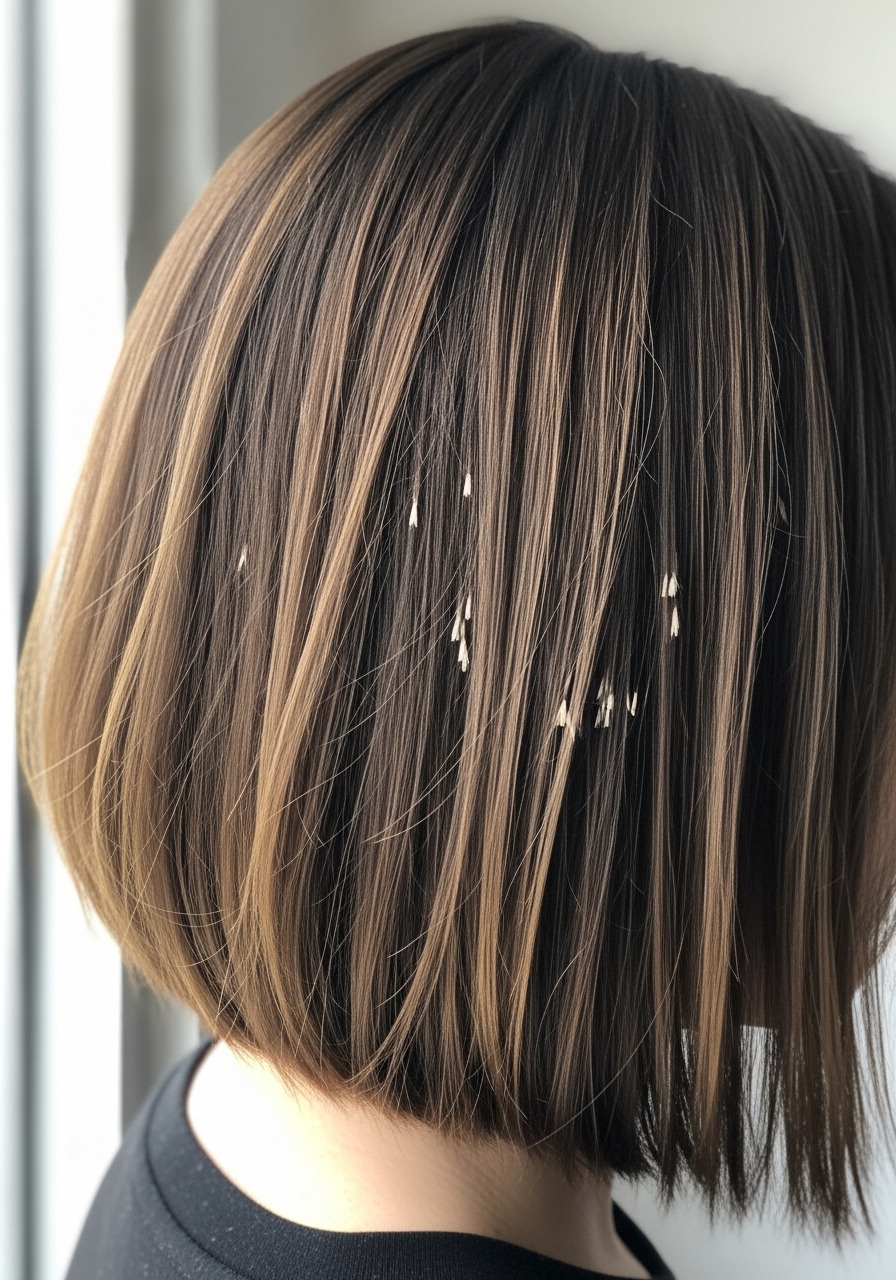
7. Blunt Lob with Invisible Layering for Movement
My stylist added internal, invisible layers — tiny, hidden cuts that don’t show but free up movement. The lob looks blunt on the outside but doesn’t sit heavy. It’s my favorite hack for fine hair that needs shape but not overt layers.
It took a few days to trust it; the first wash looked uneven until the layers settled. Tell your stylist “hidden internal graduation for movement only” and ask them to check it while hair is dry. A quick tousle with a low-heat flat brush keeps it lived-in.
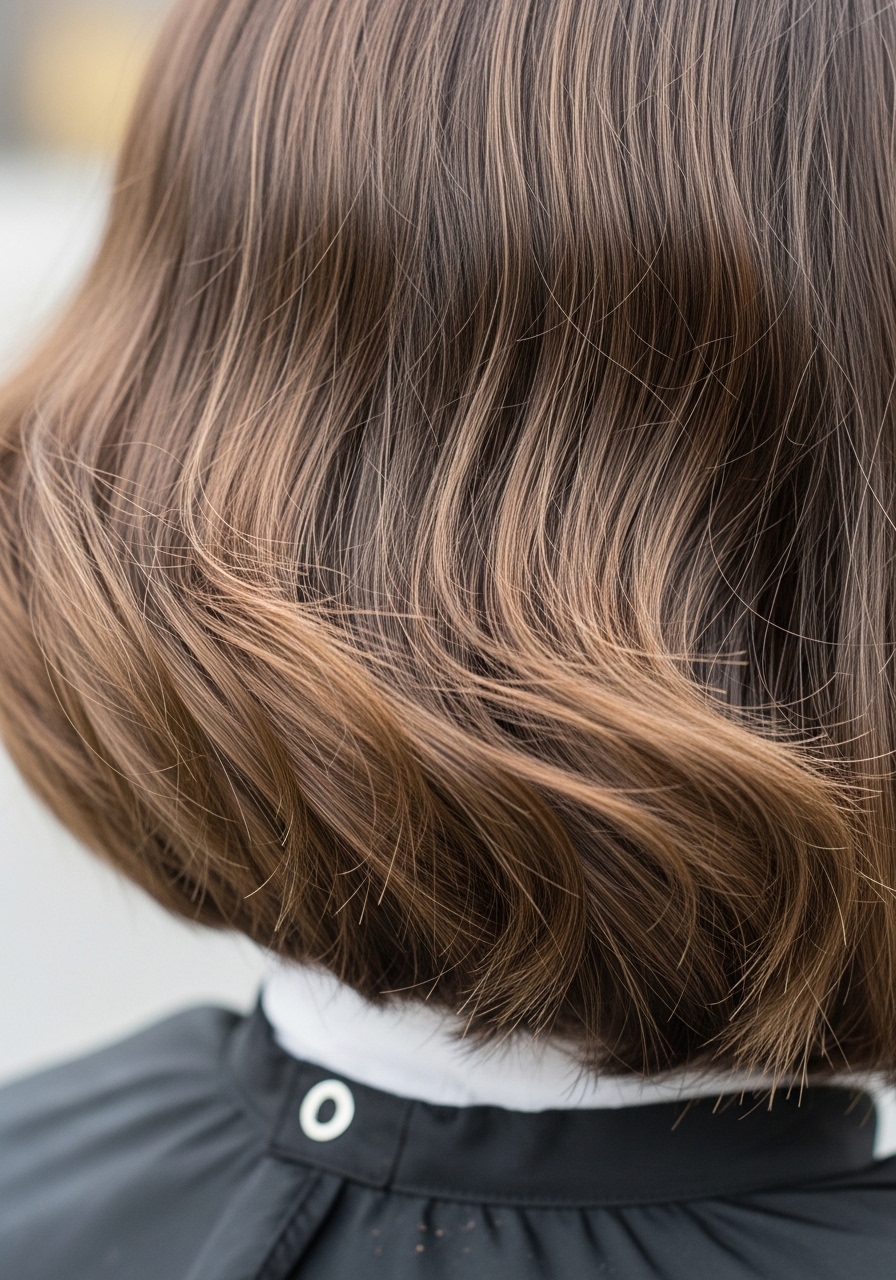
8. Lived-In Blunt Lob with Soft Waves
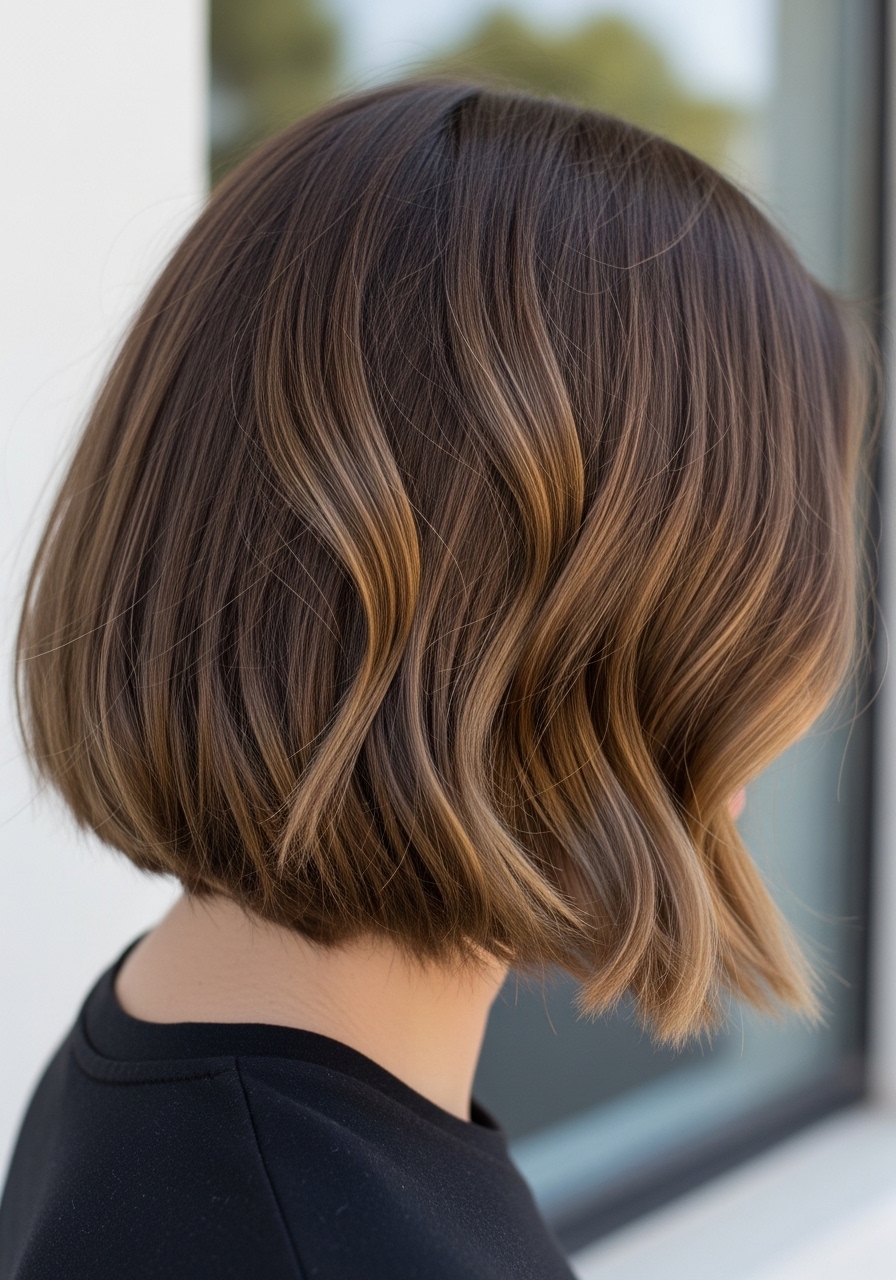
I favor a lived-in look, so I occasionally add soft waves to my blunt lob. The waves break up the straight edge and make my fine hair look fuller without product overload. It works as a casual evening look or just to change things.
I used a too-hot wand once and flattened my roots — rookie move. Use a 1-inch barrel at low heat and curl away from the face. Tell the stylist to leave the ends blunt so the waves create contrast and the perimeter reads substantial.
9. Blunt Lob with Root Smudge for Dimension
I added a root smudge to my blunt lob to avoid that stark regrowth line. The soft shadow makes the roots look fuller and less sparse. For fine thin hair, it gives immediate depth without heavy highlights that can thin ends.
The only mistake I made was going too warm once; cooler tones suit me better. Ask your colorist for a natural root smudge and low-contrast face-frame pieces. It’s low-maintenance and hides day-two oil better than an all-over single tone.
10. Blunt Lob with Slight Bend from Air-Dry
I stopped over-blow-drying and let my blunt lob air-dry until slightly damp, then used a paddle brush. The ends naturally bend in, giving a soft shape without heat. My hair kept more body through the day and felt healthier.
At first it looked sloppy because I air-dried fully without product. The fix was a pea-sized cream on damp ends. Tell the stylist you want a cut that behaves well when air-dried and to avoid internal thinning that collapses the bend.
11. Blunt Lob with Blown-Out Volume for Events
I get a round-brush blowout for events. The blunt lob suddenly looks glossy and fuller, with lifted roots and a soft inward curve. The volume lasts a day and photos look crisp, which I love.
It’s time-consuming at home, and I once used too much product and lost movement. Now I apply a light root foam, blow-dry with a medium round brush, and finish with a low-hold spray. Tell your stylist you want a lob that responds to a round-brush blowout so they don’t over-texture.
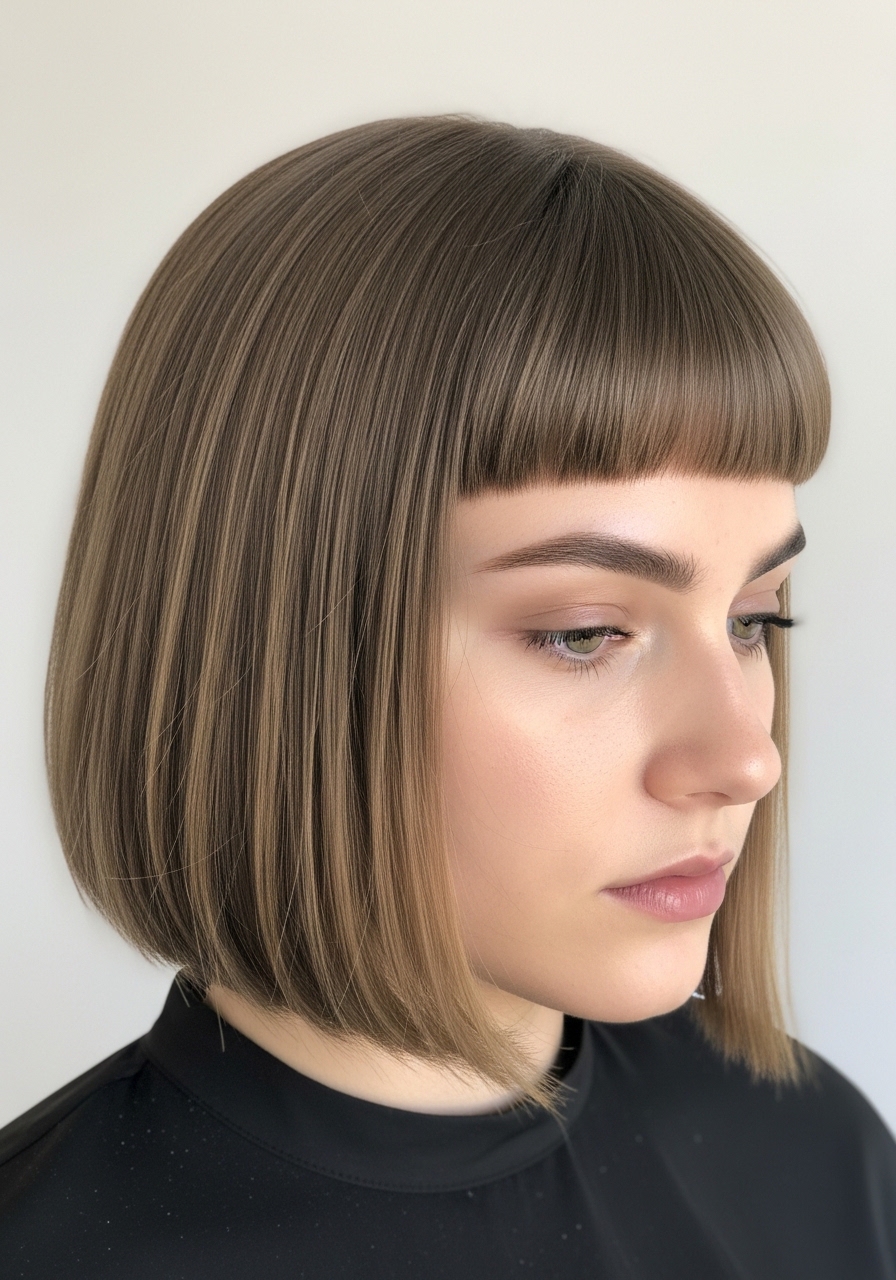
12. Textured Blunt Lob with Micro-Bangs
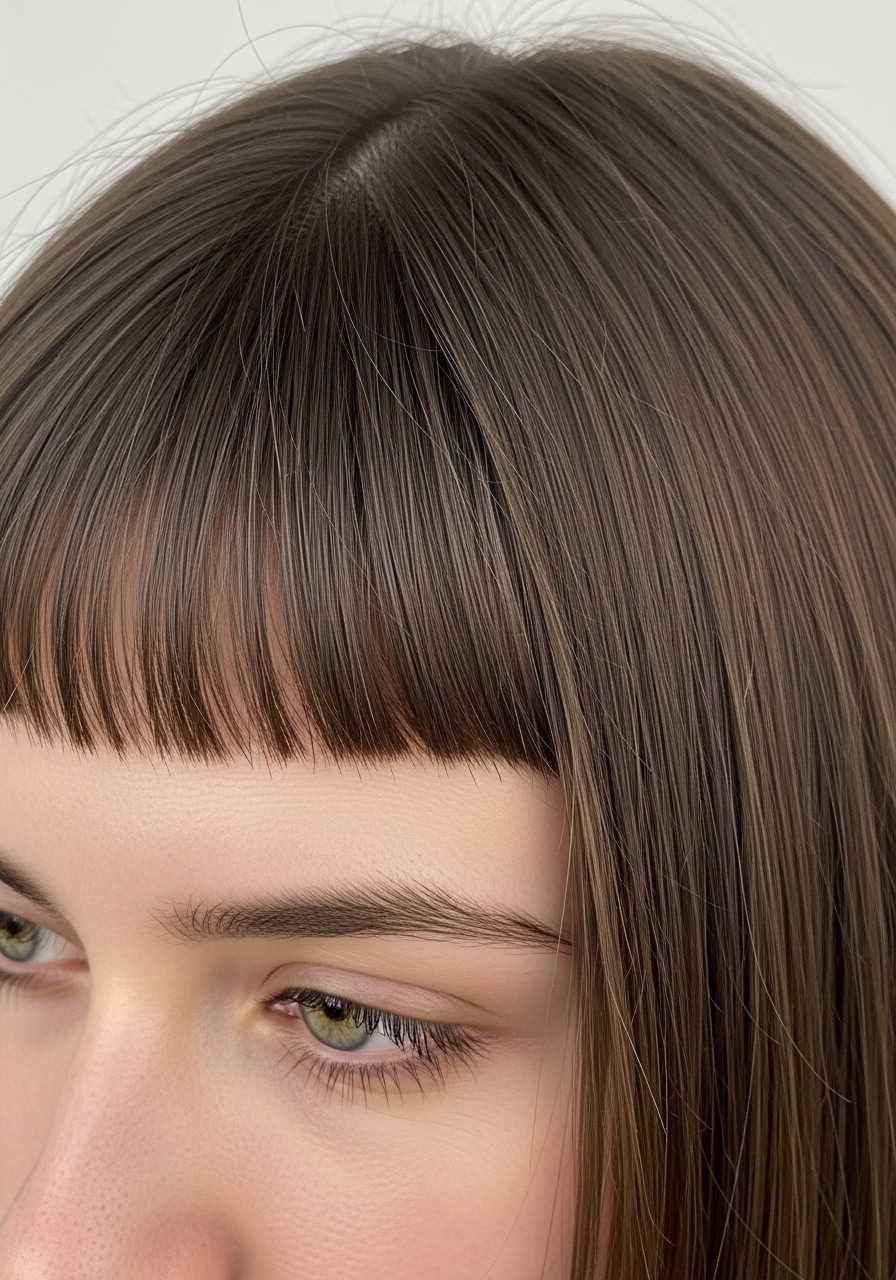
I tried micro-bangs with a blunt lob on a whim. It’s edgy but surprisingly wearable on fine hair because the short fringe makes the rest of the cut look thicker by contrast. The micro-bangs need trimming often, though.
I made the mistake of cutting them too short once and had a week of regret. I now say “soft micro-bang, enough length to brush to the side.” Use a texturizing wax to blend them gently into the lob without flattening the ends.
13. Collarbone-Length Blunt Lob for Neck Emphasis
I moved the blunt line down to my collarbone and it changed how my neck and shoulders read. The longer blunt edge sits heavier but gives a clear perimeter that tricked my eye into seeing denser hair.
It can feel heavy on humid days and pull forward when I sit. I learned to ask for a tiny internal weight removal so it doesn’t drag. Tell your stylist “collarbone blunt, remove a touch of bulk inside, keep outside edges full.”
14. Blunt Lob with Slight Under-Cut at Nape

I let my stylist do a discreet under-cut at the nape to remove weight without affecting the blunt perimeter. It keeps the lob from looking flat at the crown and gives me a tiny lift when I shake my head.
I regretted one under-cut that was too deep and showed through my top layer. Now I specify “shallow under-cut only to remove weight.” A quick tip: blow-dry the crown toward the face to reveal the lift the under-cut creates.
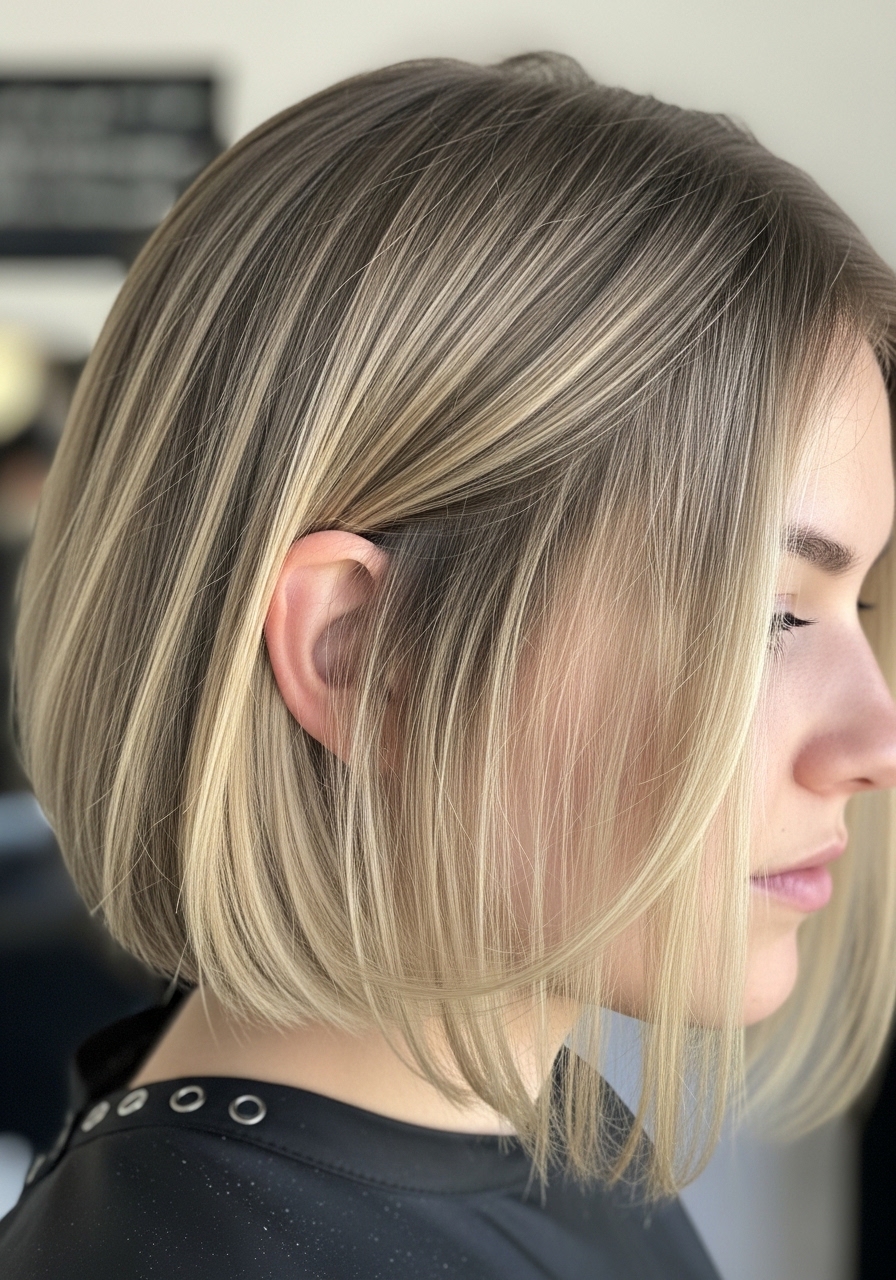
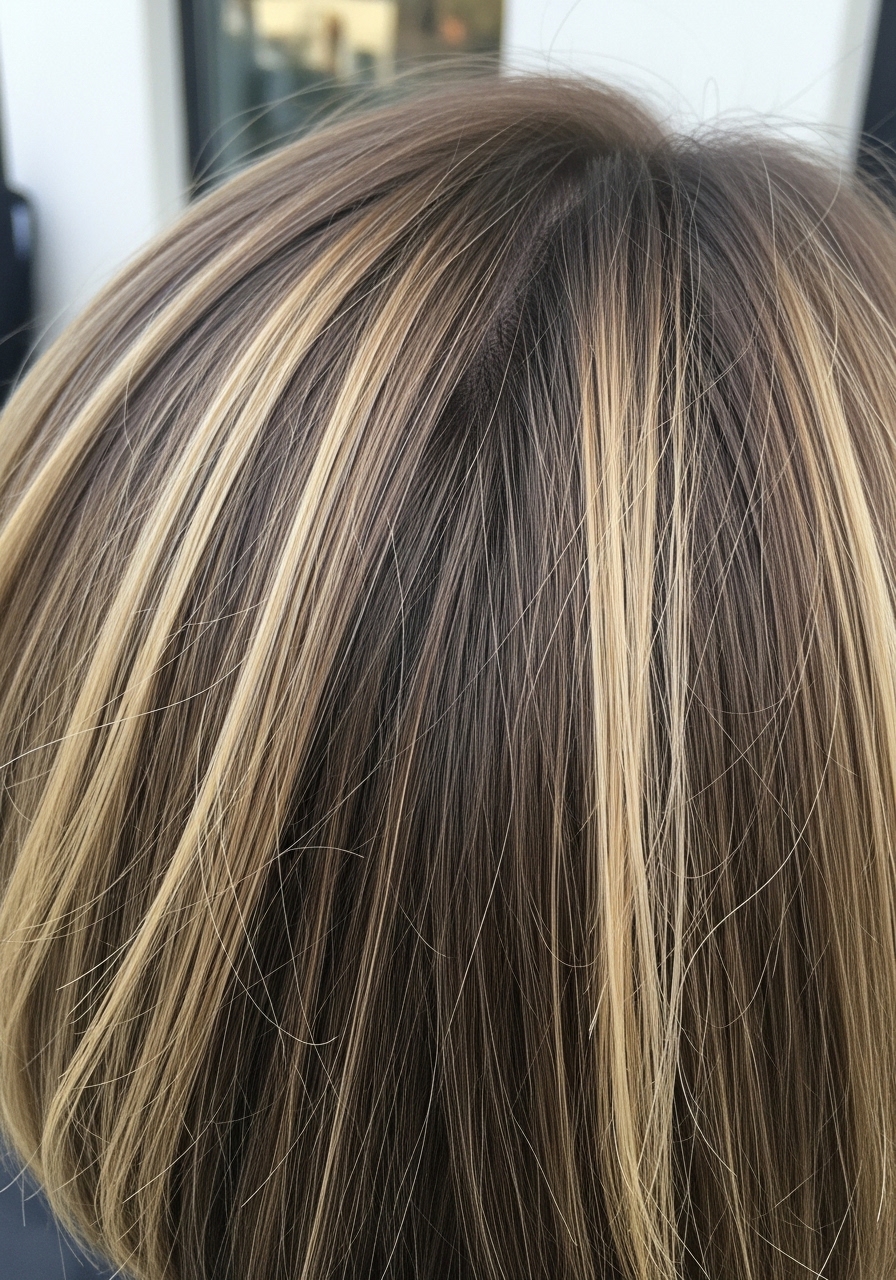
15. Blunt Lob with Subtle Face-Frame Highlights

I added soft, cool face-frame highlights to brighten my face without thinning my ends. On fine hair, small face-brightening pieces make the blunt edge pop without needing full-on color that can lighten and damage ends.
My mistake was too wide a foil section initially; it looked stripy. Now I request thin babylight pieces and ask colorist to feather them into the roots. This adds dimension that reads like fuller hair and keeps maintenance low.
16. Blunt Lob with Long Side-Swept Fringe
I went for a long side-swept fringe to break the blunt line and add softness. It tucks behind one ear easily and gives the lob an effortless asymmetry. For me, it masks a receding hairline and looks deliberate.
One time I let it grow too heavy at the temple and it weighed the fringe down. I now ask my stylist to keep the sweep light and point-cut the ends so it moves. A quick finger sweep after blow-dry is all it needs.
17. Blunt Lob with Soft Razor Finish at Ends
I allowed a very gentle razor finish at the extreme tips to remove bluntness without layering. It softened the silhouette and stopped the cut from looking too blocky on my fine hair.
I once had too much razor work and lost density fast. Now I say “soften only the very tips” and watch the stylist work. This keeps the blunt look up front but lets the ends settle naturally overnight without stiffness.
18. Blunt Lob with Slightly Tousled Bedhead

I embraced a little bedhead texture on my blunt lob and it’s my go-to lazy day look. A sea-salt spray and finger-scrunch give fine strands grit so the perimeter reads thicker. It looks casual and I don’t feel guilty skipping a full blow-dry.
I did over-salt once and made it crunchy. Now I mist lightly and shake it out. Tell your stylist you want a cut that works with texture spray so they don’t razor away the weight you need for the blunt edge.
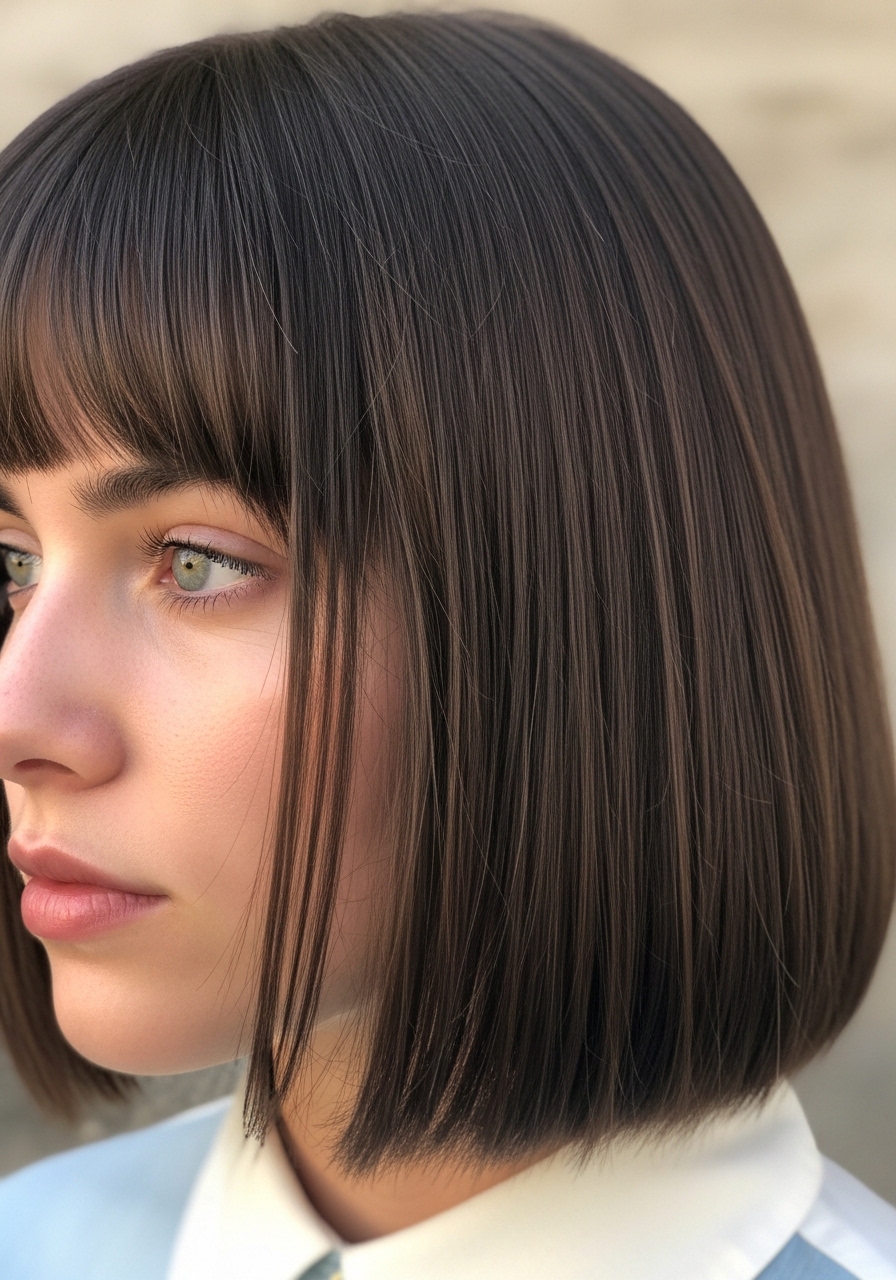
19. Blunt Lob with Soft Blunt Fringe for Balance
I tried a soft blunt fringe with my lob and it balances a round face nicely. The fringe reads dense and makes the rest look fuller. It’s surprisingly low-maintenance if kept slightly longer than eyebrow length.
I learned the hard way that short serrated bangs made my hair look thinner. My instruction now: “soft, slightly wispy blunt fringe, long enough to sweep.” Dry-shampoo and a quick round-brush blast keep the fringe from laying flat.
20. Sleek Blunt Lob with Heat-Protect Styling

For a polished look I straighten my blunt lob sleek with a flat iron. On fine hair this makes the edge read sharp and weighty. I always use heat protectant and low heat settings to avoid frying my thin strands.
My mistake was too-high heat once and my ends lost bounce. Now I set the iron to a moderate temp and run a paddle brush through while heating. Tell your stylist to blunt the ends so this sleek finish looks intentional rather than over-flat.
21. Blunt Lob with Slight Off-Center Part for Volume
I shifted to an off-center part to fake volume. The blunt lob reads fuller where hair crosses the midline. For me this is an easy morning trick — no product, just repositioning.
I once trained it the wrong way and it looked greasy. I eased into the new part over a few days, lifting roots with fingers. Tell your stylist to cut a balanced lob so you can switch parting without awkward gaps.
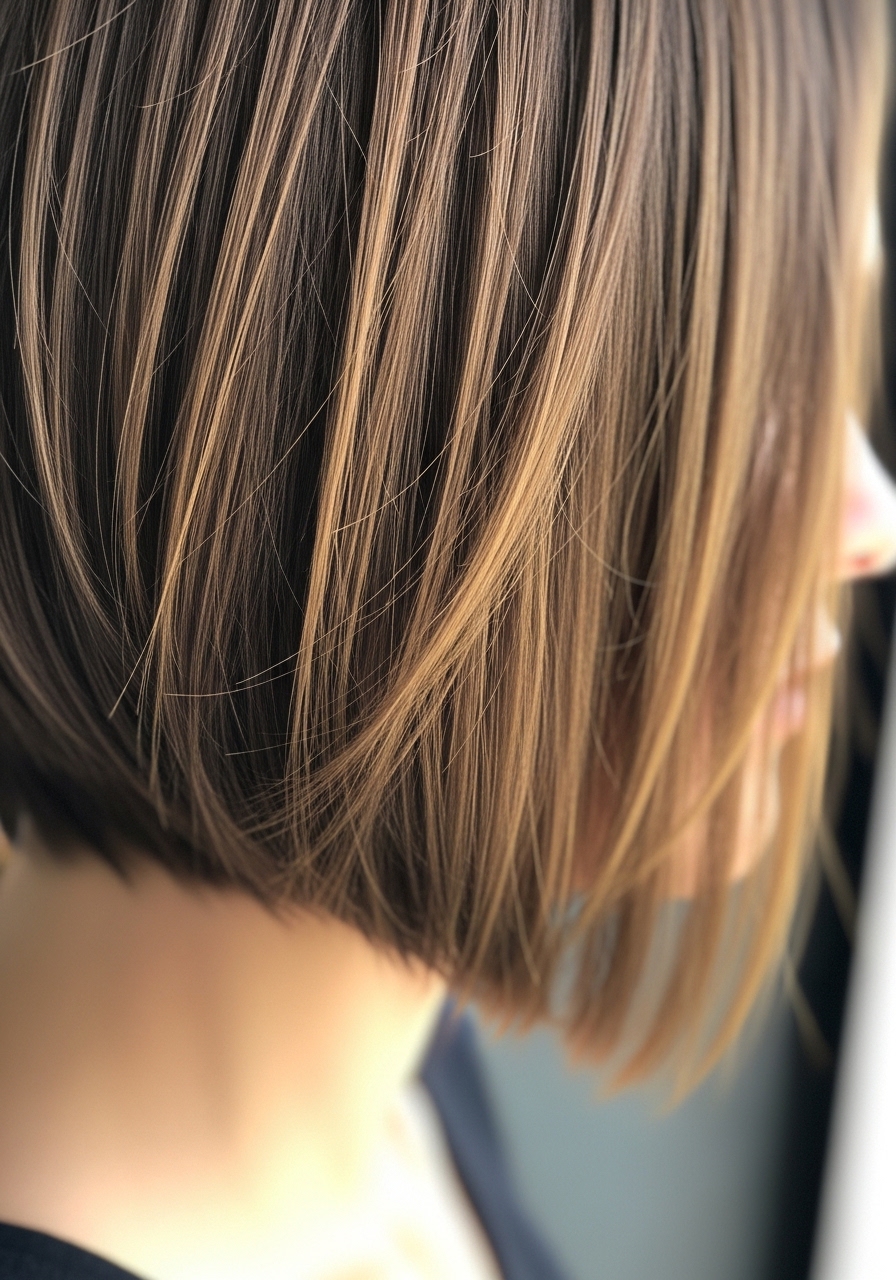
22. Blunt Lob with Low-Maintenance Color Blocking

I experimented with low-contrast color blocking at the ends to simulate density. The subtle darker roots and slightly lighter tips added depth without heavy upkeep. It hid fine stranding and made the blunt edge pop.
I made the error of going too high-contrast once; it emphasized thinness. Now I ask for soft transitions and tell my colorist the cut is blunt so they shouldn’t overlighten the ends. It’s easy to refresh twice a year.
23. Blunt Lob with Wet-Look Styling for Shine
I sometimes do a wet-look finish for nights out. The blunt lob looks very modern and dense with a glossy gel slick. For fine hair, it creates a fake thickness because the perimeter stays together.
It can feel sticky and flake if I overapply. My trick: use a small pea of hold gel and smooth with fingertips. Tell the stylist to cut the ends blunt so this slicked style keeps a clean line without fuzz.
24. Blunt Lob with Slightly Curled Under Ends
I love the very classic look of ends curled gently under. It gives the blunt lob a polished shape and keeps hair from feathering. My fine strands keep the curl all day if I prep with a light cream before drying.
I used too much product once and lost the inward bounce. Now I use a small amount and a medium round brush. Ask your stylist to keep the outside perimeter blunt so that curl reads like deliberate structure.
25. Blunt Lob with Invisible Layers and Natural Roots
I finished with my favorite — a blunt lob with invisible interior layers and my natural root texture left alone. It looks full at the edges but moves where needed. It handles humidity and day-two hair better than pure blunt cuts I tried before.
One mistake I made was asking for too much interior thinning; it thinned the edge. Now I request “internal shaping only” and no visible layers. A light texture spray at roots and a quick shake in the morning keeps the shape soft and wearable.