I used to think bright color meant loud upkeep. I ruined a faded teal once by over-bleaching and learned the hard way.
Now I like subtlety. Slim turquoise balayage lets color peek out without shouting. It’s softer on my roots and my life.
25 Slim Turquoise Balayage Hair Color
These 25 slim turquoise balayage ideas are the exact looks I tried and lived with. I counted them one-by-one so you get precise options. Expect salon phrasing, real wear notes, and how to ask your stylist for each look.
1. Thin Turquoise Babylights Around the Face
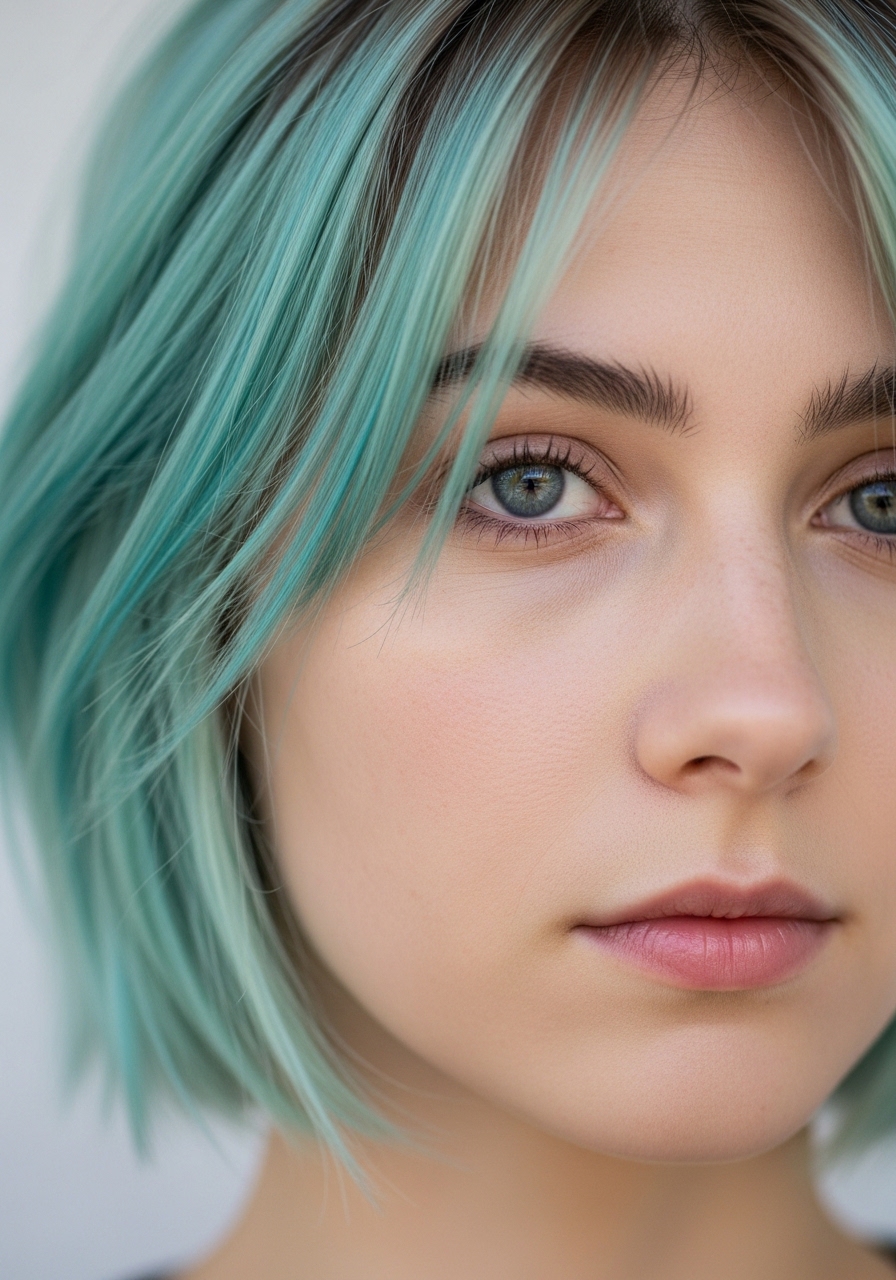
I asked my stylist for ultra-slim babylights just at my hairline. In photos it looked like a mint halo. In real life it reads soft and playful, not neon.
On fine hair this gives movement and brightness without thin hair looking sparse. It faded faster than I expected the first month. I should’ve asked for a demi-permanent mix.
Tell your stylist “1/16–1/8 inch slices around the face, feathered ends.” My tip: bring a clear reference and ask for a glaze at the end to seal tone.
2. Subtle Turquoise Money Piece for a Low-Key Pop

I finally tried a slim turquoise money piece and loved the drama without full head color. In photos it felt edgy. In life it’s a fun surprise when I part my hair.
Works best if you part your hair the same way every day. On thick hair it stays bold. On thin hair it disperses quickly.
Ask for a narrow, curtain-slice painted under the top layer. My mistake once: my stylist made it too wide. I said, “slim, painted feathered edges only,” and that fixed it.
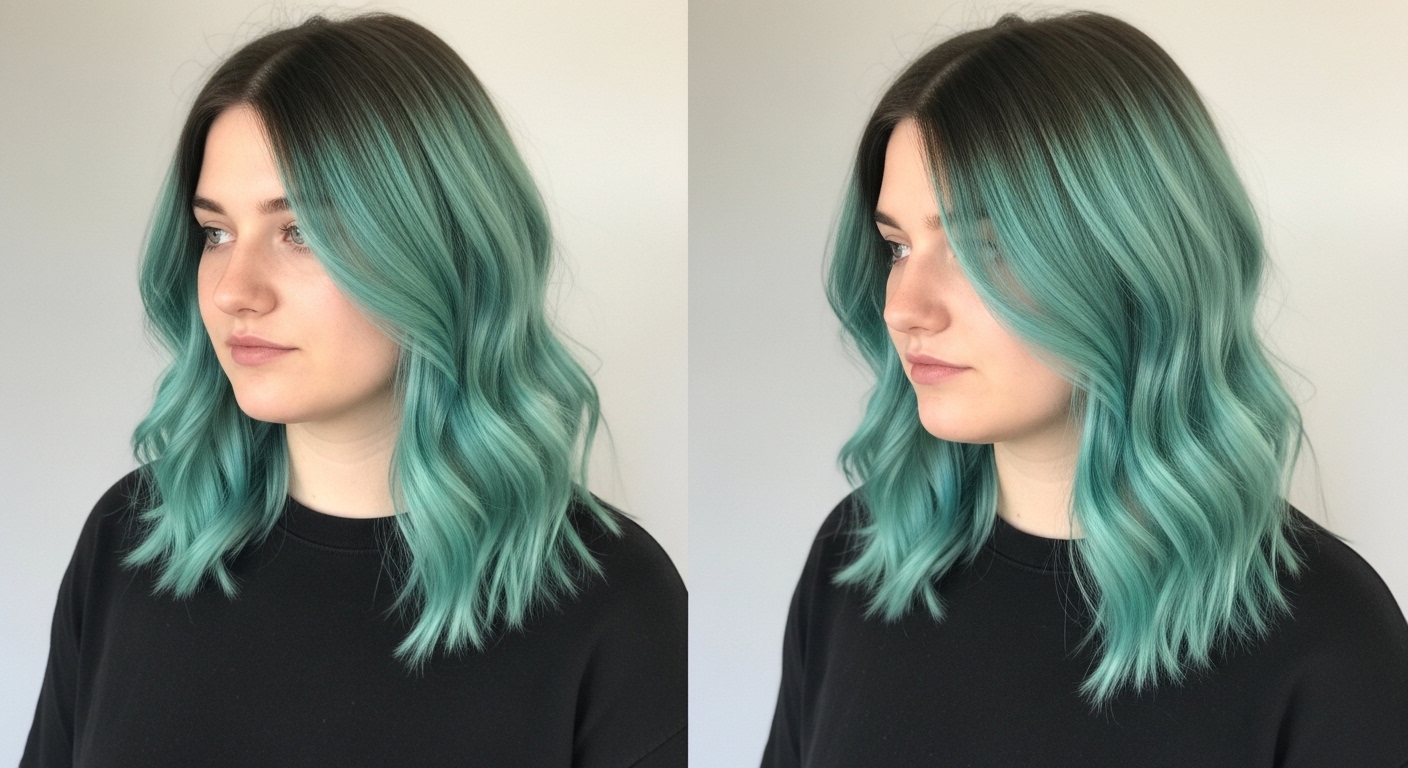
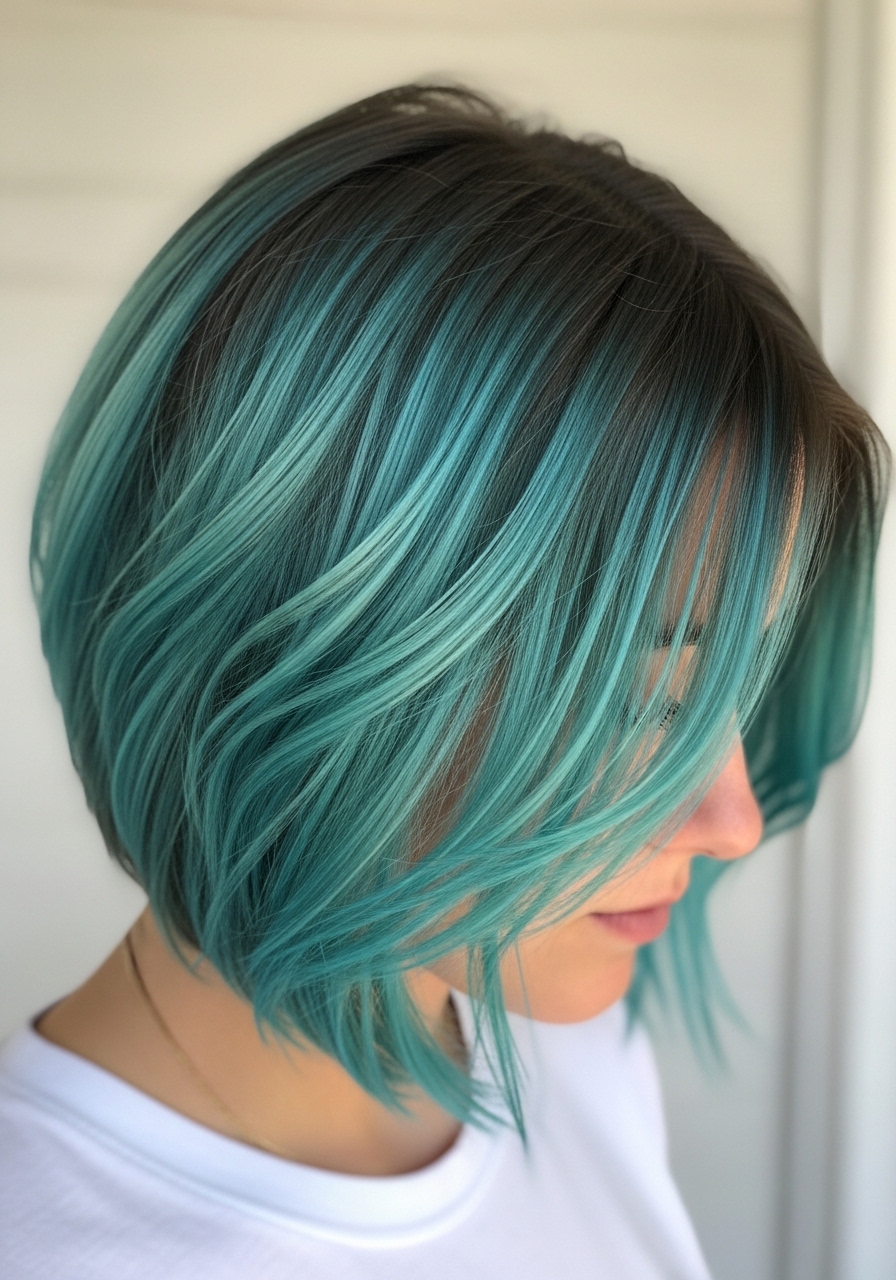
3. Teal Face-Framing Balayage on a Blunt Lob
I wanted turquoise without full commitment, so I asked for thin turquoise frames on my blunt lob. Photos looked graphic. In real life it softened my jawline and felt modern.
This is great on straight or slightly wavy lobs. My hair type kept the paint visible without lots of styling. It faded to seafoam pretty evenly.
Ask your stylist for “slim, 1/8-inch strokes starting at cheekbone level.” I learned to request a gloss so the turquoise settles and won’t wash out unevenly.
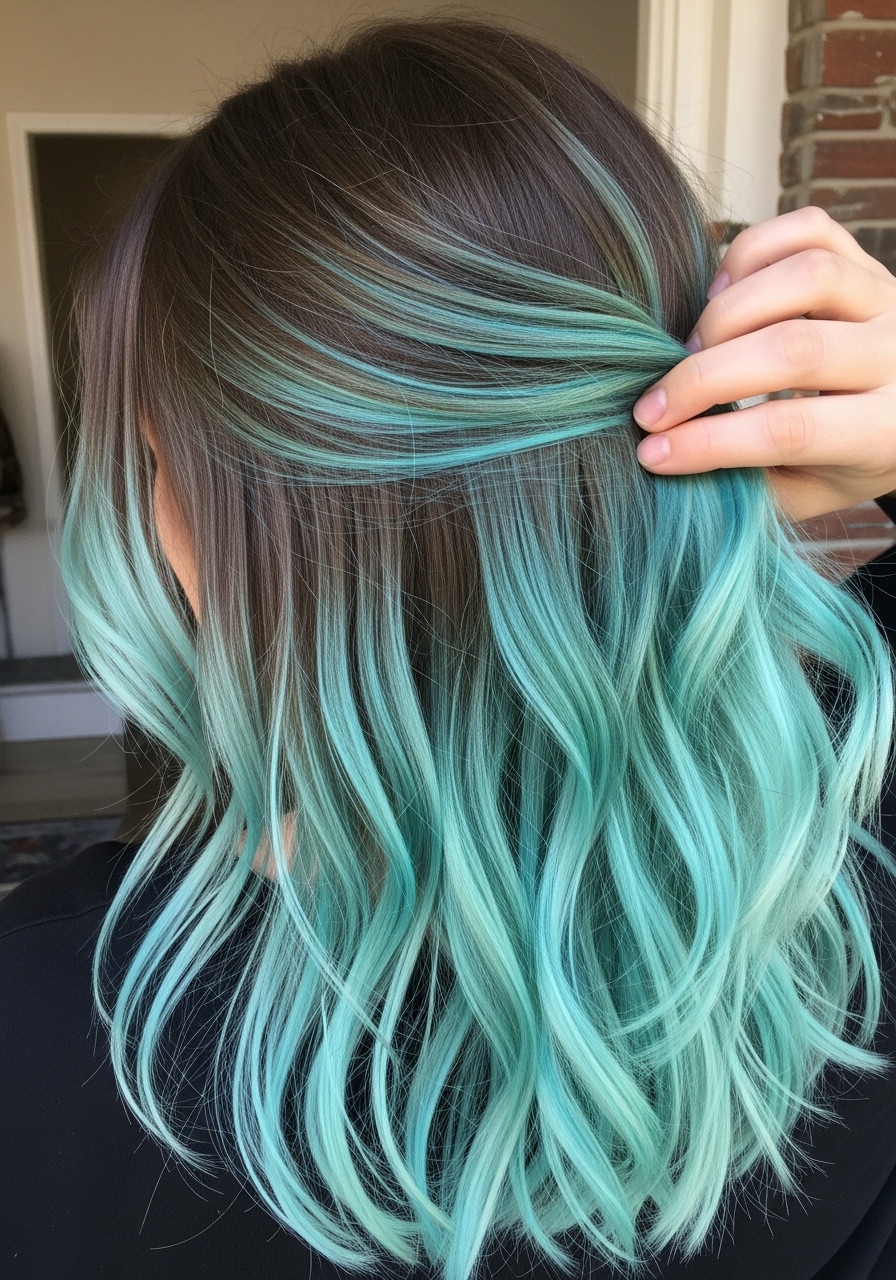
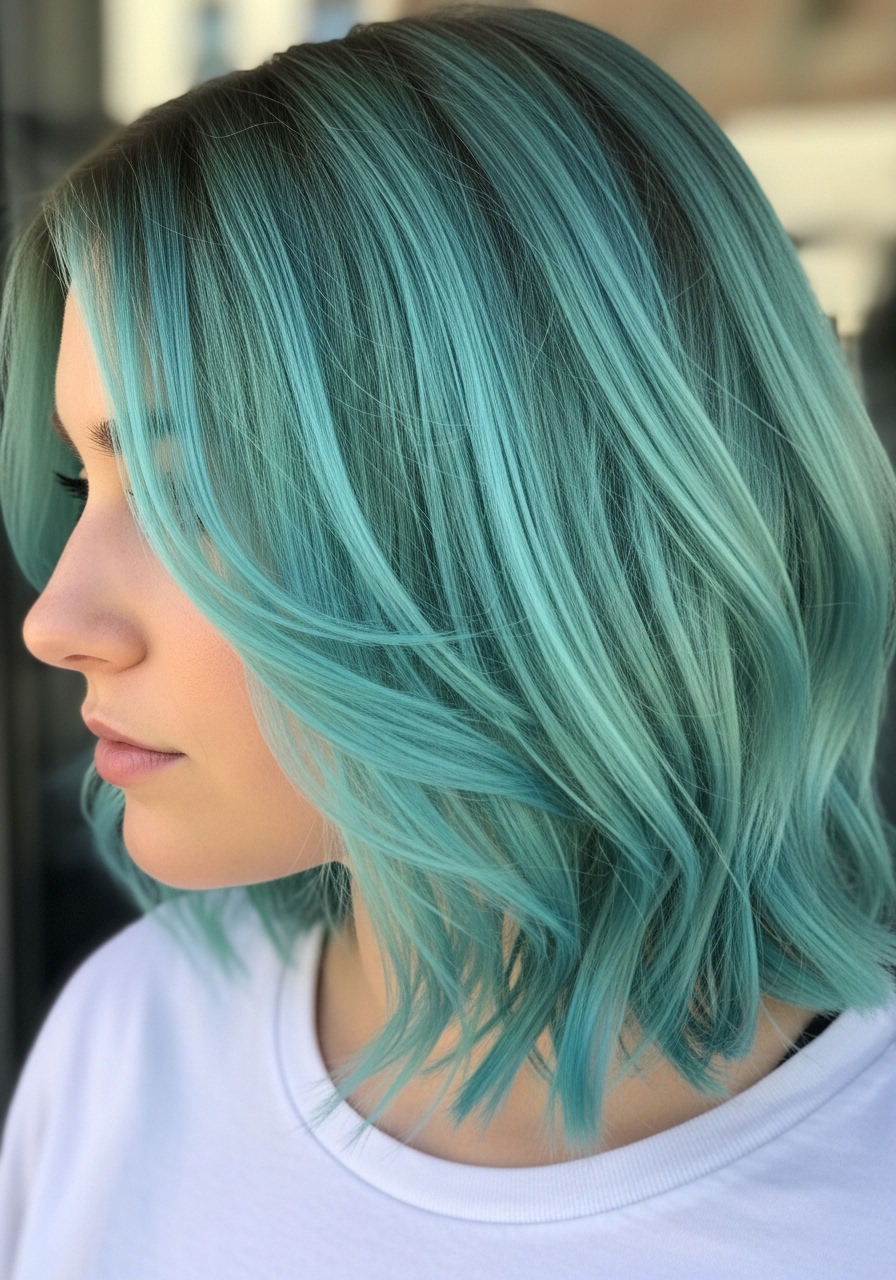
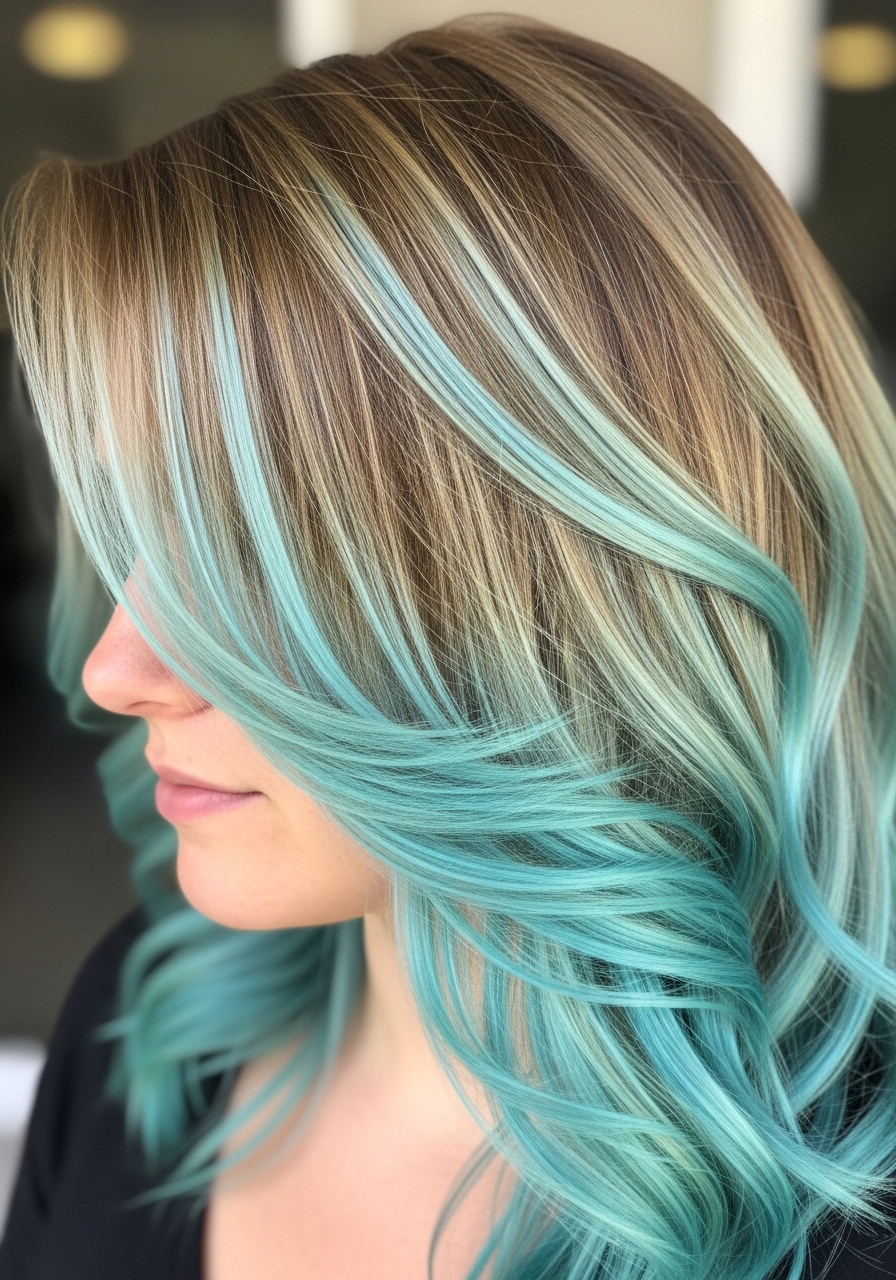
4. Slim Turquoise Balayage on Long Layers with Beach Waves
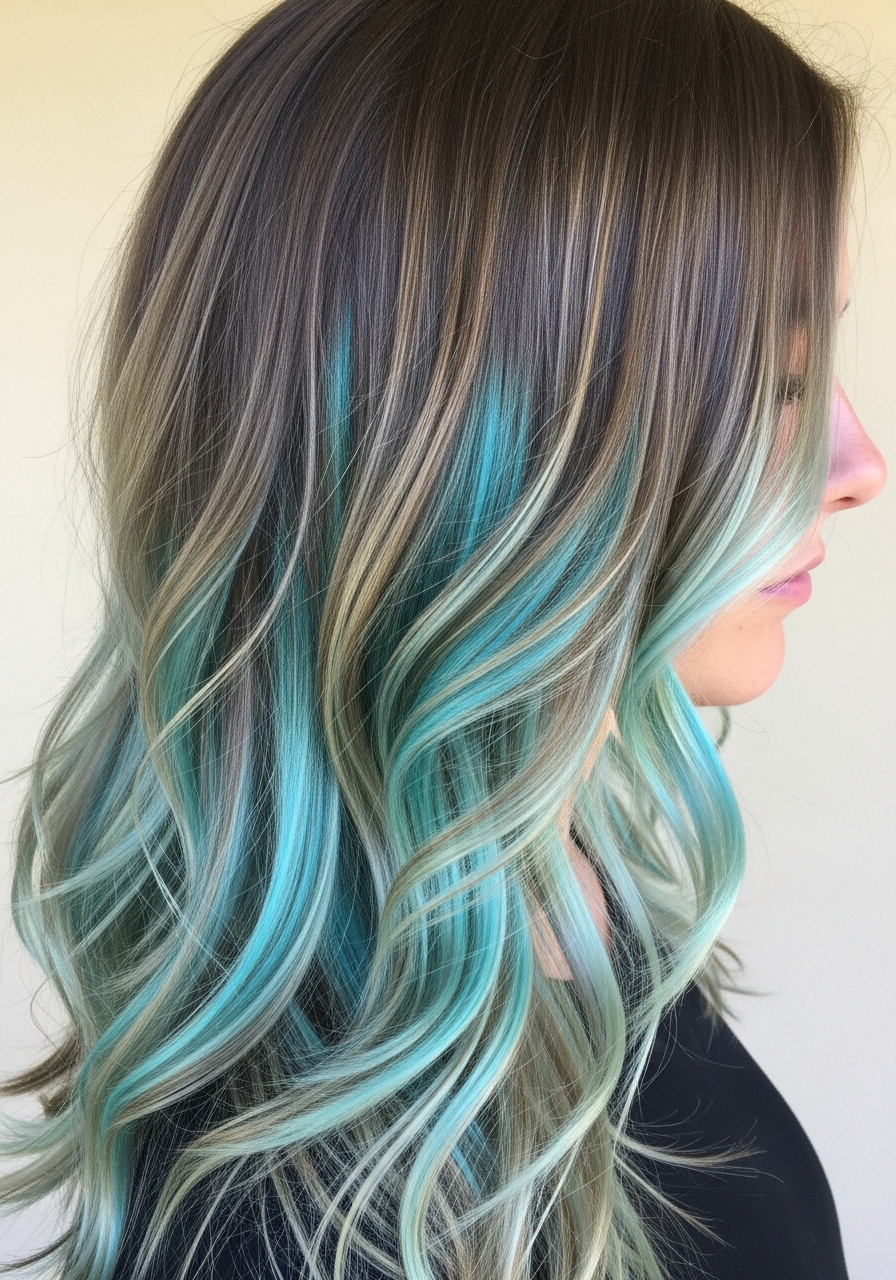
I painted turquoise into the long layers with very thin balayage strokes. On wavy days it pops in pieces. On flat days it’s softer, which I like.
This works on thick, layered hair. The color shows in movement and doesn’t look blocky. My first attempt was too dense—looked streaky when straight.
Tip for the salon: “Slim, staggered slices through layers; blend well into the mid-lengths.” I scrunch with salt spray to let the turquoise peek out naturally.
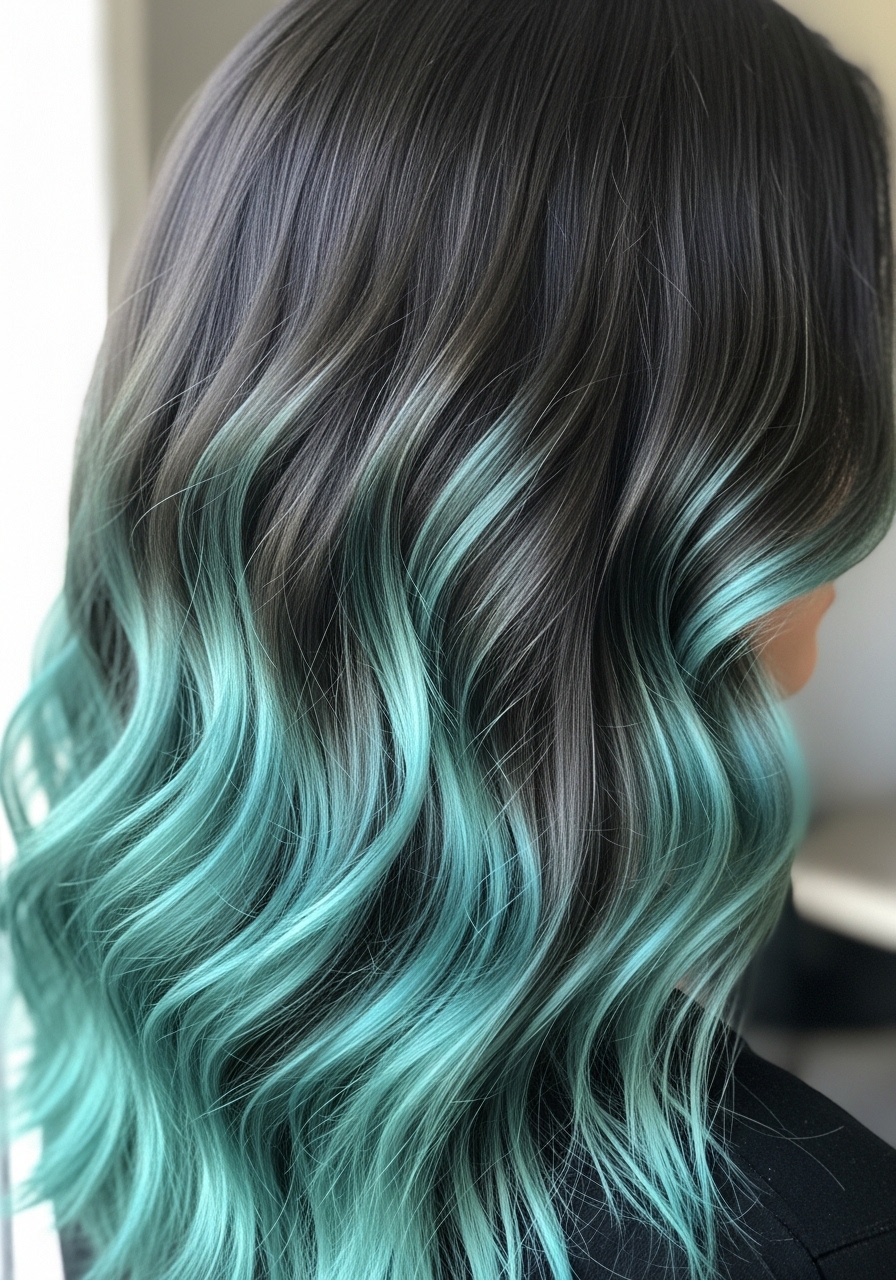
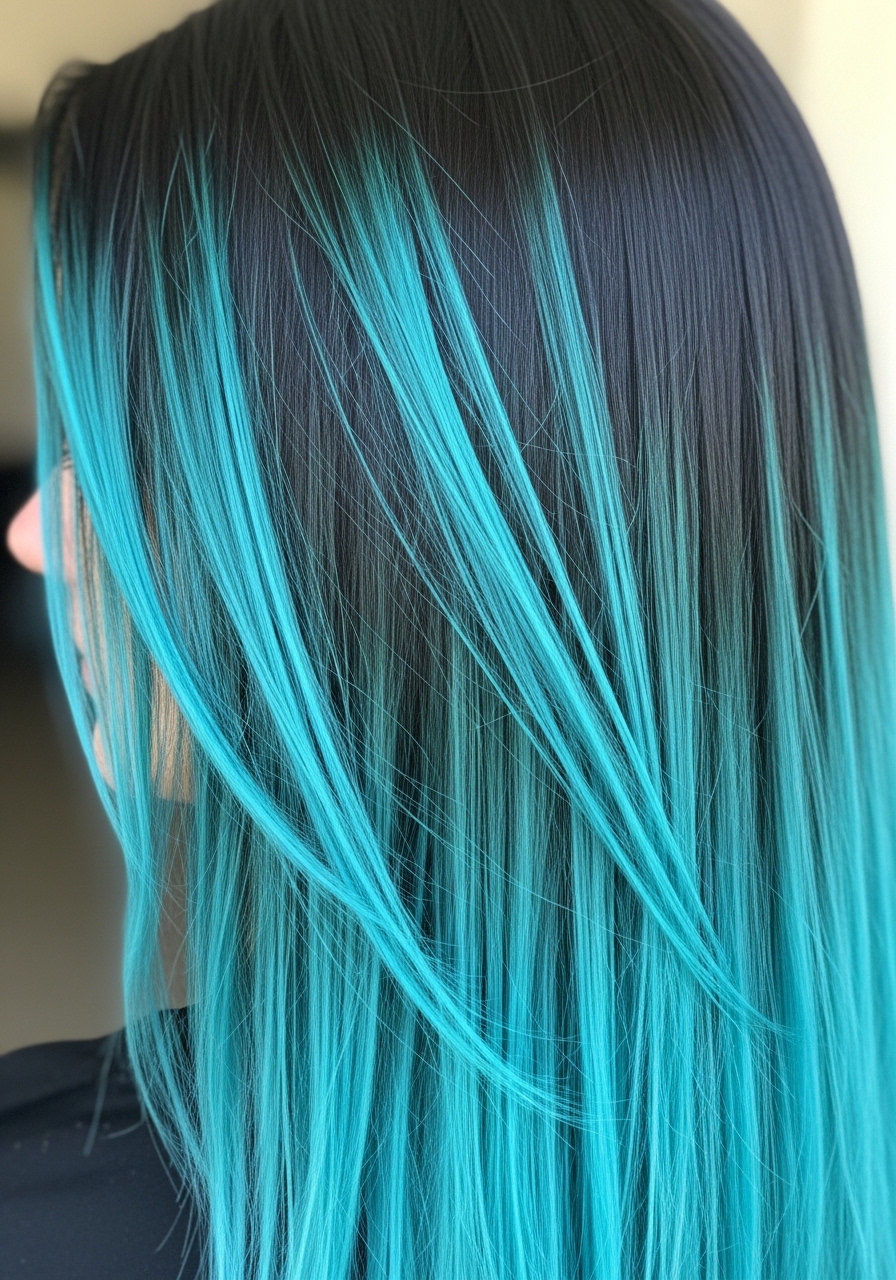
5. Shadow Root with Slim Turquoise Balayage
I kept my natural root and asked for slim turquoise balayage beneath it. Photos made it look seamless. In real life the grow-out is forgiving and less maintenance.
On darker hair the turquoise reads jewel-toned. On lighter hair it’s pastel. My first trip had the turquoise too high, so it looked like a band.
Ask for “root melt with very thin balayage strokes so color starts 2–3 inches down.” My honest insight: a touch more shadow at the root buys you months of wear.
6. Pastel Turquoise Peekaboo Underlayers
I painted the underlayers with slim turquoise for when I tied my hair up. It reads soft and wearable. When down, it hides nicely.
This is perfect if workplace rules are strict. My hair held pastel longer than I expected when I used sulfate-free shampoo. My mistake was over-washing early on.
Ask your stylist for “thin painted underlayers, pastel diluted with conditioner.” I keep a small color-depositing conditioner to refresh between salon glosses.
7. Slim Turquoise Balayage on a Choppy Pixie
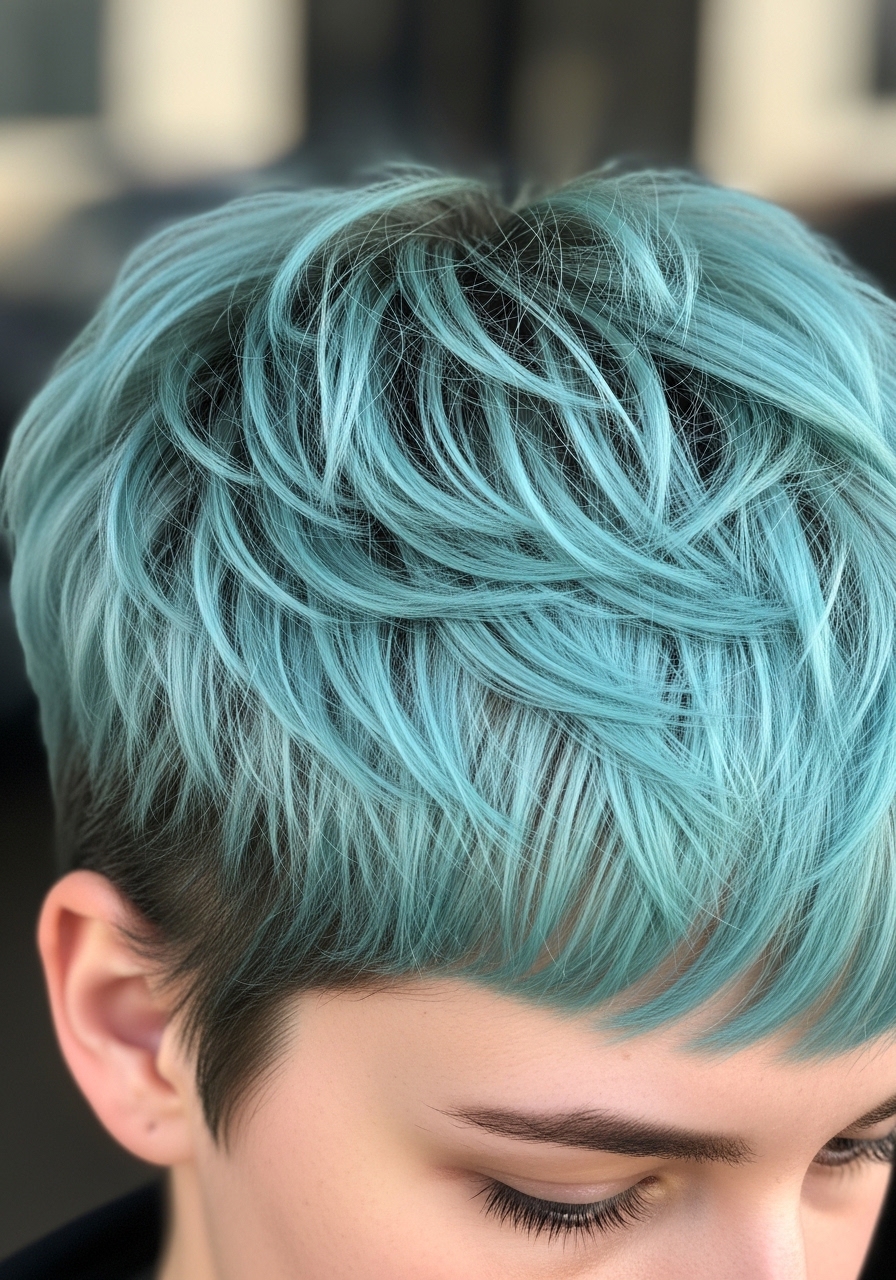
I was nervous about turquoise on a pixie. My stylist painted tiny slim slices at the crown and top fringe. Photos looked bold. In daily life it’s just enough edge.
Short textured cuts show every painted slice. If you have cowlicks, placement matters. I once asked for too many slices and it read striped.
When you sit down, say “a few slim strokes at crown and fringe, feathered edges.” My tip: use a matte paste to separate pieces so the color shows naturally.
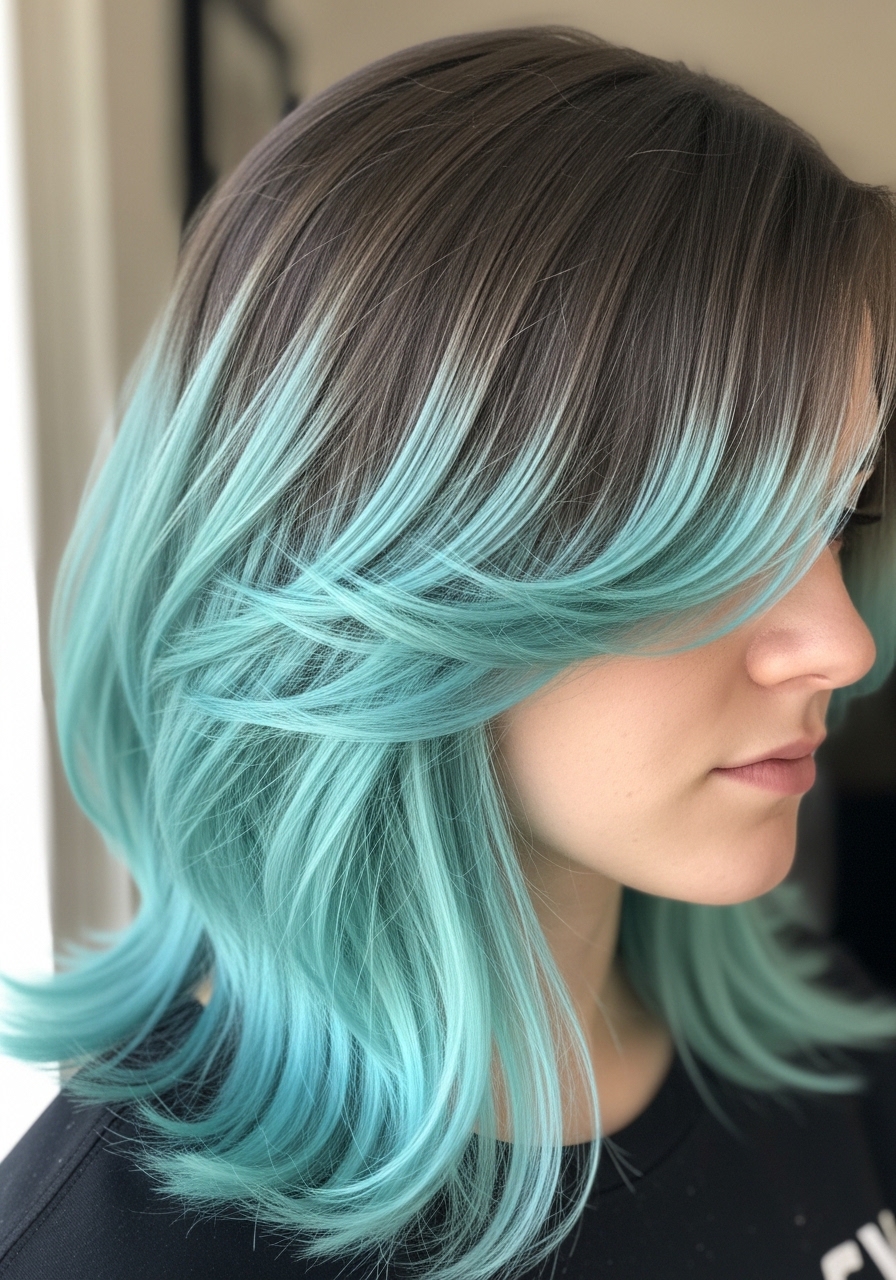
8. Slim Turquoise Balayage with Curtain Bangs
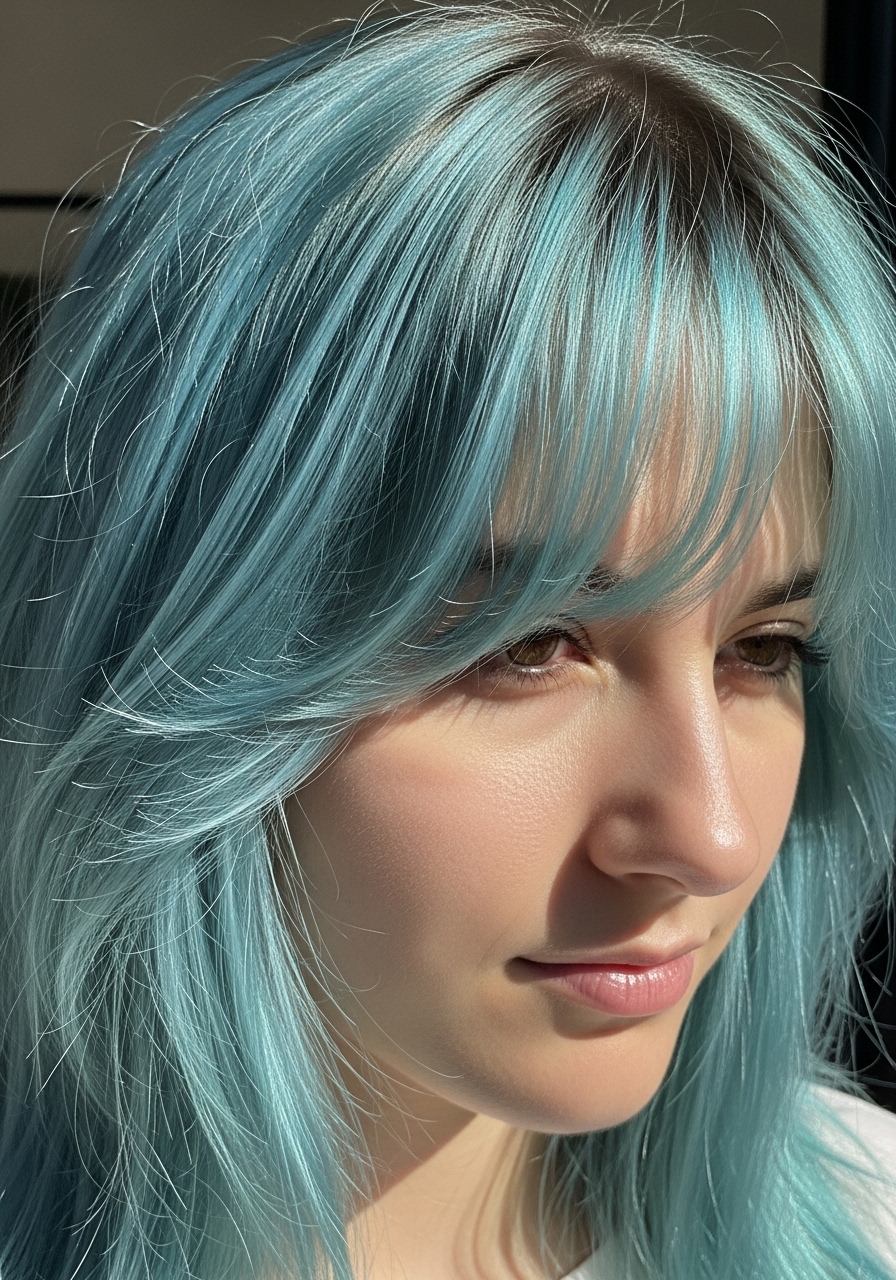
I added slim turquoise to my curtain bangs and it changed my whole face. It looks sweet in photos and playful in real life when the wind lifts it.
This is great for round faces—a small color piece elongates. My bang color faded faster because they touch skin oils constantly.
Tell your stylist “thin painted strokes through bangs, blended into top.” I learned to bring a touch-up wand for touch-ups between salon visits.
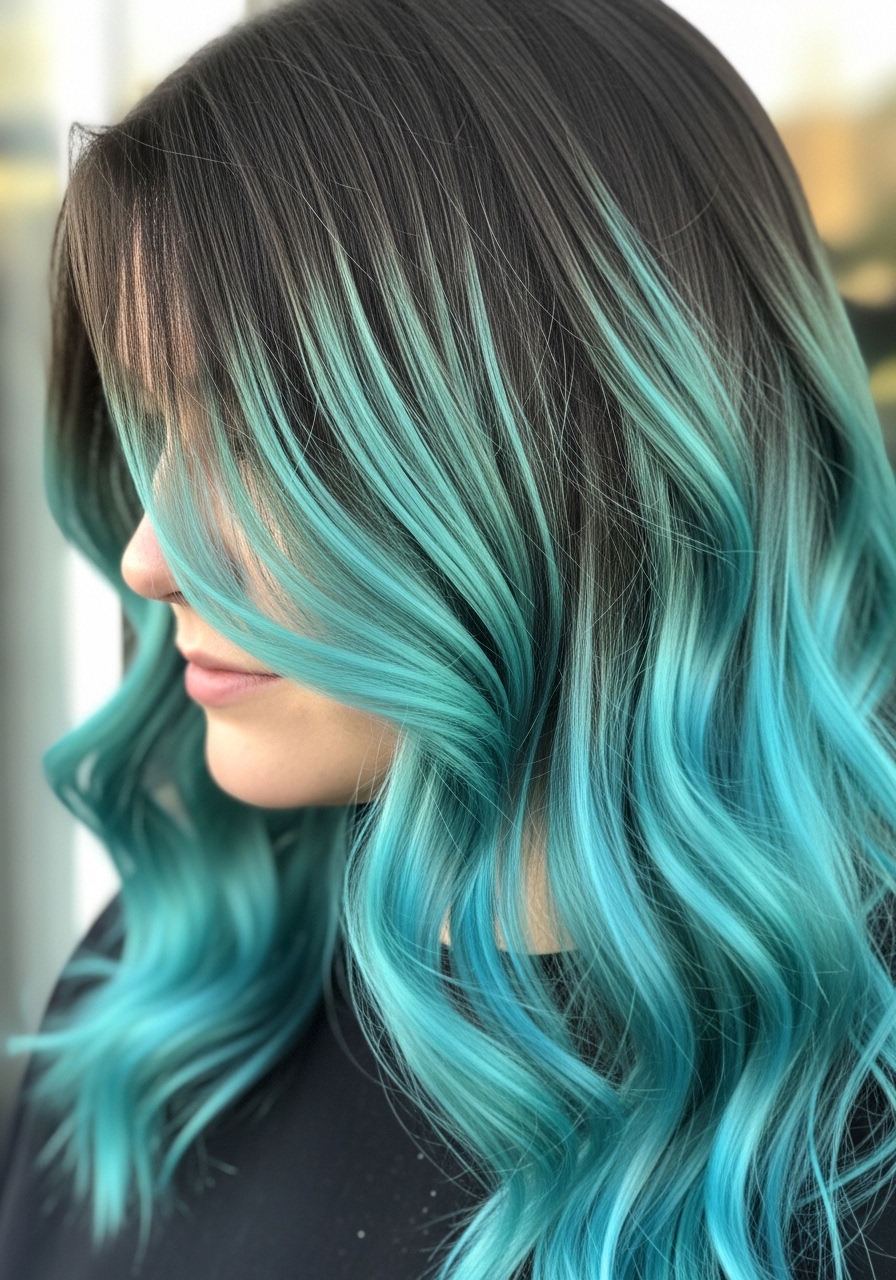
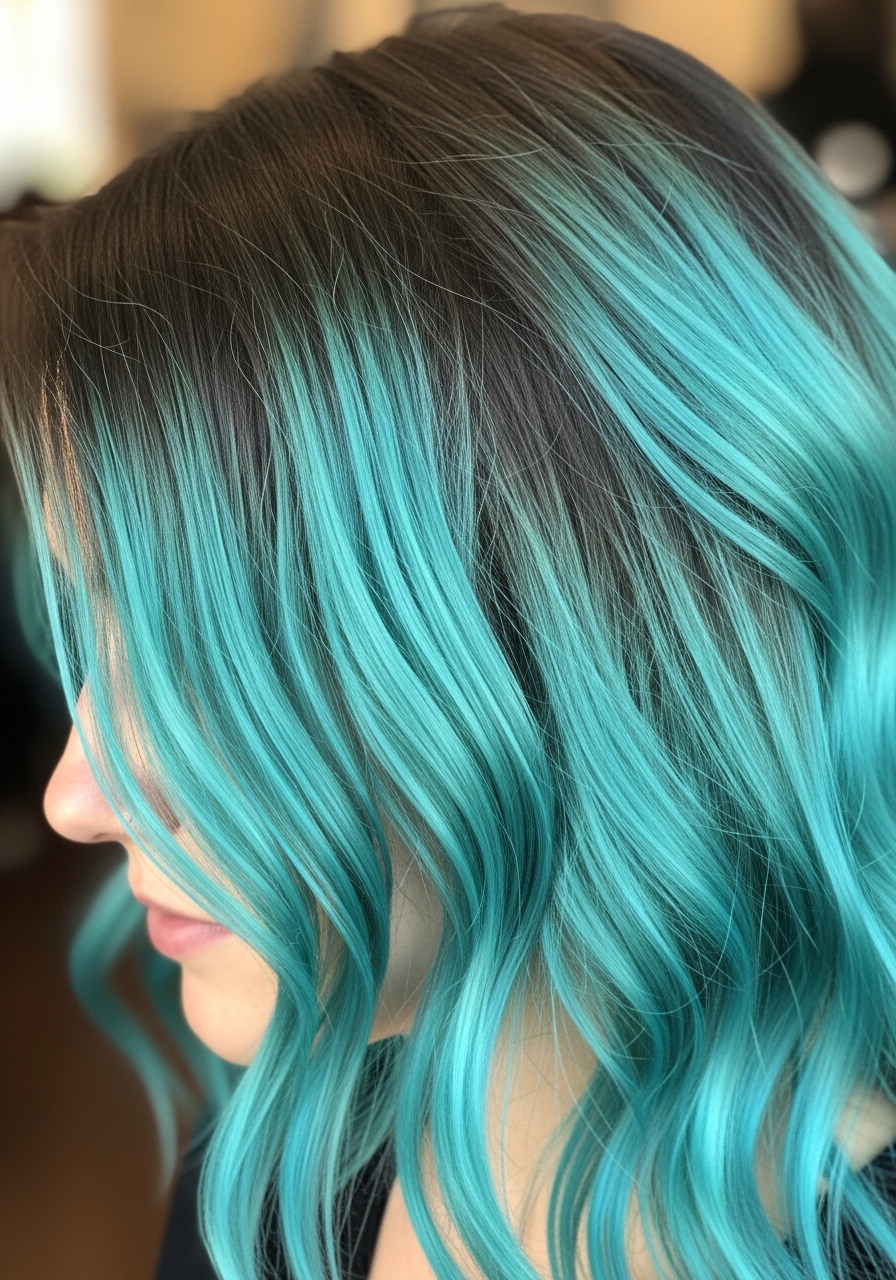
9. Smoky Turquoise Balayage on Dark Brown Hair
I wanted color without a high-contrast block. My stylist used slim, smoky turquoise strokes on dark brown. In photos it reads deep teal. In life it’s low-key and moody.
This works well if you don’t want neon. On darker hair the turquoise pops under sunlight. I made the mistake of expecting pastel—I should’ve asked for deeper saturation.
Ask for “slim, low-opacity teal painted on selected sections.” My tip: schedule a gloss to warm or cool the tone depending on how it fades.
10. Slim Turquoise Balayage with Soft Blonde Base
I lightened my ends first and then asked for slim turquoise panels. Photos were candy-colored. In real life the turquoise blended into the blonde subtly when I brushed.
Best on naturally light or pre-lightened hair. My oversight was skipping a bond-builder; the ends felt brittle until I asked for a treatment.
Ask your stylist for “very thin turquoise slices focused on mids to ends; use a bond-repair treatment.” I sleep on silk to keep the dyed ends smoother.
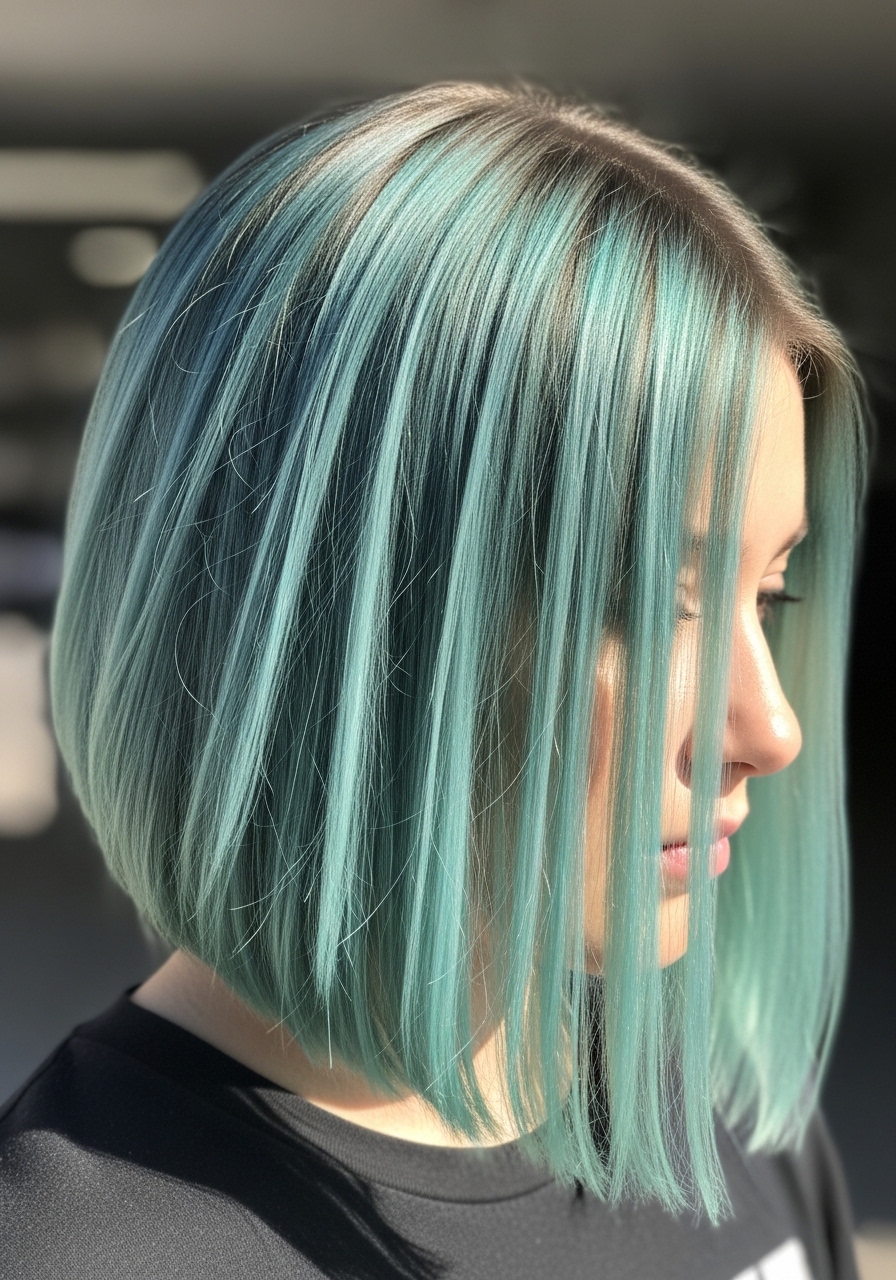
11. Neon-Edge Slim Turquoise on a Sleek Bob
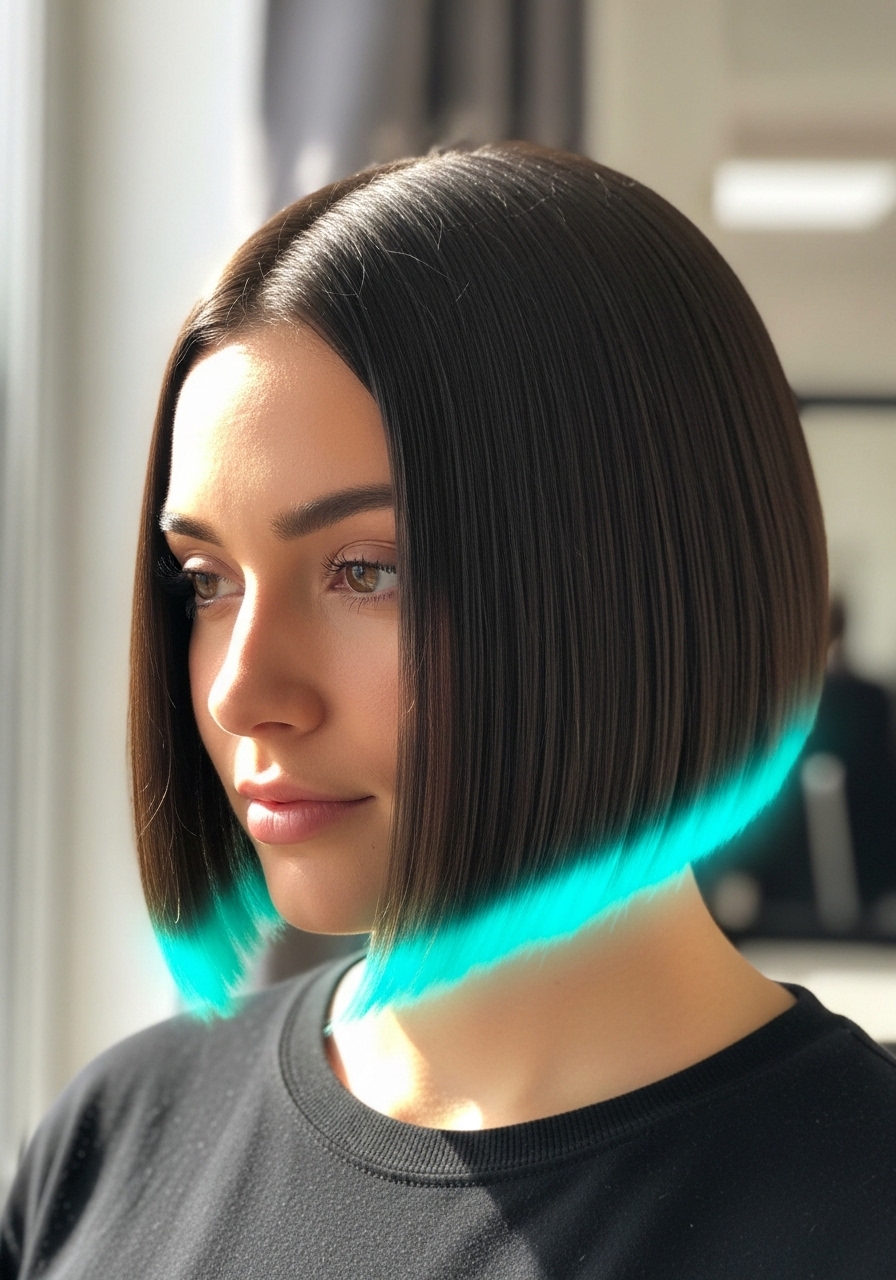
I requested a single slim turquoise line along my bob’s ends. Photos looked editorial. In real life it reads chic and unexpected.
This suits straight hair best. On curly days the line breaks up. My first try was too thick and looked like a band.
In the salon ask “paint a 1/8-inch line along the edge, keep it crisp and cool-toned.” I flat-iron gently to reveal the line cleanly without flattening volume.
12. Slim Mermaid Balayage with Dimensional Turquoise
I wanted mermaid without full commitment, so I layered slim turquoise with deeper aqua slices. Photos were deep and playful. In daily wear it catches light and looks multi-tonal.
This suits medium-to-thick hair; thin hair can look busy if overdone. My first mistake was asking for too many tones—end result was muddy.
Tell your stylist “slim slices in two turquoise shades, keep them separated.” My tip: use a clear gloss to keep the tones distinct between appointments.
13. Slim Turquoise Balayage on Curly Coil Hair
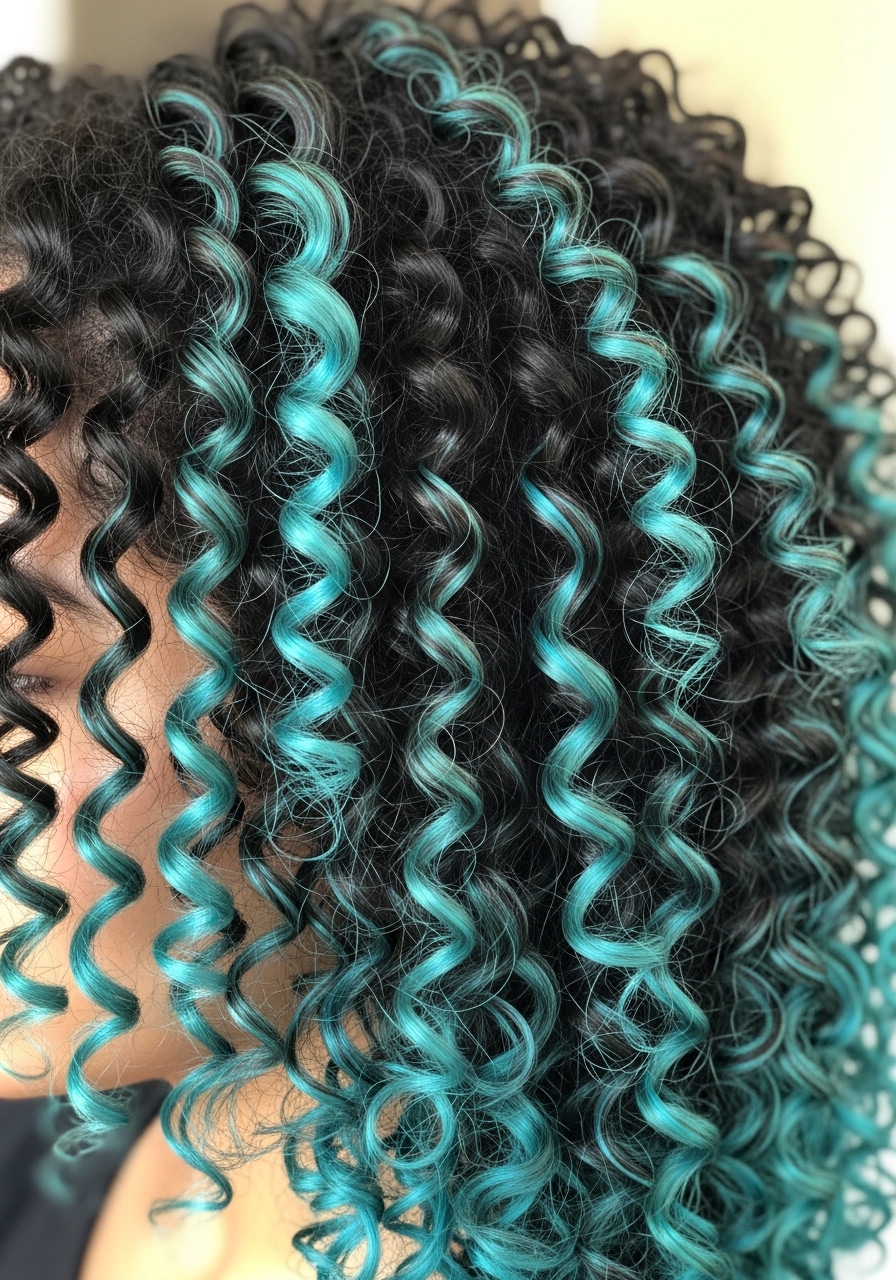
I was nervous about color on my coils. My stylist painted tiny slim slices so the turquoise appears when curls move. In photos it pops in clusters. In life it’s subtle and fun.
Curly hair hides placement; color lasts longer between washes. My mistake early on was too-sparse placement that vanished when dried tightly.
Ask for “very thin slices through outer curl clumps, avoid over-bleaching fragile curls.” I refresh with a color-depositing leave-in to keep the tone alive.
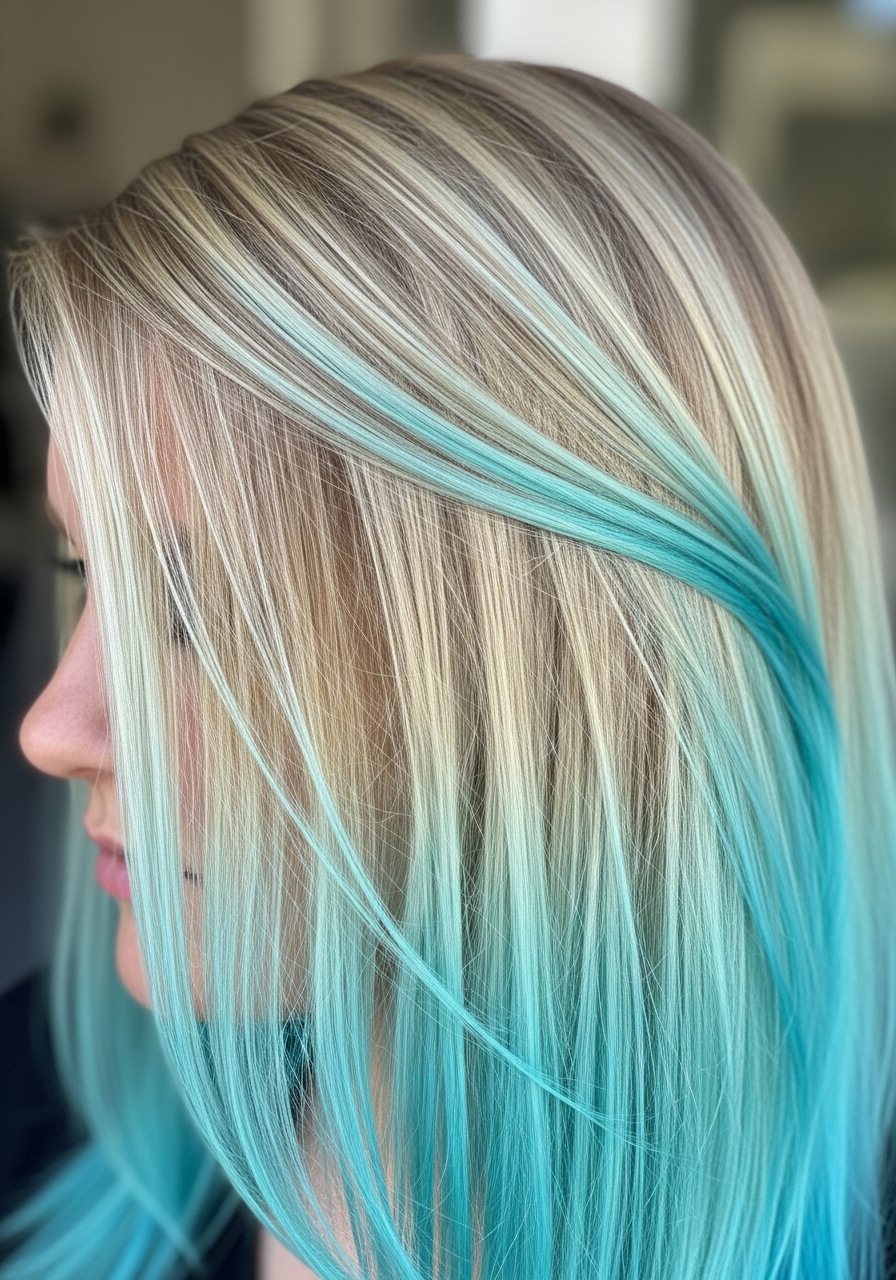
14. Slim Turquoise Balayage with Silver-Blonde Blend
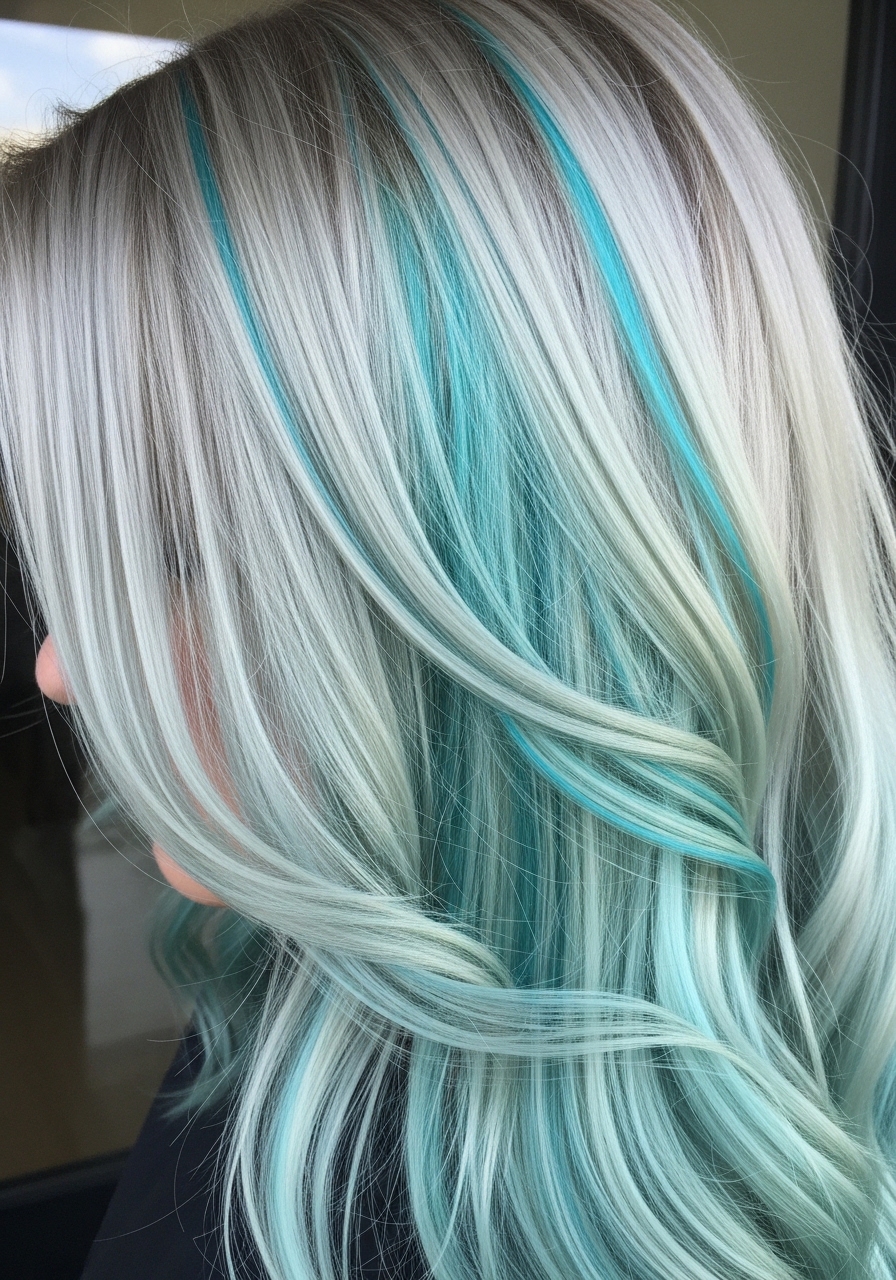
I mixed slim turquoise into silver-blonde for a cool, icy look. Photos were high-fashion. In every-day life it softens and never feels too loud.
Cool bases make turquoise read icy rather than green. My misstep: skipping a toner at the end, which made the turquoise look slightly green for a week.
Tell your stylist “blend slim turquoise into a cool silver base; end with an ash gloss.” I use cool shampoos to keep the blonde and turquoise aligned.
15. Slim Turquoise Balayage on a Layered Shag
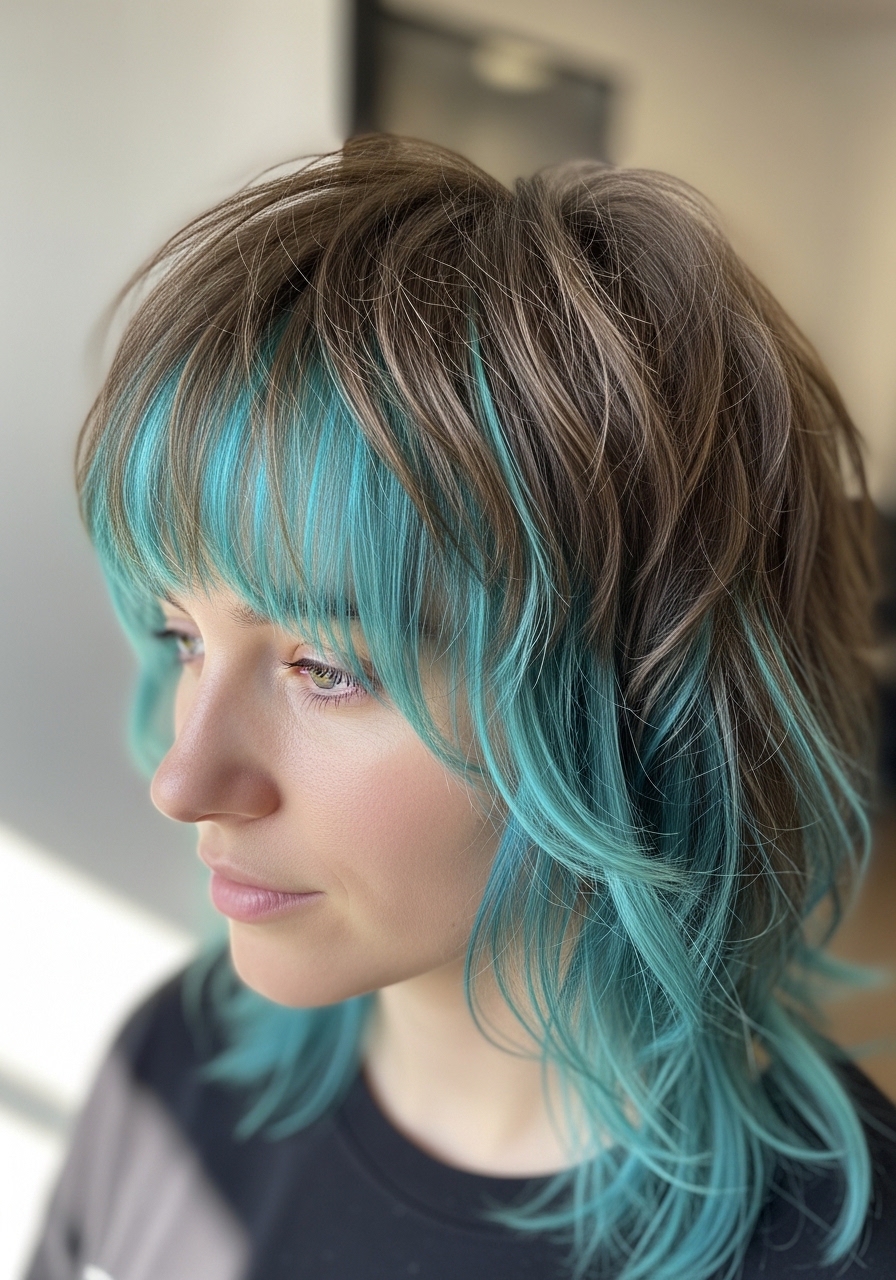
I put slim turquoise paint on a shag and suddenly my messy hair looked intentional. Photos felt retro. In real life the color shows where the layers flip.
Shags are forgiving; the color peaks and recedes naturally. I made the mistake of asking for too uniform placement—the color looked patterned.
Say “paint slim, irregular strokes across top layers only.” I scrunch with a light cream to let the turquoise bits separate and peek without looking painted.
16. Slim Turquoise Balayage with Root Shadow for Easy Grow-Out
I wanted low upkeep, so I paired slim turquoise with a shadow root. Photos made it look cohesive. In life it lets me stretch appointments without odd bands.
Root shadow helps the turquoise melt into my natural color. My first time I underestimated how quickly pastel fades near the ends.
Ask for “root shadow blended into slim turquoise balayage starting 2–3 inches down.” My tip: plan touch-ups every 10–12 weeks and refresh the mid-length glaze sooner if needed.
17. Slim Turquoise Balayage on a Growth-Out Lob
I grew out a pixie into a lob and used slim turquoise to avoid obvious touch-ups. In photos it gave dimension. In daily wear it camouflaged awkward stages.
This works when you want color that ages well during cuts. I learned that too-bright slices made the grow-out look messy.
Tell your stylist “very slim strokes placed randomly to break up banding.” I ask for a clear gloss every visit to refresh tone without re-bleaching.
18. Slim Turquoise Balayage Accent on Braids
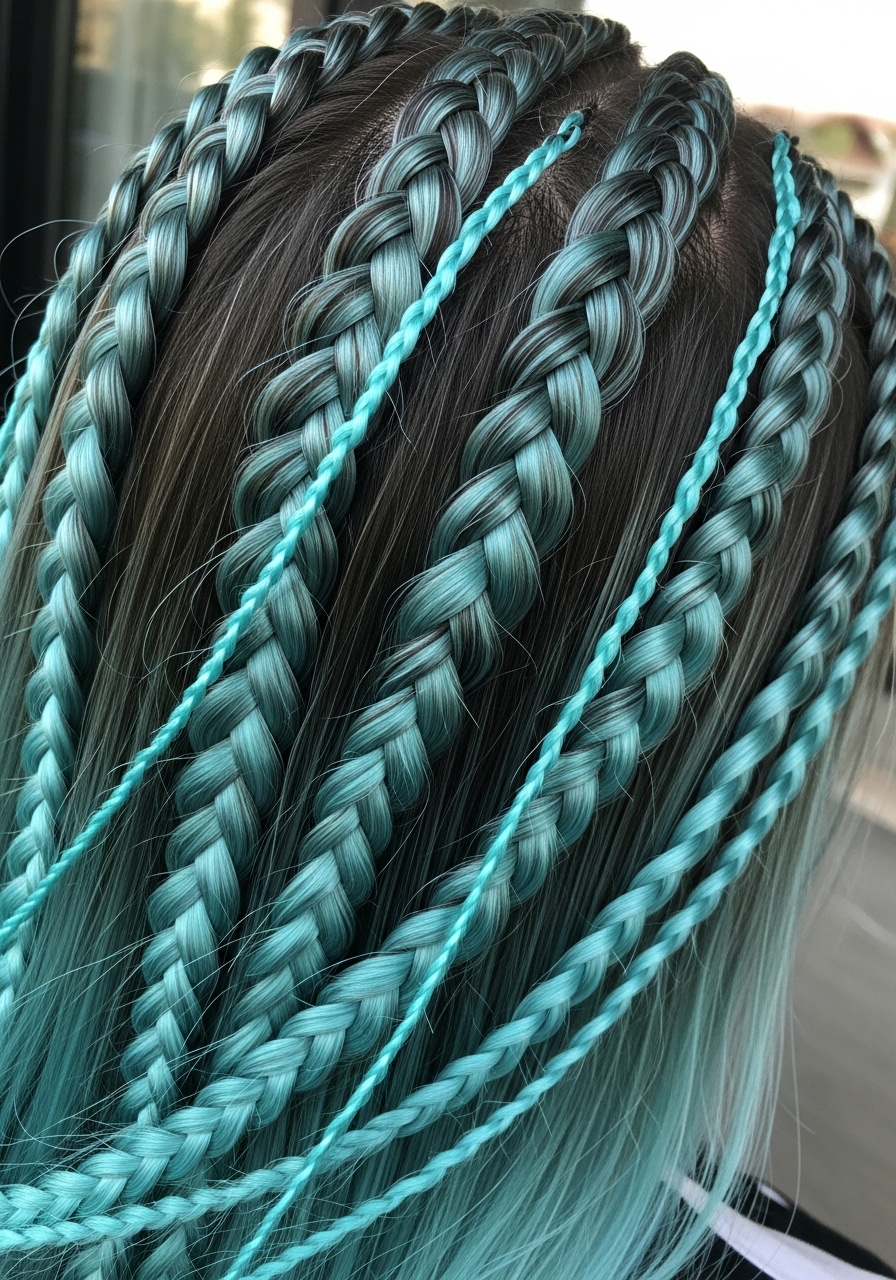
I wove slim turquoise strands into my braids for festival hair. Photos looked intricate. In life the color peeks subtly as the braid moves.
This is great short-term or for summer. My mistake once was painting too many pieces so the braid lost definition.
Ask for “select slim strands painted to be woven into braids.” I oil the scalp lightly and avoid heavy products so the painted bits keep their crispness.
19. Turquoise Balayage Money Pieces with Soft Melt
I combined slim turquoise money pieces with a soft root melt. In photos it looked curated. In everyday life it reads intentional, not sticker-like.
This suits anyone who parts the hair differently; the melt keeps the pieces wearable. I once had the money pieces placed too low and they only showed when I tucked hair.
Ask “slim money pieces with a gradual root melt” and bring a photo. I learned to ask for thin placement—then the turquoise feels like an accent, not a stripe.
20. Slim Turquoise Balayage on Heat-Styled Curtain Layers

I blow-dried my curtain layers to show the turquoise streaks. Photos show them peeking in motion. In real life they look soft and salon-finished.
This works well if you style daily. My error was expecting the color to pop without heat—on air-dried days it’s much subtler.
Ask for “thin strokes placed to catch when blow-dried forward.” My tip: use a low-heat protectant gloss to keep the turquoise from stripping during styling.
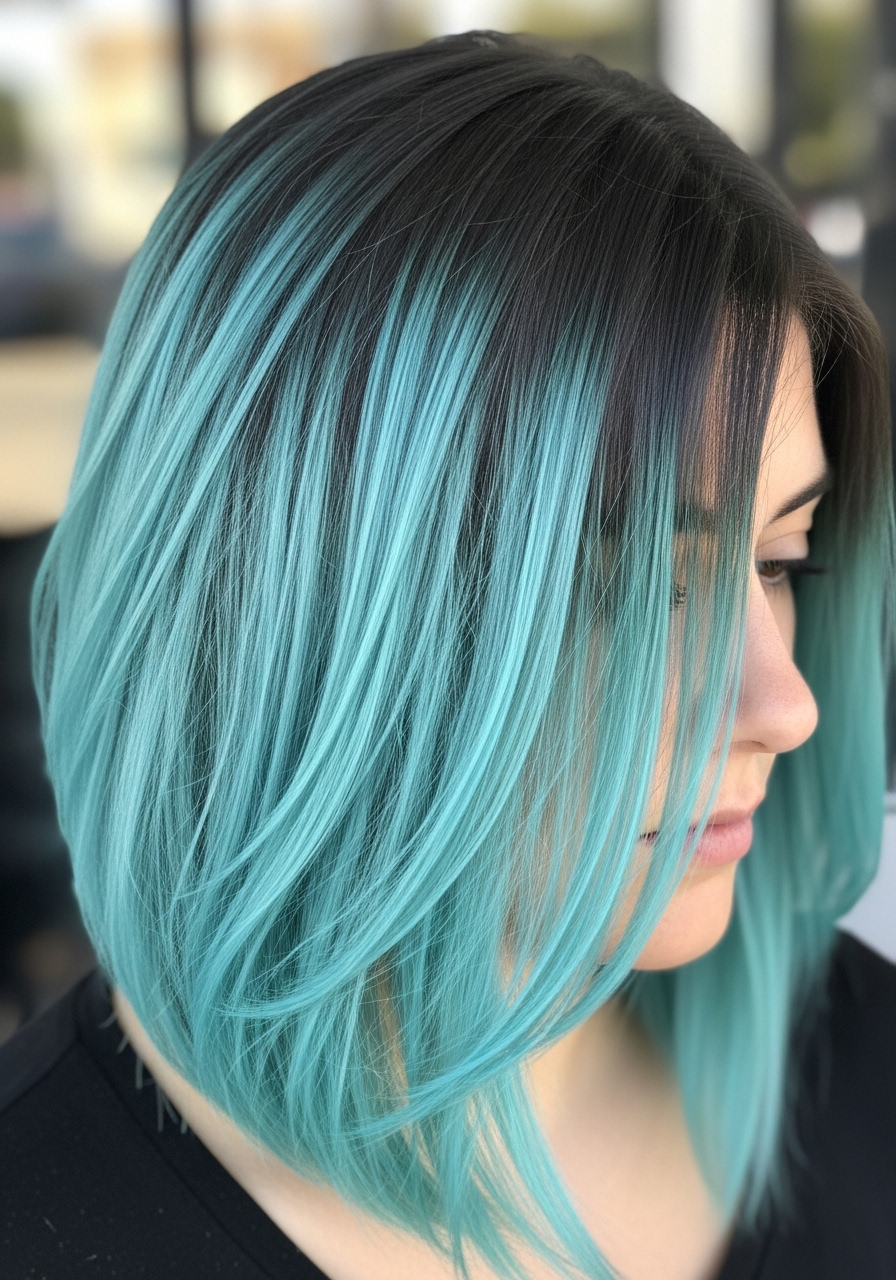
21. Slim Turquoise Balayage with Subtle Ombre Fade
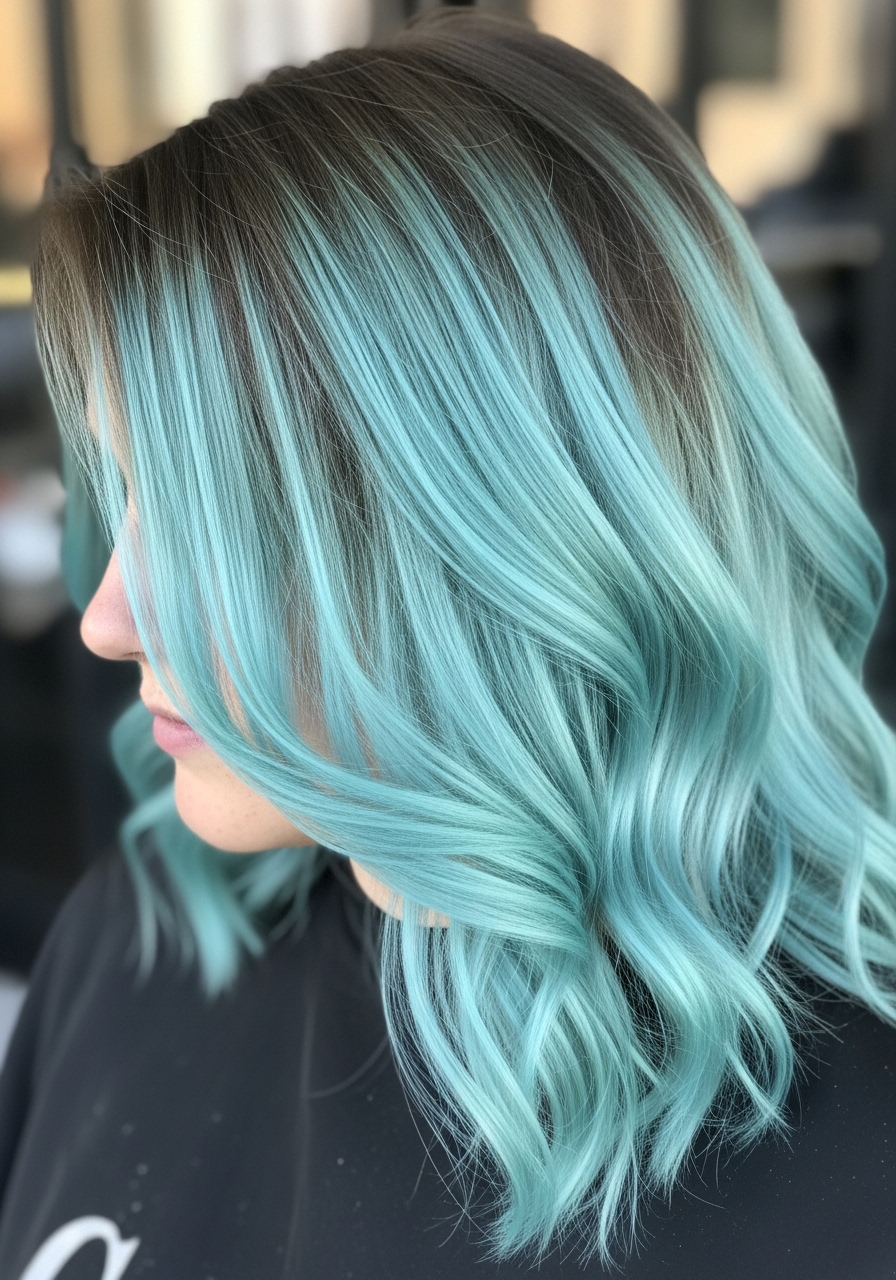
I asked for slim turquoise concentrated mid-lengths that softly faded to my natural ends. Photos looked gradient. In real life it’s understated and wearable.
This is forgiving for low-maintenance hair. I once had the fade too abrupt; it read like two different colors.
Tell your stylist “slim, feathered strokes blended into a soft ombre—no harsh lines.” I refresh with a diluted semi-permanent tone to keep the fade smooth.
22. Slim Turquoise Balayage on Sun-Kissed Highlights
I layered slim turquoise over existing warm highlights. Photos gave a beachy teal vibe. In daily life the turquoise tempers the warmth and reads ocean-kissed.
This works if you already have dimensional warmth. My early mistake was not telling them to cool the highlights first; the turquoise leaned green.
Ask for “thin turquoise strokes over neutralized highlights.” My tip: mention the base tone so your stylist can cool or warm the mix.
23. Slim Turquoise Balayage with Glossy Finish for Shine
I ended a session with a clear gloss to make the slim turquoise feel polished. Photos were reflective. In real life the gloss kept the turquoise from looking powdery.
Gloss helps color look fresher between touch-ups. I once skipped it and the turquoise dulled fast under indoor lighting.
Ask for “final gloss to seal tone and add shine.” I keep a bottle of lightweight oil to refresh that glossy look at home.
24. Slim Turquoise Balayage for Active Lifestyles
I needed color that survives workouts and quick washes. Slim turquoise balayage worked because the pieces hid under sweat and dried naturally.
This is great if you shower daily or sweat a lot. My mistake was heavy pigment; it required more delicate care than I wanted.
Tell your stylist “slim, durable placement, avoid saturated pastels.” I use dry shampoo and cold rinses to preserve color after workouts.
25. Tiny Turquoise Tips on a Long Straight Cut
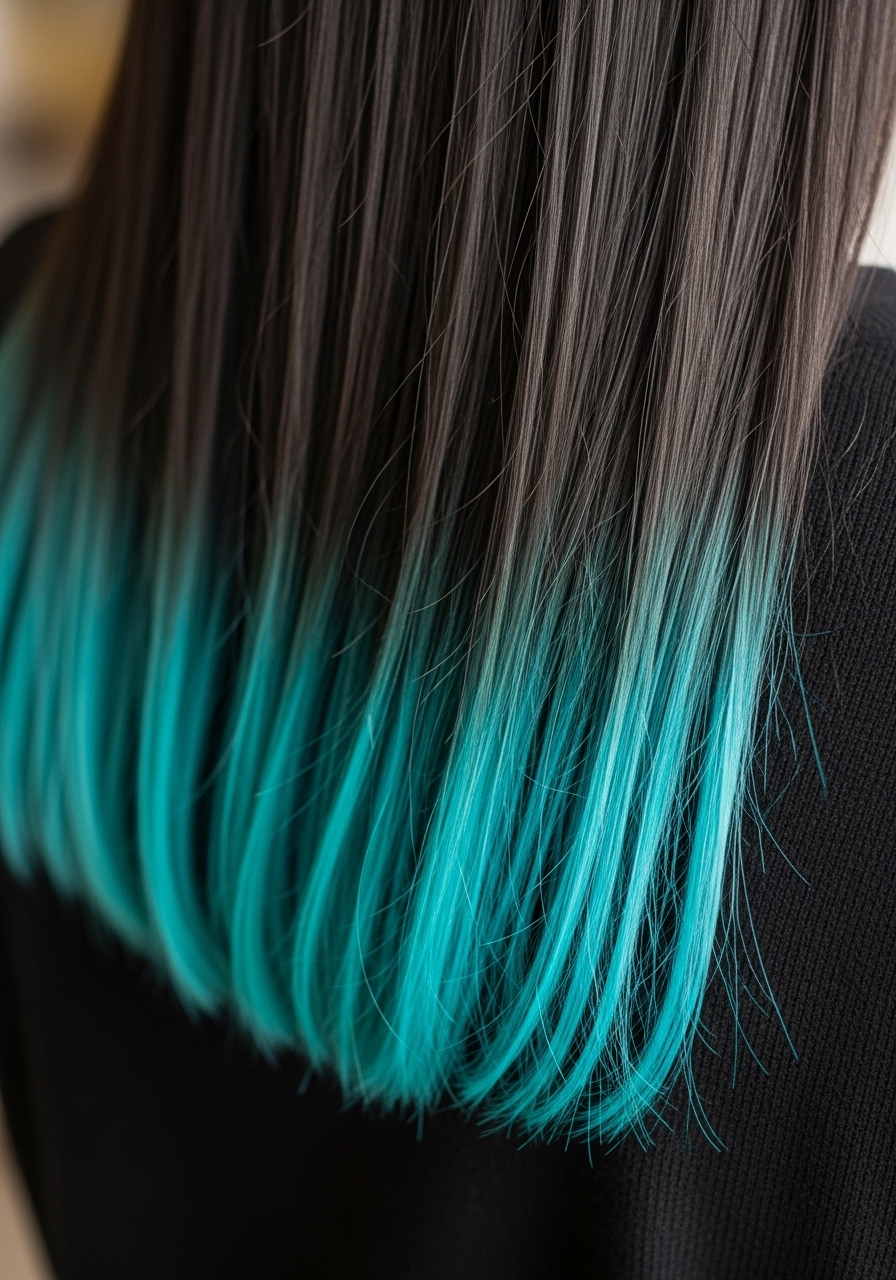
I asked for tiny turquoise tips—just the very ends. Photos looked playful. In real life it’s the least maintenance and the most subtle way to try turquoise.
This is ideal if you want a trial run. My small slip-up was leaving the tips too thin; they faded quickly and looked patchy.
Ask for “1/8-inch painted tips, slightly feathered into the ends.” I deep-condition the ends weekly to keep the dyed tips from drying and to extend the color.